

-
Welcome to Tacoma World!
You are currently viewing as a guest! To get full-access, you need to register for a FREE account.
As a registered member, you’ll be able to:- Participate in all Tacoma discussion topics
- Communicate privately with other Tacoma owners from around the world
- Post your own photos in our Members Gallery
- Access all special features of the site
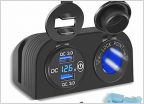 12v Socket install
 Arm rest broken - how to fix?
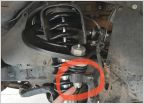 Help! Upper ball joint keeps turning when installing UCA
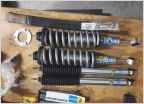 3" Bilstein 5100/Toytec AAL Suspension lift Guide
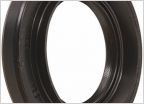 Front Differential Seal Part #'s
DIY leather arm rests
Discussion in '2nd Gen. Tacomas (2005-2015)' started by reid, Sep 1, 2007.
Page 22 of 23
Page 22 of 23


