1. Welcome to Tacoma World!

    You are currently viewing as a guest! To get full-access, you need to register for a FREE account.

    As a registered member, you’ll be able to:
    • Participate in all Tacoma discussion topics
    • Communicate privately with other Tacoma owners from around the world
    • Post your own photos in our Members Gallery
    • Access all special features of the site

Anytimebackupcamera.com Install- Front and Rear Cameras

Discussion in '3rd Gen. Tacomas (2016-2023)' started by Papadave418, Sep 7, 2018.

  1. Nov 25, 2018 at 5:39 PM
    #321
    Black1Tacoma

    Black1Tacoma #TRUKTOY

    Joined:
    Jun 27, 2017
    Member:
    #222509
    Messages:
    418
    Gender:
    Male
    Carlsbad
    Vehicle:
    2017 Black Tacoma TRD OffRoad 4x4

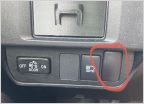
    Where did you get the switch? I like the front rear like you had done.
     
  2. Nov 25, 2018 at 5:55 PM
    #322
    Papadave418

    Papadave418 [OP] Well-Known Member

    Joined:
    Jul 17, 2017
    Member:
    #224251
    Messages:
    1,935
  3. Nov 25, 2018 at 6:11 PM
    #323
    Black1Tacoma

    Black1Tacoma #TRUKTOY

    Joined:
    Jun 27, 2017
    Member:
    #222509
    Messages:
    418
    Gender:
    Male
    Carlsbad
    Vehicle:
    2017 Black Tacoma TRD OffRoad 4x4
  4. Nov 25, 2018 at 6:17 PM
    #324
    cruxx

    cruxx Well-Known Member

    Joined:
    Apr 20, 2017
    Member:
    #216831
    Messages:
    1,199
    Gender:
    Male
    First Name:
    Huy
    Vehicle:
    2017 TRD Sport
    Easy to wire.... do not need a diode but will have to trim opening with a dremel a little bit. Ebay also sells the aob switch
     
    This site contains affiliate links for which the site may be compensated.
  5. Nov 25, 2018 at 7:43 PM
    #325
    Black1Tacoma

    Black1Tacoma #TRUKTOY

    Joined:
    Jun 27, 2017
    Member:
    #222509
    Messages:
    418
    Gender:
    Male
    Carlsbad
    Vehicle:
    2017 Black Tacoma TRD OffRoad 4x4
    Perfect thanks!!
     
    This site contains affiliate links for which the site may be compensated.
  6. Nov 27, 2018 at 8:14 AM
    #326
    n6vmo

    n6vmo Well-Known Member

    Joined:
    Jan 1, 2018
    Member:
    #239972
    Messages:
    870
    Gender:
    Male
    Sahuarita, AZ
    Vehicle:
    2018 DCLB OR AT Super "Priviledged"
    Bilstein 6112, ICON UCAs, 5160, AAL, 265/75/16 Falken Wildpeaks
    Another drawing version and how I will configure my system.....

    Tacoma Front Camera Wiring.jpg
     
    Last edited: Dec 5, 2018
  7. Dec 1, 2018 at 5:18 PM
    #327
    n6vmo

    n6vmo Well-Known Member

    Joined:
    Jan 1, 2018
    Member:
    #239972
    Messages:
    870
    Gender:
    Male
    Sahuarita, AZ
    Vehicle:
    2018 DCLB OR AT Super "Priviledged"
    Bilstein 6112, ICON UCAs, 5160, AAL, 265/75/16 Falken Wildpeaks
    Got the kit partially installed today and ran into an issue. After installing the wiring harnesses, mounting the relay, routing the switch wires and installing the Entune back in the dash, I decided to test before finishing the dash. No front camera was installed yet.

    I was not getting rear camera video at all. Override or putting the truck in reverse. Removed the Entune again and checked all connections. Looping the video cable back into the Entune I was able to get rear camera video just like stock, in reverse.

    Using a ohm meter I discovered one relay coax was shorted from center to shield. After removing the heat shrink I did not see anything wrong. However, the suspect coax had an untrimmed, single shield wire crimped in its center connection at the relay. Just a whisker. Removed this whisker and the system worked as expected.

    You can see the 'whisker' in this photo.

    short.jpg
     
  8. Dec 1, 2018 at 5:20 PM
    #328
    RushT

    RushT Amateur Everythingist

    Joined:
    Dec 10, 2017
    Member:
    #238171
    Messages:
    5,523
    Gender:
    Male
    North Texas
    Vehicle:
    '18 DCSB TRDOR Inferno
    This has been my second best mod. Passenger door keyless is my top mod, but this one’s a close second.
     
    harbrown and Papadave418[OP] like this.
  9. Dec 1, 2018 at 9:22 PM
    #329
    Papadave418

    Papadave418 [OP] Well-Known Member

    Joined:
    Jul 17, 2017
    Member:
    #224251
    Messages:
    1,935
    Thanks for adding to the knowledge base about your install. Bummer about the construction quality on your unit, but dang great job on diagnosing it and fixing it!
     
    orion808 likes this.
  10. Dec 3, 2018 at 5:42 AM
    #330
    ohioboater

    ohioboater Well-Known Member

    Joined:
    Dec 5, 2017
    Member:
    #237692
    Messages:
    108
    Gender:
    Male
    Vehicle:
    2017 DCLB 4x4 Sport
    Not really asking a question here, just venting. I installed the full kit this weekend, using the cheap Chuanganzhou camera from Amazon that a number of other folks here have successfully used. Mounted it with wires horizontal, which based on my research was the direction needed to have the image right side up. No dice - the image was upside down. So I switched to mounting with wires vertical. This oriented the image correctly, but things were mirrored. I expected the mirroring based on the camera's documentation, so I snipped the green wire to remove the mirroring. Unfortunately, not only did this remove the mirroring, it also INVERTED the damn image again. So I disconnected the camera yet again and switched the mounting back to the original "wires horizontal" mode. Yay, now the image was right side up and non-mirrored. Cleaned everything up and called it a day.

    This morning, I turned the camera on to enjoy my handiwork. Guess what? INVERTED IMAGE AGAIN! I kept turning it on and off during my drive to work, but the image remained inverted. Just for the heck of it, I turned the camera on one last time as I was parking, and after a few seconds the image flickered and oriented itself properly. Either I have a bad unit with an internal short, or there's something weird going on with the severed green wire. I did hide the wire under a wrap of electrical tape to keep the exposed ends from inadvertently touching, so I guess it's possible that the little exposed bits of copper at the end of the wire are getting 'reconnected' by the tape's glue. Still, that seems counterintuitive for the glue of an insulating tape to be conductive. Maybe it's just a defective unit. Either way, this install was enough of a pain in the butt that I'm not looking forward to removing/replacing the camera.

    BTW, no complaints with the harness kit. It works as advertised, though you do have to splice or solder two "Y" connections to the end of it if you're using a DPDT switch.
     
  11. Dec 3, 2018 at 6:23 AM
    #331
    Papadave418

    Papadave418 [OP] Well-Known Member

    Joined:
    Jul 17, 2017
    Member:
    #224251
    Messages:
    1,935
    I bet that’s very frustrating. That’s why I ended up ditching that camera and have been happy with this one. To change out the camera isn’t hard and this one is mounted with the wires vertically. It allows you to toggle through a number of options till the orientation is correct, no cutting little green or white wires

    https://www.amazon.com/dp/B072KQG664/ref=cm_sw_r_cp_tai_hez6Bb07RYKPW
     
    Last edited: Dec 3, 2018
  12. Dec 3, 2018 at 6:41 AM
    #332
    ohioboater

    ohioboater Well-Known Member

    Joined:
    Dec 5, 2017
    Member:
    #237692
    Messages:
    108
    Gender:
    Male
    Vehicle:
    2017 DCLB 4x4 Sport
    You're right that replacing the camera isn't that hard. I'll mess with the green wire this evening to see if that's the issue. If the camera still misbehaves, I'll ask the seller directly if they'll send me a new unit, since I'm outside of Amazon's normal return window. Worst case, I'll try the camera you linked to. Thanks.
     
  13. Dec 3, 2018 at 3:30 PM
    #333
    iNfectious

    iNfectious Well-Known Member

    Joined:
    Jul 15, 2018
    Member:
    #259406
    Messages:
    184
    First Name:
    Q
    Lone Star State
    Vehicle:
    '18 TRD Sport 4X4 DCSB
    I bought my Chuanganzhou camera two years ago. Works fine. Might have been different batches out there.
     
    ohioboater and Papadave418[OP] like this.
  14. Dec 4, 2018 at 4:39 AM
    #334
    n6vmo

    n6vmo Well-Known Member

    Joined:
    Jan 1, 2018
    Member:
    #239972
    Messages:
    870
    Gender:
    Male
    Sahuarita, AZ
    Vehicle:
    2018 DCLB OR AT Super "Priviledged"
    Bilstein 6112, ICON UCAs, 5160, AAL, 265/75/16 Falken Wildpeaks
    This is the one I installed too, no complaints about configuration. Just wish I had purchased a camera with a bit better resolution. This one has 400TVL (TV Lines) and there are plenty out there with 600TVL.
     
  15. Dec 4, 2018 at 6:25 AM
    #335
    Papadave418

    Papadave418 [OP] Well-Known Member

    Joined:
    Jul 17, 2017
    Member:
    #224251
    Messages:
    1,935
    400TVL is not very good, I’m just gonna say it so don’t hate me...but this is your truck, second largest investment (usually) behind buying a home...better cameras are only about $30 why not just buy a new camera and pop it in? Yes that old camera was probably $13 on Amazon but your truck is worth it. I did the same thing and replaced my original camera because it sucked and now I’m happy I did and just ate the cost. Figured it was equal to the mistake of taking my GF to see a Ben Affleck movie :D
     
  16. Dec 7, 2018 at 12:54 PM
    #336
    Onemorodeo

    Onemorodeo Well-Known Member

    Joined:
    Sep 29, 2018
    Member:
    #267772
    Messages:
    332
    Gender:
    Male
    OC SoCal
    Vehicle:
    ‘18 dclb TRD Sport 4wd Cement
    So I installed front and rear anytime mod using a dpdt switch, connected the power on the video cable to the relay. Did not connect any other power to the front camera, now I can switch to the rear camera anytime, but when I switch the front camera I get a blank screen. Should I have run additional power to the front camera? Please help
     
  17. Dec 7, 2018 at 1:01 PM
    #337
    n6vmo

    n6vmo Well-Known Member

    Joined:
    Jan 1, 2018
    Member:
    #239972
    Messages:
    870
    Gender:
    Male
    Sahuarita, AZ
    Vehicle:
    2018 DCLB OR AT Super "Priviledged"
    Bilstein 6112, ICON UCAs, 5160, AAL, 265/75/16 Falken Wildpeaks
    Have you wired it up just like the drawing below? Do you hear the relay switch as you select and deselect the front camera?


    [​IMG]
     
    Papadave418[OP] likes this.
  18. Dec 7, 2018 at 1:30 PM
    #338
    cruxx

    cruxx Well-Known Member

    Joined:
    Apr 20, 2017
    Member:
    #216831
    Messages:
    1,199
    Gender:
    Male
    First Name:
    Huy
    Vehicle:
    2017 TRD Sport
    I hooked mine up directly to power but i think i ran into this problem. There was a way to test if front camera is working by skipping the switch. Called mike and he was super helpful. In my case hooked up correctly but faulty crimp caused the switch not to function correctly. If not, running a power wire to camera to test is not hard

    make sure where you split the red/black wires are crimped good. That problem also prevents you from seeing front cam
     
    Last edited: Dec 7, 2018
  19. Dec 7, 2018 at 3:17 PM
    #339
    Onemorodeo

    Onemorodeo Well-Known Member

    Joined:
    Sep 29, 2018
    Member:
    #267772
    Messages:
    332
    Gender:
    Male
    OC SoCal
    Vehicle:
    ‘18 dclb TRD Sport 4wd Cement
    Yes I followed the diagram, but the camera wasn’t t getting power.

    I went ahead and connected the camera directly to power and it worked! Thanks @n6vmo and @cruxx for your reply’s!
     
    cruxx[QUOTED] likes this.
  20. Dec 7, 2018 at 6:40 PM
    #340
    orion808

    orion808 Jack of all trades. Master of none.

    Joined:
    Aug 30, 2017
    Member:
    #228617
    Messages:
    622
    Gender:
    Male
    Florida
    Vehicle:
    2017 Inferno Tacoma Off-Road (Premium & Tech)
    Interior LEDs Hardwired DashCam/Extra USB Black "Tacoma" on tailgate Blackened Badges Nerf Bars Mud Guards Rear Diff. Breather Mod Plasti-dipped Grille Glovebox Vinyl LED Bed Lights LED soft glow flooring accent lights Custom switches Diamondback Tonneau 3rd Bed Rail Sill Protectors w/ Vinyl Tweeter Upgrades Tint windows Husky Floor Mats Molle Panel behind seats Speaker Upgrades Anytime Camera Mod w/ Secondary Rear Camera Plan: Clazzios 2-3" Lift
    Leaving it hooked up to always on power could result in shorter lifespan of the camera.

    Hook the red from the camera to the red from the relay. That way the camera is only on when it is intended to be viewed.

    The diagram he linked has it shown that way as well, but it's not obvious to some. The video cable probably has a power cable run along it. I stuffed my relay behind the radio and made most of the connections there.
     
    Papadave418[OP] and n6vmo like this.

Products Discussed in

To Top