1. Welcome to Tacoma World!

    You are currently viewing as a guest! To get full-access, you need to register for a FREE account.

    As a registered member, you’ll be able to:
    • Participate in all Tacoma discussion topics
    • Communicate privately with other Tacoma owners from around the world
    • Post your own photos in our Members Gallery
    • Access all special features of the site

Finally purchased my lift, looking for clarification on the install

Discussion in 'Suspension' started by Frawstme, Dec 22, 2018.

  1. Dec 22, 2018 at 10:41 AM
    #1
    Frawstme

    Frawstme [OP] Well-Known Member

    Joined:
    Aug 27, 2018
    Member:
    #264315
    Messages:
    125
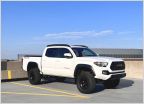
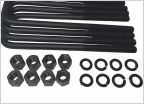
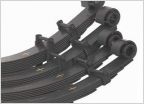
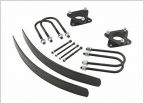
    Hello! I just purchased a ADS lift through headstrong offroad. I took this kit:
    https://www.headstrongoffroad.com/s..._Toyota_Tacoma_with_Dakar_Full_Leaf_Pack.html

    I chose the extended coils 650#, heavy duty leaf pack, and camburg ball joints. I also got the ECGS bearing. I'm combining this with Method MR309s and 285/75r16 KO2s.

    I am not experienced on installing lifts and this will be my first time doing a project this big. I think that I have all the appropriate tools, but am trying to be as educated as possible before I do the install. These two videos have been tremendously useful:
    https://www.youtube.com/watch?v=IOW-FRDl5wg
    https://www.youtube.com/watch?v=bbsTJgb6S_c

    Now I understand that one of these videos show UCAs being installed and that's a difference. I don't understand all the other differences though, why doesn't the total chaos video touch the camber bolt at all? Why's it such a different process? I know they are different kits but the components are similar.

    So a few questions that I could really use some clarification on:
    -Will my ADS kit have any different of an install process other than the ECGS bearing?
    -Where exactly should I measure the before and afters for lift height?
    -Should I grease the bushings that go in the back leafs? It's weird you grease the bushings on the UCA but not the leafs.
    -What's the "best" setting for the preload? I'm seeing the max settings but from what I understand showing the most threads leads to the worst quality of ride. I'd like to end up with 2" of lift
    -Any other suggestions while i'm down there or things that I should be prepared for?

    Thank you so much for your time!
     
  2. Dec 24, 2018 at 2:26 PM
    #2
    Frawstme

    Frawstme [OP] Well-Known Member

    Joined:
    Aug 27, 2018
    Member:
    #264315
    Messages:
    125
    Bah da ba da bummp
     
  3. Dec 24, 2018 at 2:29 PM
    #3
    tcjacado

    tcjacado Well-Known Member

    Joined:
    Aug 29, 2016
    Member:
    #195947
    Messages:
    41,570
    Where are you located?
     
  4. Dec 24, 2018 at 3:10 PM
    #4
    Frawstme

    Frawstme [OP] Well-Known Member

    Joined:
    Aug 27, 2018
    Member:
    #264315
    Messages:
    125
    Virginia
     
    tcjacado[QUOTED] likes this.
  5. Dec 24, 2018 at 3:22 PM
    #5
    tcjacado

    tcjacado Well-Known Member

    Joined:
    Aug 29, 2016
    Member:
    #195947
    Messages:
    41,570
  6. Dec 24, 2018 at 3:33 PM
    #6
    SUMOTNK

    SUMOTNK Pavement Pounder / Mall Crawler

    Joined:
    Sep 8, 2014
    Member:
    #137895
    Messages:
    3,047
    Gender:
    Male
    First Name:
    Eddie
    NorCal/South Bay Area
    Vehicle:
    Looks like a Gen2.5 TRD Sport, but really an '08 TRD OffRoad
    TRD Supercharged / OTT Tuned
    Disclaimer: ive never installed ADS...nor am i an automotive Tech.

    1. I think pretty much all standard coilovers will install almost the same on the tacoma. When i did my fox setup with ext. reservoir, i didnt need to touch the alignment cam on the lca. I did pop the uca BJ loose from the top of the spindle. The coilover will slide in on full suspension droop.

    2. Most people measure from the edge of the fender to the center of the hub.

    3. I would grease anything that has an urethane bushing..especially the end bushings on the OME leafs.

    4. The ADS thread in the suspension forum should give u a pretty good idea on how to get 2" of lift from the preload setting and/or how many threads should be showing.

    Good luck. Happy holidays
     
  7. Dec 26, 2018 at 4:31 PM
    #7
    Frawstme

    Frawstme [OP] Well-Known Member

    Joined:
    Aug 27, 2018
    Member:
    #264315
    Messages:
    125
    Thank you, this was very helpful. Does the type of grease/lube matter at all?
     
  8. Dec 26, 2018 at 8:44 PM
    #8
    SUMOTNK

    SUMOTNK Pavement Pounder / Mall Crawler

    Joined:
    Sep 8, 2014
    Member:
    #137895
    Messages:
    3,047
    Gender:
    Male
    First Name:
    Eddie
    NorCal/South Bay Area
    Vehicle:
    Looks like a Gen2.5 TRD Sport, but really an '08 TRD OffRoad
    TRD Supercharged / OTT Tuned
    Personally, for "rubber/urethane parts", i dont think it really matters that much. Ive been using the same tube of valvoline synthetic grease for the last decade. Its the super sticky but like spreadable butter type of grease. I've used it to pack wheel bearings and lube up rubber bushings etc

    But then again, manufacturers like SPC will recommend that you should use a specific grease that they sell/have...
     
    Last edited: Dec 26, 2018
  9. Dec 27, 2018 at 10:50 AM
    #9
    MAG GRY TACO15

    MAG GRY TACO15 Well-Known Member

    Joined:
    Sep 5, 2018
    Member:
    #265273
    Messages:
    5,086
    Gender:
    Male
    First Name:
    Alan
    GA
    Vehicle:
    '15 TRD Off-Road
    Same crap everyone else got

    2 different methods of install (didn't watch vids just going by install options i've seen).
    one loosens the lower control arm and the other disconnects the upper from the ball joint. Since you are replacing your upper control arms already, I wouldn't worry about loosening the bottom lower control arm.
    drop sway bar, unbolt sway bar from spindle, unbolt upper ball joint, unbolt tie rod, unbolt lower shock mount and 3 upper stock tower bolts. shock and spring will drop out together. then remove UCA. Then put it all back together with the new parts.
     
  10. Dec 28, 2018 at 5:57 AM
    #10
    Frawstme

    Frawstme [OP] Well-Known Member

    Joined:
    Aug 27, 2018
    Member:
    #264315
    Messages:
    125

    This is exactly what I was looking for, thank you. Is bending the frame at that spot really necessary when doing the UCA method? I was looking through the comments to that video and didn't really see a work around to it.

    Another thing that I was wondering is about maintenance. Is there anything I can do or any products that I should use to make my lift last longer or wear slower? I've seen some pics of coils here that are rusted and rear shocks that have started leaking. I'd definitely be interested in keeping them maintained.
     
  11. Dec 28, 2018 at 6:49 AM
    #11
    MAG GRY TACO15

    MAG GRY TACO15 Well-Known Member

    Joined:
    Sep 5, 2018
    Member:
    #265273
    Messages:
    5,086
    Gender:
    Male
    First Name:
    Alan
    GA
    Vehicle:
    '15 TRD Off-Road
    Same crap everyone else got
    From all the installs i've seen, yes you need to bend that body lip with channel locks or something similar. Once you bend it back you will cover it back up with the fender skits so it won't be noticeable I believe.

    As far as maint. goes.....no not really. If you live in the rust belt, then just do what you would do to preserve the rest of your vehicle. If a shock starts leaking, it's either from hard abuse or wear over time. You can't do anything preventive maint to stop it. There are some that say the boot will keep the shaft clean and prevent debris from damaging the seal but then others have a theory that the boot only traps stuff inside and leads to rust of the shaft and damage of the seal so it's a toss up. I've run shocks both ways and have seen no difference. They are wear parts, when they go, they go and just need to be replaced. When that time comes for the front of your vehicle, then you may want to look into using the other install method via the lower control arm so you can decompress and compress the spring safely off the old shock and on the new one.
     

Products Discussed in

To Top