

-
Welcome to Tacoma World!
You are currently viewing as a guest! To get full-access, you need to register for a FREE account.
As a registered member, you’ll be able to:- Participate in all Tacoma discussion topics
- Communicate privately with other Tacoma owners from around the world
- Post your own photos in our Members Gallery
- Access all special features of the site
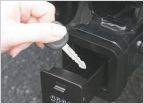 Manual transmission spare keys
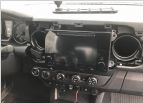 Ram Tough Track for mounting on the dash of '19 Tacoma
 MT Accumulator Delete Mod (ADM) and BS Thread
 Got hit in rear. Go OEM or mod?
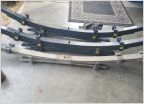 Recommend leaf spring setup
 Wireless Apple Car Play
3rd Gen Tacoma Bed Storage/Platform Build
Discussion in '3rd Gen. Tacomas (2016-2023)' started by Sauzacoma, Dec 25, 2018.
Page 1 of 4
Page 1 of 4


