1. Welcome to Tacoma World!

    You are currently viewing as a guest! To get full-access, you need to register for a FREE account.

    As a registered member, you’ll be able to:
    • Participate in all Tacoma discussion topics
    • Communicate privately with other Tacoma owners from around the world
    • Post your own photos in our Members Gallery
    • Access all special features of the site

Long Travel BS Thread

Discussion in 'Long Travel Suspension' started by amaes, Aug 20, 2010.

  1. Jan 24, 2019 at 5:42 PM
    anomalyTRD

    anomalyTRD Well-Known Member

    Joined:
    Jul 12, 2013
    Member:
    #108160
    Messages:
    294
    Gender:
    Male
    Oakland, CA
    Vehicle:
    2019 Ford F150
    VO Nomad
    Sorry, mean to say 250 miles a week. There are also costs outside of fuel for driving your truck. Tires, brakes, etc are way more expensive consumables at our build level than stock. Considering you can get an EV lease for like $250/mo with a $500 drive off it's pretty easy to make it cost neutral, plus you aren't just piling miles onto the truck. That said, to each their own...
     
    nate232 and snowsk8air2 like this.
  2. Jan 24, 2019 at 5:42 PM
    Coot83

    Coot83 DORKEL NATION

    Joined:
    Aug 9, 2016
    Member:
    #194134
    Messages:
    13,250
    Gender:
    Male
    First Name:
    Chris
    Scottsdale, Az
    Vehicle:
    2012 Baja TX
    TC 3.5 LT, RCV axles, Demello sliders, BD light bar/fogs, LP6, DMZ rear, SOS skids, custom bumper, King 16" triples, Locked-on hydro rear bumps...
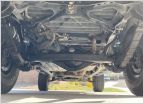
    Damn brother is that a fresh LSK kit???

    Straight sex.
     
    nate232[QUOTED] and Arcticelf like this.
  3. Jan 24, 2019 at 7:24 PM
    snowsk8air2

    snowsk8air2 how hard can it be?

    Joined:
    Sep 16, 2011
    Member:
    #63607
    Messages:
    10,537
    Gender:
    Male
    First Name:
    Ryan
    Flagstaff, AZ
    Vehicle:
    Supercharged TX Pro
    2011 S/C and basic mods
    Ok yeah, your original post I took as “you need to do this so you can save a ton of money”, but we’re basically on the same page
     
    anomalyTRD[QUOTED] likes this.
  4. Jan 25, 2019 at 1:37 AM
    nate232

    nate232 Insta: @LT_YOTA

    Joined:
    Jan 18, 2015
    Member:
    #146638
    Messages:
    283
    Gender:
    Male
    First Name:
    Nate
    Hesperia, CA
    Vehicle:
    2015 TRD Off-road DCSB 4x4
    It’s their basic kit:anonymous: thanks man, they built it perfectly
     
    anomalyTRD[QUOTED] likes this.
  5. Jan 25, 2019 at 1:40 AM
    nate232

    nate232 Insta: @LT_YOTA

    Joined:
    Jan 18, 2015
    Member:
    #146638
    Messages:
    283
    Gender:
    Male
    First Name:
    Nate
    Hesperia, CA
    Vehicle:
    2015 TRD Off-road DCSB 4x4
    Yeah, I see the plus side into doing it. Honestly, just going to enjoy the truck and drive it everywhere. I didn’t pay all that money to have it sit ahha. I’ll eventually get a commuter, proabbly a civic or something.
     
    anomalyTRD[QUOTED] likes this.
  6. Jan 25, 2019 at 1:43 AM
    nate232

    nate232 Insta: @LT_YOTA

    Joined:
    Jan 18, 2015
    Member:
    #146638
    Messages:
    283
    Gender:
    Male
    First Name:
    Nate
    Hesperia, CA
    Vehicle:
    2015 TRD Off-road DCSB 4x4
    Yes sir!! LSK basic 4x4 in the front and DMZ springunder in the rear:smokertransformer:
     
    Coot83[QUOTED] and Dalandser like this.
  7. Jan 25, 2019 at 2:02 AM
    Cam2010taco

    Cam2010taco IG: Blvcktaco

    Joined:
    Aug 28, 2018
    Member:
    #264343
    Messages:
    356
    Gender:
    Male
    First Name:
    Cameron
    Mission Viejo, CA
    Vehicle:
    2010 4x4 Tacoma
    All right bout to paint my fenders... I’m gonna be using duplicolor paint match to the black sand pearl and a 2k clear coat but I have one question... what do you do to prep fiberglass for paint? Do I sand it, and if I do what grit? I’m not new to amateur painting but painting fiberglass I’ve never done. I wouldn’t care so much but I picked them up used from smp fab and whoever ran them before accumulated tiny weird brown rust dots all over the top and I wanna get rid of that before hand. Any pointers?
     
  8. Jan 25, 2019 at 5:16 AM
    Coot83

    Coot83 DORKEL NATION

    Joined:
    Aug 9, 2016
    Member:
    #194134
    Messages:
    13,250
    Gender:
    Male
    First Name:
    Chris
    Scottsdale, Az
    Vehicle:
    2012 Baja TX
    TC 3.5 LT, RCV axles, Demello sliders, BD light bar/fogs, LP6, DMZ rear, SOS skids, custom bumper, King 16" triples, Locked-on hydro rear bumps...
    Hell yea man, what are the travel numbers on the front! Looks good brother.
     
    nate232[QUOTED] likes this.
  9. Jan 25, 2019 at 5:37 AM
    Coot83

    Coot83 DORKEL NATION

    Joined:
    Aug 9, 2016
    Member:
    #194134
    Messages:
    13,250
    Gender:
    Male
    First Name:
    Chris
    Scottsdale, Az
    Vehicle:
    2012 Baja TX
    TC 3.5 LT, RCV axles, Demello sliders, BD light bar/fogs, LP6, DMZ rear, SOS skids, custom bumper, King 16" triples, Locked-on hydro rear bumps...
    I painted my old bedsides on my first gen black sand pearl as well. I did 220 all around to level it out, 600, 1000, and 1500 if you want to go to that level, wipe down the surface and verify it is dry and clean before painting. I would really recommend an orbital sander to save on the joints, but to help maintain that consistency throughout as fenders can be quite telling with the sun always hitting them if the sanding is not balanced. As far as the brown spots, you could try some acetone on them and see if that pulls them off. If not, you can always just sand a little more and Im sure they will burn off, worst case when you paint I doubt you will see it. I'm not a pro painter, but it came out pretty decent for my process. Paint can typically dry in anywhere from 25-40 min depending on how heavy you go and temp conditions outside...more time is always better than less.

    You should be able to hang the fenders by the holes you drilled out for the bolt on portions of them...If you are painting before fitting I would strongly consider fitting first.

    1. I did two coats of self-etching primer with the first coat being a lighter "tack" coat where you want to have less coverage and more dispersion for the subsequent coats of paint to be better stick to.
    2. After the self-etching primer is completely dry, do a light tack coat of the base color (black sand pearl). When this coat is dry you will do your first wet coat where you get a lot of paint coverage laid down, I would give extra time for the paint to dry as this is your first real coat of base paint.
    3. Do 2-3 more layers of base coat until you have complete coverage which black is pretty easy to tell if you got it all.
    4. When the base coat is completely applied, let that dry for a little while as well so the paint can completely cure to an extent.
    5. Clear coat. You want to be very patient with clear coat especially if you are using rattle can as the sprayer can get gunked up and spit which will lead to random spots at the end of the job. I would be extra diligent to cleaning the tip with a paper towel and be conservative with your sprays...its better to do 5 light coats instead of two heavy coats so that the coverage is balanced and not rushed. I will warn you, the clear coat is where paint jobs get a lot of the cost from as good quality clear will fill and look healthy while cheap stuff will get you the shine, but can also make the surface much more transparent with inconsistencies if there are any on the surface since its a much more watered down paint.

    Cool thing is you can always paint more clear down the road if you feel it doesn't live up to what you were expecting.

    This is clearly an amateur approach, but hopefully this works for ya.
     
  10. Jan 25, 2019 at 6:23 AM
    Dalandser

    Dalandser ¡Me Gustan Las Tacos-mas!

    Joined:
    Feb 19, 2015
    Member:
    #149090
    Messages:
    17,629
    First Name:
    Anthony
    Downey
    Vehicle:
    08 PreRunner Regular Cab / 98 4x4 Extra Cab
    Empty Wallet Mod
    Prior to painting I'd undercoat the insides with your coating of choice so you don't have to mask off your new paint and can wipe off any overspray with acetone.

    400 is about as fine as you need to go before primer - you want to leave texture for the paint to grab and auto body primers are pretty high build and will smooth out most inconsistencies anyway. If you're spending all that money on clear coat I'd just get color matched cans (sounds like that's the method you're going if I read your post right) from the auto paint store and good 2k primer as well.

    Sand between primer and base coat if you have overspray making the surface "dusty". Wet sanding and waxing your clear coat after the manufacturer's recommended wait time (usually weeks) will make it as close to factory looking as you can.
     
    Last edited: Jan 25, 2019
    Cam2010taco and Tango Bravo like this.
  11. Jan 25, 2019 at 10:15 AM
    Cam2010taco

    Cam2010taco IG: Blvcktaco

    Joined:
    Aug 28, 2018
    Member:
    #264343
    Messages:
    356
    Gender:
    Male
    First Name:
    Cameron
    Mission Viejo, CA
    Vehicle:
    2010 4x4 Tacoma
    Wow those were some great words! I’m still a little confused on the sanding part and I always have been... what am I looking for while sanding before primer? Like when do I step up the grit and why? And how do you know you’re ready for primer?
     
    Coot83[QUOTED] likes this.
  12. Jan 25, 2019 at 10:16 AM
    Cam2010taco

    Cam2010taco IG: Blvcktaco

    Joined:
    Aug 28, 2018
    Member:
    #264343
    Messages:
    356
    Gender:
    Male
    First Name:
    Cameron
    Mission Viejo, CA
    Vehicle:
    2010 4x4 Tacoma
    That really helped thank you!!!
     
    Dalandser[QUOTED] likes this.
  13. Jan 25, 2019 at 10:21 AM
    excorcist

    excorcist Well-Known Member

    Joined:
    Aug 25, 2016
    Member:
    #195492
    Messages:
    2,527
    Gender:
    Male
    Reno, NV
    Vehicle:
    '06 dcsb, '86 pickup, '89 runner
    you definitely don't want to go to 1500 before painting, not even close.. I like to stay at 320-400 before primer or paint. If you sand with 1500 and then paint over it you willl have very little adhesion between the coats and if it chips it will likely just peel off. So in a simple format :

    1. Sand until smooth, depending on how rough they are I start with around 220 and end with 400
    2. Lay a nice base of primer down, this will show you any areas that need more sanding work
    3. Sand or scuff and then lay basecoat until satisfied with coverage, then your clear last making sure not to let the basecoat dry completely or again you will have adhesion issues.

    If you want to get real fancy and depending on how your clear comes out, you can wetsand with 1,500 - 2,000 grit and then buff / polish / wax.
     
    Cam2010taco[QUOTED] likes this.
  14. Jan 25, 2019 at 11:47 PM
    nate232

    nate232 Insta: @LT_YOTA

    Joined:
    Jan 18, 2015
    Member:
    #146638
    Messages:
    283
    Gender:
    Male
    First Name:
    Nate
    Hesperia, CA
    Vehicle:
    2015 TRD Off-road DCSB 4x4
    Getting 14” in the front. They got the most out of the kit they could
     
  15. Jan 26, 2019 at 8:08 AM
    anthony250f

    anthony250f Well-Known Member

    Joined:
    Feb 18, 2012
    Member:
    #73066
    Messages:
    16,775
    Gender:
    Male
    First Name:
    Anthony
    San Diego, CA
    Vehicle:
    2008 dcsb trd offroad 4wd
    I either have great luck, or horrible luck wet sanding clear coat (burn through)

    Sand to either 400 or 600 before primer. You can use acetone or a tac cloth to keep things clean.

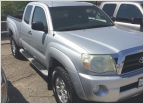
    I just used duplicolor to paint my shell. After blending it came out decent...it does have somewhat of a light texture but I don’t want to risk ruining the clear again lol..
    A637E371-F7C8-46F4-BEBE-6018DA528A49.jpg
     
    Dalandser likes this.
  16. Jan 26, 2019 at 12:42 PM
    Coot83

    Coot83 DORKEL NATION

    Joined:
    Aug 9, 2016
    Member:
    #194134
    Messages:
    13,250
    Gender:
    Male
    First Name:
    Chris
    Scottsdale, Az
    Vehicle:
    2012 Baja TX
    TC 3.5 LT, RCV axles, Demello sliders, BD light bar/fogs, LP6, DMZ rear, SOS skids, custom bumper, King 16" triples, Locked-on hydro rear bumps...
    Considering how hard silver is to paint match in general...I think you killed it man!
     
    Dalandser likes this.
  17. Jan 26, 2019 at 1:53 PM
    Anthony250

    Anthony250 Ex Fabricator

    Joined:
    Sep 29, 2010
    Member:
    #44016
    Messages:
    3,775
    Gender:
    Male
    First Name:
    Anthony
    Rialto CA
    Vehicle:
    99 Tacoma LT Prerunner
    LSK Race Kit, King Shocks, Methods, Glassworks, Baja Designs, Built by myself.
    Anybody have swayaway shock 2.5 can give me a rod end measurement, also lookingn for two rod ends for sway away
     
  18. Jan 26, 2019 at 1:55 PM
    anthony250f

    anthony250f Well-Known Member

    Joined:
    Feb 18, 2012
    Member:
    #73066
    Messages:
    16,775
    Gender:
    Male
    First Name:
    Anthony
    San Diego, CA
    Vehicle:
    2008 dcsb trd offroad 4wd
    Thanks man! Took a few tries actually lol. The blending was super hard. I still would like to wet sand and buff but worried of messing it up.
     
    Coot83[QUOTED] and Dalandser like this.
  19. Jan 27, 2019 at 12:34 PM
    Coot83

    Coot83 DORKEL NATION

    Joined:
    Aug 9, 2016
    Member:
    #194134
    Messages:
    13,250
    Gender:
    Male
    First Name:
    Chris
    Scottsdale, Az
    Vehicle:
    2012 Baja TX
    TC 3.5 LT, RCV axles, Demello sliders, BD light bar/fogs, LP6, DMZ rear, SOS skids, custom bumper, King 16" triples, Locked-on hydro rear bumps...
    Oh yea I’m sure it did! I would leave it, but I can see after that much effort that you would want perfection as well. I didn’t notice the blemish u til you pointed it out.
     
  20. Jan 27, 2019 at 12:36 PM
    anthony250f

    anthony250f Well-Known Member

    Joined:
    Feb 18, 2012
    Member:
    #73066
    Messages:
    16,775
    Gender:
    Male
    First Name:
    Anthony
    San Diego, CA
    Vehicle:
    2008 dcsb trd offroad 4wd
    For you that are 4wd are you guys running oem boots or sdhq?
     
    Coot83 likes this.

Products Discussed in

To Top