1. Welcome to Tacoma World!

    You are currently viewing as a guest! To get full-access, you need to register for a FREE account.

    As a registered member, you’ll be able to:
    • Participate in all Tacoma discussion topics
    • Communicate privately with other Tacoma owners from around the world
    • Post your own photos in our Members Gallery
    • Access all special features of the site

"Ole' MG"- Adam's 2000 Tacoma Build + Adventures

Discussion in '1st Gen. Builds (1995-2004)' started by aknickyota22, Jan 7, 2019.

  1. Jan 7, 2019 at 3:52 PM
    #1
    aknickyota22

    aknickyota22 [OP] Well-Known Member

    Joined:
    Jul 20, 2017
    Member:
    #224589
    Messages:
    421
    Gender:
    Male
    First Name:
    Adam
    Durango, CO
    Vehicle:
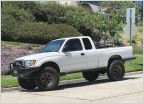
    2000 Tacoma 4x4 TRD
    Bilstein Suspension, All Pro Baja Bumper, and more
    Current (as of 1/20/20):
    IMG_20200120_162736.jpg


    As of 7/18/19:
    P1080306.jpg

    As of 3/17/19:
    P1010163.jpg


    Specs:
    -
    2000 Toyota Tacoma SR5 TRD Off Road 4X4 Natural White Extended Cab
    -Mileage (5/4/20)- 213,000
    -3.4l 5VZ-FE V6
    -A340F 4-Speed Automatic
    -TRD E-Locker

    Mod List:

    Armor:
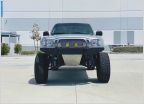
    -All-Pro Baja Front Bumper
    -All-Pro IFS Skid

    Suspension:
    -Bilstein 5100 Front Shocks
    -OME 880 Front Coils
    -Bilstein 5100 Rear Shocks
    -Wheeler's Off-Road 1.5" Add a Leaf

    Tires/Wheels:
    Summer-
    -Stock Toyota 15" alloys
    -31/10.5R15 Laufenn X-Fit A/T Tires

    Winter-
    -16" Silver Steel Wheels from 2002 Tundra
    -245/75/16 Bridgestone Blizzak DMV-1 Tires

    Lights:
    -Auxbeam 20" LED Light bar
    -Relocated front turn signals
    -LED reverse lights
    -Phillips X-tremeVision headlight bulbs
    -TYC Replacement headlight housings

    Interior:
    -Scanguage 2 mounted on Paranoid Fabrications ashtray mount
    -Husky Liners
    -Autozone special seat covers
    -Pioneer single DIN stereo w/ Bluetooth
    -BH3D 3D Printed Cup Holder
    -Scosche Magnetic phone mount

    Miscellaneous:
    -Gray Wire Mod
    -Rear diff breather Mod
    -BAMF BPV Bracket
    -Stickered Up Century camper shell w/ Yakima roof rack
    -Leader Roof Cargo Basket w/ 6 ft awning
    -Self contained solar setup in bed (Renogy 100W Panel + 100AH AGM battery)
    -Sleeping platform w/ drawer, cabinet, 4" foam mattress
    -Long Tru-Cool LPD Aux Transmission Cooler

    Recovery:
    -
    Stock Bottle Jack
    -Come-along
    -Knock-off Maxtrax (Lost 1 in Oregon Dunes RIP)
    -Warn tow rope
    -Hi-Lift Tree Saver

    Planned Mods/Maintenance:
    -Replace leaking passenger CV axle
    -Fix leaking driver side rear axle seal
    -Bigger tires (235/85/16 Falken Wildpeak AT3W)
    -Better suspension setup (probably full OME)
    -Install Cobra 19 Ultra III CB w/ 4' Firestik*
    -Replace cracked engine vacuum lines

    *Have the parts, just need to install

    Adventures:
    -4/11/17- Echo Basin
    -10/7/17- Kennebec Pass
    -3/9/18- Lockhart Basin
    -5/14/18- Old Lime Creek Road
    -6/28/18- Clear Lake, Hurricane Pass, and California Pass
    -8/21/18- Alpine Loop
    -9/21/18- Cascade Divide and Bolam Pass
    -2/11/19- Chokecherry Canyon
    -4/26/19-6/30/19- Western US Road Trip (Write-Up TBA)

    Maintenance List:

    -3/25/17- First oil change (Mobil-1 Full Synthetic)- 169,575
    -3/26/17- Replaced serpentine belts (3)- 169,580
    -3/31/17- Drained and Refilled automatic transmission fluid (Valvoline Maxlife ATF)- 169,654
    -4/23/17- Replaced PCV Valve- 170,196
    -4/23/17- Replaced Idler Pulley- 170,196
    -6/5/17- New Tires, Laufenn X-Fit A/T- 171,577
    -6/8/17- Drained and Refilled automatic transmission fluid (Valvoline Maxlife ATF)- 171,670
    -7/18/17- Replaced Steering Rack and Sway Bar bushings, Energy suspension- 172,020
    -8/8/17- Drained and Refilled automatic transmission fluid (Valvoline Maxlife ATF)- 172,478
    -10/1/17- Dropped transmission pan, replaced pan, filter, dipstick, new ATF- 172,757
    -11/4/17- Second oil change (Mobil-1 Full Synthetic)- 173,856
    -1/4/18- Installed Bilstein 5100 Front shocks + OME 880 coils- 175,304
    -2/3/18- Replaced spark plugs (Denso K16TR11)- 176,426
    -2/3/18- Replaced fuel filter- 176,426
    -2/17/18- Changed coolant (OEM Red) + Replaced leaking lower radiator hose- 176,775
    -2/24/18- Third oil change (Mobil-1 Full Synthetic)- 177,024
    -3/5/18- Replaced inner + outer tie rods- 177,363
    -4/9/18- Replaced air filter- 178,913
    -4/27/18- Replaced cracked air box- 179,636
    -4/29/18- Installed rear 1.5" AAL and rear Bilstein 5100 shocks- 179,648
    -5/23/18- Fourth oil change (Mobil-1 Full Synthetic)- 180,509
    -6/8/18- Replaced front brake pads and rotors (Centric rotors + Akebono pads)- 180,979
    -7/31/18- Replaced valve cover gaskets- 182,218
    -7/31/18- Replaced lower ball joints (OEM Toyota)- 182,218
    -10/27/18- Fifth oil change (Mobil-1 Full Synthetic)- 184,754
    -11/6/18- Replaced spark plug wires- 185,130
    -11/20/18- Installed All-Pro Front bumper- 185,407
    -1/25/19- Replaced radiator, radiator hoses, thermostat, coolant- 187,689
    -3/23/19- Replaced battery (Napa Legend Premium)- 189,842
    -3/23/19- Sixth oil change (Mobil-1 Full Synthetic)- 189,864
    -3/23/19- Drained and Refilled automatic transmission fluid (Valvoline Maxlife ATF)- 189,864
    -3/23/19- Changed rear differential fluid (Valvoline 75W-90)- 189,864
    -3/24/19- Changed transfer case fluid (Valvoline 75W-90)- 189,882
    -3/24/19- Replaced air filter- 189,882
    -4/6/19- Installed aux automatic transmission cooler- 190,311
    -4/11/19- Replaced coolant bypass pipe, intake manifold gaskets, knock sensor wiring harness, and IACV coolant hose- 190,480
    -4/13/19- Changed front differential fluid (Valvoline 75W-90)- 190,591
    -5/13/19- Replaced inner + outer rear axle seals, rear wheel bearings, rear brake shoes and drums- 193,121
    -6/9/19- Seventh oil change (Mobil-1 Full Synthetic)- 198,303
    -7/3/19- Replaced throttle position sensor (TPS)- 200,829
    -8/17/19- Eighth oil change (Mobil-1 Full Synthetic)- 202,691
    -1/4/20- Ninth oil change (Mobil-1 Full Synthetic)- 208,231
    -1/12/20- New Snow Tires, Blizzak DM-V1 On 02' Tundra 16" Steel Wheels- 208,484
    -4/11/20- Took off Snows, put on Laufenn A/T's- 212,174

    Cost/Purchase Log:

    2000 Tacoma Costs 226.jpg


    The Backstory:

    My family has always owned and loved Toyotas. Specifically, Toyota pickup trucks. Over the course of several decades, my family has owned the following Toyota trucks:
    -1988 Toyota Pickup 2wd 22re 5-spd
    -1989 Toyota Pickup 4x4 22re 5-spd
    -1993 Toyota Pickup 4x4 3.0 V6 5-spd
    -2001 Toyota Tundra 4x4 4.7 V8 Auto
    -1996 Toyota Tacoma 4x4 3.4 V6 5-spd
    -2001 Toyota Tacoma 4x4 3.4 V6 Auto
    -2003 Toyota 4runner 4x4 4.7 V8 Auto

    When I was 15 and just starting to learn to drive, my Dad owned a 1996 Toyota Tacoma. I loved that truck and insisted that I learn to drive in it. For months I would have my Dad take me out, teaching me the basics of driving as well as how to drive a standard. My first car ended up being a 1994 Honda Accord, which was a very practical first car, but left me disappointed because I wished I had the ability to drive off-road and the explore the beautiful landscape around me. From that moment, I set it in my mind that my next vehicle would be a 4x4 Toyota truck.

    My father's 1996 Tacoma that got me hooked on Toyota trucks:
    P1090738(LPEDIT).jpg

    The Purchase:

    On 3/20/17, after months of looking, I purchased my 2000 Toyota Tacoma off of Craigslist with 169,000 miles for $7,400. It had everything I wanted; extended cab, white, TRD off-road package, V6, camper shell, and relatively low-miles. The only thing it was missing was the 5-speed manual transmission that I wanted. But, considering all the other advantages this truck had, I figured I could live with the automatic.

    Now the truck was not perfect, it needed some work. The tires were almost bald, valve cover gaskets were leaking like a sieve, the ATF was very dark and had a faint burnt smell to it, the headlights were yellow, and the paint was very chalky from the sun.

    But I finally had a Toyota truck I could call my own.
     
    Last edited: May 4, 2020
    boostedka, Tacofire98 and Wsteven like this.
  2. Jan 7, 2019 at 6:26 PM
    #2
    aknickyota22

    aknickyota22 [OP] Well-Known Member

    Joined:
    Jul 20, 2017
    Member:
    #224589
    Messages:
    421
    Gender:
    Male
    First Name:
    Adam
    Durango, CO
    Vehicle:
    2000 Tacoma 4x4 TRD
    Bilstein Suspension, All Pro Baja Bumper, and more
    3/25/17-3/31/17- Some Baseline Maintenance

    Having just purchased the truck, I figured I'd do some baseline maintenance on it. Started by changing the oil for the first time, having not known when it was done last. Decided to go with Mobil-1 Full Synthetic as that's what my father ran in his 96'. Then I discovered the extremely easy to access oil filter location (not), and proceeded to get oil all over the front skid plate. With fresh oil in it (and after removing and cleaning the skid plate), I decided to change out the 3 serpentine belts that were squealing and badly cracked, they almost looked original to the truck in fact.

    IMG_20170326_152908.jpg

    I finally got all the belts in after struggling to access all of the adjusters/tensioners. Having only worked on vehicles with one serpentine belt, the extra 2 on this truck was interesting to me. Next, I decided to do a drain and refill of the automatic transmission fluid as it was very dark and smelt a little burnt. I choose to go with Valvoline Maxlife ATF. I planned to do a series of 3-4 drain and refills over a few thousand miles in order to slowly replace all of the old fluid with new. (P.S the owner's manual that states 2.1 quarts of ATF for a drain and refill is wrong; takes more like a little over 4 quarts).

    IMG_20170330_210753.jpg


    4/11/17- The First Excursion- Echo Basin

    With a little maintenance out of the way, I felt comfortable taking the truck out to test it's off-road capability on some mild trails. Most trails local to me were still closed for the winter, but I found one that wasn't and headed out with a friend, who for some reason started calling the truck MG, which stuck.

    IMG_20170411_130646.jpg

    P1180762.jpg

    P1180768.jpg

    I was surprised at how well the truck did, especially on near bald 235/75R15 Yokohama Geolanders. Granted, the trail was pretty mild, but I did encounter some deep mud that I had to engage the rear e-locker to get out of. All was good, and I decided to head back home. That's when disaster struck. I was off the rougher trail and on a graded dirt road when I accidentally hit a pot hole and heard a loud popping sound. I pulled over and found this.

    IMG_20170414_172329.jpg

    The passenger side front shock had pushed up through the mount and was now touching the top of the fender well. So much for the newish front shocks the previous owner had put on. I limped it back home and ordered a cheap stock height Monroe Quick Strut to get it back on the road. Link: https://www.amazon.com/gp/product/B002NETMZU/ref=ppx_yo_dt_b_asin_title_o05__o00_s00?ie=UTF8&psc=1

    IMG_20170420_170213.jpg
     
    Last edited: Jan 10, 2019
  3. Jan 9, 2019 at 3:29 PM
    #3
    aknickyota22

    aknickyota22 [OP] Well-Known Member

    Joined:
    Jul 20, 2017
    Member:
    #224589
    Messages:
    421
    Gender:
    Male
    First Name:
    Adam
    Durango, CO
    Vehicle:
    2000 Tacoma 4x4 TRD
    Bilstein Suspension, All Pro Baja Bumper, and more
    4/23/17-6/19/17- Cosmetic Refresh and New Tires

    My headlights were extremely hazy and yellow, so I decided to restore them. I used this Turtle Wax kit, which worked pretty good. I was impressed with the results. https://www.amazon.com/Turtle-Wax-T-240KT-Headlight-Restorer/dp/B001TI5IIQ

    Before:
    IMG_20170423_215146.jpg

    After:

    IMG_20170423_215151.jpg

    5/7/17- Painting the wheel center caps

    My wheel center caps were also sun faded and yellowed. I considered buying new ones, but after seeing the price, I chose to paint them instead. I went with Rustoleum Professional Aluminum spray paint, which wasn't a perfect match, but was close enough for me.

    IMG_20170507_160230.jpg

    6/5/17- New Tires

    Next, I made the decision to get new tires. The badly worn 235/75R15 tires that came on the truck when I bought it were't cutting it and they looked too small. I chose to go with 31/10.5R15 Laufenn X-Fit A/T's. They were affordable, fairly aggressive, and I knew several people that had them on their vehicles and were impressed with them. Plus they were the size that came on the truck from the factory and would match my spare. I got them from a local tire shop that my friend worked at and he was able to get me the employee discount, so I ended up spending about $400 mounted and balanced.

    IMG_20170605_170752.jpg

    P1190239.jpg

    6/12/17- Painting the tailgate

    The paint was worn off of the top 2" of my tailgate due to the camper shell door rubbing on it. I took the tailgate off the truck, grabbed a can of truck bed liner, and went to work.

    Before:
    IMG_20170612_203236.jpg

    After:
    IMG_20170613_192149.jpg
    P1190249.jpg

    6/17/17- New TRD Decal

    The TRD Off Road decal on the drivers side was peeling off, so I ordered one on Amazon to replace it. It wasn't quite up to the same quality as the Toyota ones, but still good nonetheless. Here's the link: https://www.amazon.com/Toyota-Truck...8&qid=1547075617&sr=8-3&keywords=trd+stickers

    IMG_20170617_211559.jpg
    P1190407 (2).jpg

    6/19/17- New reverse light bulbs

    Next, I replaced the stock reverse lights with LED's. I have a very long driveway and I could barely see backing out at night with the dim stock bulbs. I got some cheap ones from Amazon and they are significantly brighter.
    https://www.amazon.com/gp/product/B017386GLS/ref=oh_aui_detailpage_o02_s00?ie=UTF8&psc=1

    Before:
    IMG_20170619_191516.jpg

    After:
    IMG_20170619_191521.jpg

    Also did some maintenance during this time period. I replaced the PCV valve (just because), replaced a squeaky idler pulley (https://www.amazon.com/gp/product/B000C2YA6G/ref=oh_aui_detailpage_o05_s00?ie=UTF8&psc=1), and did another drain and refill of the automatic transmission fluid.
     
    Last edited: Jan 10, 2019
  4. Jan 10, 2019 at 10:53 PM
    #4
    aknickyota22

    aknickyota22 [OP] Well-Known Member

    Joined:
    Jul 20, 2017
    Member:
    #224589
    Messages:
    421
    Gender:
    Male
    First Name:
    Adam
    Durango, CO
    Vehicle:
    2000 Tacoma 4x4 TRD
    Bilstein Suspension, All Pro Baja Bumper, and more
    6/29/17-10/1/17- Deckplate Mod and Transmission Issues

    So after spending some time reading through articles on TW, I came across the deckplate mod. I read various claims of performance enhancements as well as sound improvements, so I figured what the hell, why not. I bought some sensor safe RTV and a 4" deckplate from Amazon and then dusted off the Dremel. It all went smoothly, but I didn't really notice any performance changes, just a louder intake noise.
    Links:
    https://www.amazon.com/gp/product/B0002UEOKK/ref=ppx_yo_dt_b_asin_title_o02__o00_s00?ie=UTF8&psc=1
    https://www.amazon.com/gp/product/B00KFOZMBS/ref=ppx_yo_dt_b_asin_title_o01__o00_s00?ie=UTF8&psc=1

    IMG_20170629_194520.jpg
    IMG_20170629_204727.jpg

    7/18/17- New steering rack and sway bar bushings

    I noticed my steering bushings were very worn and had a significant amount of play in them as did my sway bar bushings. Having heard good things about the Energy Suspension poly bushings, I went ahead and ordered some from Wheelers Off Road and some lubricant for them (https://www.amazon.com/gp/product/B000MW5SJ4/ref=ppx_yo_dt_b_asin_title_o07__o00_s00?ie=UTF8&psc=1). Replacing them went fairly smoothly, but was time consuming. After I finished, I noticed my steering felt tighter and had much less slop in it. Well worth it in my opinion. Unfortunately, I don't have any pictures of this process.

    8/17/17- Oh no what was that noise- a strange transmission issue

    I was out running errands and stopped at my bank. When I got in my truck to leave, I put it into reverse and heard a loud metallic ping sound. I put it back into park and then into reverse again. Ping. Figuring the noise was transmission related, I popped the hood to check the transmission fluid. I pulled the dipstick and only 3/4 of it came out. Great. The bottom 1/4 of the dipstick had sheared off, fell into the transmission pan, and was now rattling around whenever I put the truck into gear. Not wanting to risk the dipstick doing any damage to the valve body of the transmission, I called a friend and loaded the truck onto a trailer and towed it home.

    IMG_20170817_200511.jpg
    IMG_20170823_114513.jpg

    At this point, I was about to start my first semester of college, so I parked the truck and used my other vehicle, a 2006 Honda CR-V, to commute for a couple of months until I could get around to dropping the pan to remove the dipstick.

    9/23/17- Replacing the trans dipstick and filter

    I finally got around to ordering a new transmission dipstick from Toyota. I figured while I had the transmission pan off, I might as well replace the filter as well. So I ordered a new filter from RockAuto as well as some Toyota FIPG to reseal the pan. Getting the pan off was pretty easy, but the hard part was scraping all the old FIPG off the pan and the transmission itself. I used a plastic tool and some acetone so as to not damage the mating surfaces. The inside of the pan was pretty clean, and the magnets had what I would call a normal amount of clutch pack material on them. Filter looked pretty good as well, but since I had the new one, I went ahead and replaced it anyways.

    IMG_20170923_125659.jpg
    P1190741.jpg

    All clean:
    P1190743.jpg
    P1190744.jpg

    All was going well, I applied the new FIPG to the pan and got it torqued down to the transmission. Then everything went downhill when I went to put the drain plug back it. Started tightening it and the bam, the plug strips out. Wouldn't tighten or come out. Luckily the FIPG hadn't set yet, so I quickly removed the pan and drilled the plug out. I was hoping only the threads on the plug itself were ruined, but to my misfortune it was the threads on the pan. So I cracked open my tap and die set and tried to re-thread the pan, which didn't work at all. Angry and irritated at this point, I went inside and ordered a whole new pan and drain plug from Toyota. Expensive, but problem solved.

    10/1/17- Installing new transmission pan

    The new pan arrived on 10/1/17, so I installed it, waited for the FIPG to set up, and filled the trans up with fresh fluid. It was nice being able to drive my truck again after having it parked for almost 2 months, plus the transmission felt like it shifted smoother as well.

    IMG_20170930_135932.jpg
     
  5. Jan 11, 2019 at 10:45 PM
    #5
    aknickyota22

    aknickyota22 [OP] Well-Known Member

    Joined:
    Jul 20, 2017
    Member:
    #224589
    Messages:
    421
    Gender:
    Male
    First Name:
    Adam
    Durango, CO
    Vehicle:
    2000 Tacoma 4x4 TRD
    Bilstein Suspension, All Pro Baja Bumper, and more
    10/7/17- La Plata Canyon- Kennebec Pass

    After getting the truck back up and driving after the minor transmission issue, I decided I wanted to do a little wheeling as I hadn't done much since I bought the truck. I chose to head up La Plata Canyon and Kennebec Pass, a relatively easy but fun trail local to me. Kennebec Pass, despite the name, is not actually a pass. At one point it was, but now it just dead ends at a notch that was blasted in a ridge. The views from this point are quite spectacular, especially with the fall colors. The trail/road itself isn't terribly rough, just a little rocky. The worst section is leading up to the "notch", where it turns into a shelf road just wide enough for one vehicle and is peppered with loose scree. I went with a few friends, one of which brought his Lunar Mist 1st gen Double Cab with an ARB front bumper. The truck did excellent, just threw it in 4hi on the way up and 4lo coming down so I wasn't riding my brakes the whole way.

    The lack of engine breaking off-road is my main issue with the automatic transmission. 1st gear isn't quite low enough, so you have to resort to using 4lo to slow the truck down on steeper slopes. I took my father's 96 5-speed Tacoma on this exact trail the previous summer, and I was able to use 1st gear and 4hi to maintain a slow speed on the way down.

    Warning: This post is picture heavy. :D

    The notch can be seen above and behind the trucks:
    P1190816(LPEDIT).jpg
    P1190819(LPEDIT).jpg
    P1190820.jpg
    P1190823.jpg

    Looking east from the notch:
    P1190837.jpg
    P1190835.jpg
    P1190840.jpg
    P1190845.jpg

    An old, sealed up mine shaft we encountered on the east side of the notch:
    P1190860.jpg
    P1190863.jpg

    P1190866.jpg

    Looking west from the notch:
    P1190880.jpg
    P1190881.jpg

    More Tacoma pictures inside the notch:
    P1190878.jpg
    P1190887(LPEDIT).jpg
     
    Tacofire98 likes this.
  6. Jan 14, 2019 at 8:09 PM
    #6
    aknickyota22

    aknickyota22 [OP] Well-Known Member

    Joined:
    Jul 20, 2017
    Member:
    #224589
    Messages:
    421
    Gender:
    Male
    First Name:
    Adam
    Durango, CO
    Vehicle:
    2000 Tacoma 4x4 TRD
    Bilstein Suspension, All Pro Baja Bumper, and more
    10/18/17-12/27/17- My first check engine light, a detail, and another small trip

    I was driving to class in the morning when I noticed an orange light appear on my dash. My first check engine light. Truck was running fine and I didn't notice any considerable issues. After class, I drove to my local auto parts store and had them plug in their OBD scanner. Code came back as a PO171, System too lean (Bank 1). I did some quick research on TW and found that the MAF sensor might be the issue. So I bought some MAF cleaner, pulled the sensor and cleaned it well. I put everything back together, disconnected then reconnected the negative battery terminal, and took the truck for a drive. No more check engine light. Awesome.
    MAF cleaner I used: https://www.amazon.com/CRC-05110-Mass-Sensor-Cleaner/dp/B000J19XSA

    IMG_20171018_084600.jpg

    11/4/17- Second oil change

    I decided to do my second oil change after a little over 4,000 miles. The process went a lot smoother than the first time now that I knew what I was doing. This time I used a plastic cup and held it under the oil filter to catch the oil as it came out. This made things a lot less messy and I only spilled a few drops on the skid plate.

    11/21/17- A full exterior detail

    When I bought my truck, the white paint was very faded and chalky from spending so much time outside in the sun. I knew someone who worked in the detail shop at a local dealership and he offered to do a full exterior detail for free, which I obviously accepted. He buffed, polished, and waxed the entire truck as well as restored the plastics. It came out excellent IMO.

    Probably the cleanest my truck has ever looked:
    IMG_20171121_165049.jpg
    IMG_20171114_165151.jpg
    IMG_20171130_161526.jpg

    12/27/17- Smelter Mountain

    After having not driven off road in a while, a got an itch to go again. I decided to go on a trail/road local to me that I had been on once before in my truck. Smelter Mountain, named after the uranium smelter that used to live at it's base. The smelter opened in the 1880's, originally for the gold and silver mines in the area. In 1942, the smelter was bought out and began smelting uranium. Eventually, after sitting abandoned for years, it was torn down the the 1980's due to health concerns. The road up the mountain is easy overall, but there are a few steep and rocky sections. At the top, the views of the town I live in are spectacular. To make things interesting this time, my friend decided to see if his 2017 Honda Fit 6-Speed could make it to the top.

    IMG_20171227_143938.jpg
    IMG_20171227_143858.jpg
    IMG_20171227_143901.jpg
    IMG_20171227_144457.jpg
    IMG_20171227_144514.jpg

    Yes, the Honda did make it all the way up, very slowly. Going up this part was the most difficult part, clutch was slipped a lot :D.
    IMG_20171227_142310(LPEDIT).jpg
    IMG_20171227_142249.jpg
     
    Last edited: Jan 14, 2019
  7. Jan 19, 2019 at 9:16 PM
    #7
    aknickyota22

    aknickyota22 [OP] Well-Known Member

    Joined:
    Jul 20, 2017
    Member:
    #224589
    Messages:
    421
    Gender:
    Male
    First Name:
    Adam
    Durango, CO
    Vehicle:
    2000 Tacoma 4x4 TRD
    Bilstein Suspension, All Pro Baja Bumper, and more
    1/4/18-3/5/18- Front lift and more maintenance

    I decided I wanted to replace the cheap stock height shocks and coils that were on the front of the truck. The driver's side was of unknown quality, was replaced by the previous owner, and was in much worse shape than the passenger side Monroe QuickStrut I had installed a few months earlier. I decided that I wanted a small amount of lift and chose Bilstein 5100 shocks paired with OME 880 coils. I ordered them from Wheeler's Offroad and had them assemble the shocks and coils as well. The install went smoothly as I had replaced the front suspension on my father's 1996 Tacoma and the passenger side strut on my truck previously. I used the stock bottle jack and placed it between the fender well and upper control arm in order to push the lower control arm down enough to slip the bottom bolt through, which worked well. I didn't take any before measurements, so I'm not sure exactly how much lift I gained, but I measured 22" from hub to bottom of fender on the driver's side and 23" on the passenger's side.

    IMG_20180103_224645.jpg

    Installed:
    P1200002.jpg
    P1200036.jpg
    P1200101.jpg
    Overall, the ride was much better and felt more controlled. It was definitely stiffer than before, but I figured it would soften up a little as the shocks and coils broke in. Also, as evident by the pictures, I had a little bit of reverse stinkbug going on, with the front now higher than the rear, which still had the stock, sagging leafs. I had plans to remedy this later however.

    1/18/18- More cup holders

    I was disappointed in the cup holders in my truck from the beginning. They were square and there were only two. After searching through TW, I found some that someone had 3D printed made to fit on the right side of the shifter bezel. It featured two cup holders, a phone holder, a flashlight holder, and 2 places for pens. Perfect, so I ordered it. Here's the link: http://www.bh3dprinting.com/product/1996-2004-tacoma-double-cup-holder/

    IMG_20180118_212636.jpg
    The color matched the rest of the interior pretty well. It included some double sided tape as well as two screws to mount it, but I only used the tape as I didn't feel like screwing into the shifter bezel. The tape held it well and it's plenty secure.

    2/3/18- Maintenance day- New plugs and fuel filter

    The previous owner told me that he had replaced the spark plugs and wires a few months before selling the truck to me. I decided to pull a plug to see if he had and what kind of shape they were in. So I pulled out the spark plug socket and removed a plug. It was the wrong one, a single electrode instead of the dual electrode recommended by Toyota. It wasn't in bad shape, but I decided to order the correct ones from Toyota (Denso K16TR11) and replace them anyways. The wires looked in good shape to me, so I decided to forgo replacing them (This came back to kick me in the butt later). I also ordered a new fuel filter as it had never been replaced to my knowledge. The plugs came out easy as did the fuel filter and the truck seemed to run better after replacing both.

    IMG_20180127_211824.jpg

    The parts (along with some oil filters and outer tie rods) I ordered from Toyota:
    IMG_20180201_191820.jpg
    IMG_20180203_192635.jpg

    Installing the spark plugs:
    IMG_20180203_192622.jpg

    New fuel filter installed:
    IMG_20180203_192759.jpg

    2/22/18- An attempt at new (to me) wheels

    Ever since buying the truck, I wanted to put black wheels on it. I thought they would look really good contrasting with the white paint. But I couldn't justify getting rid of the stock alloys that came on the truck as they were in such good shape. I was scouring through Craigslist when I came across a set of steel wheels with tires that came off a 1987 Toyota Pickup. The tires were shot, but the wheels were in good shape and they were only asking $40 for them. So I figured I could buy them, get rid of the tires, and paint the wheels black. So I went and bought them, cleaned them up, and attempted to put them on the truck.

    IMG_20180222_195138.jpg

    When I went to put them on the truck, I immediately noticed a problem; they wouldn't fit. They were hitting the brake calipers in the front. I looked closer at the wheels and realized they said 15x6. I needed 15x7 in order to clear the calipers. Damn. I should have done more research before buying them, but you live and you learn. I later ended up selling them for a profit, so it all worked out.

    3/5/18- New tie rods

    My steering felt loose and the truck wandered a bit on the highway, so I figured a tie rod replacement was in order. I got new inner tie rods from Low Range Offroad and new outers from Camelback Toyota. (Link for the inners: http://www.lowrangeoffroad.com/1995-2004-toyota-tacoma-inner-tie-rod-end-left-or-right.html).
    I also ordered some new bellows (Beck/Arnley from RockAuto) as the ones on the truck had some dry rot on them. Changing them was mostly pain free, with the exception of the driver's side outer tie rod, which was seized and took some serious persuasion to remove from the LBJ. I also had to buy a giant crescent wrench in order to remove the inner tie rods. Unfortunately, I didn't take any pictures of the process, but after I was done, I did notice how much tighter the steering felt and how much nicer the truck drove at highway speeds.

    Some pictures of my truck in the snow to make up for the lack of tie rod pics:
    IMG_20180212_114850.jpg
    IMG_20180212_114857.jpg
    IMG_20180212_121920.jpg

    Overall, I was glad to get some maintenance done before going on my first major journey in the truck: Utah.
     
    Last edited: Feb 26, 2019
  8. Jan 19, 2019 at 9:43 PM
    #8
    boostedka

    boostedka Well-Known Member

    Joined:
    Sep 29, 2011
    Member:
    #64367
    Messages:
    5,856
    Gender:
    Male
    First Name:
    James
    NM
    Vehicle:
    2013 DCSB 6MT, 2004 4runner
    Awesome truck and build thread! You've done some nice work restoring your Tacoma.
    That's pretty awesome living in Durango. That's my retirement goal is to live in that area. We go up there a few times a year and never want to leave every time.
     
    aknickyota22[OP] likes this.
  9. Jan 20, 2019 at 11:02 AM
    #9
    aknickyota22

    aknickyota22 [OP] Well-Known Member

    Joined:
    Jul 20, 2017
    Member:
    #224589
    Messages:
    421
    Gender:
    Male
    First Name:
    Adam
    Durango, CO
    Vehicle:
    2000 Tacoma 4x4 TRD
    Bilstein Suspension, All Pro Baja Bumper, and more
    Thanks! It's definitely a work in progress, but it's coming along. It's taking some time to get this thread caught up to where the truck currently is. Durango is awesome, lived here my whole life (20 years). Lots of places to explore, but the cost of living here is very expensive.
     
  10. Feb 3, 2019 at 11:02 PM
    #10
    aknickyota22

    aknickyota22 [OP] Well-Known Member

    Joined:
    Jul 20, 2017
    Member:
    #224589
    Messages:
    421
    Gender:
    Male
    First Name:
    Adam
    Durango, CO
    Vehicle:
    2000 Tacoma 4x4 TRD
    Bilstein Suspension, All Pro Baja Bumper, and more
    3/9/18-3/13/18- Lockhart Basin and Canyonlands National Park

    Spring break was approaching and I finally had some time off school. I decided I wanted to head over into Utah, specifically the Lockhart Basin and Needles District of Canyonlands National Park area. I had been there several times in the past with my father in his 2001 Tundra and 1996 Tacoma, but never in my truck. Considering it was only a short 3 hour drive away, I figured why not and started packing. Last time I had been in the area, I camped in a nice, secluded space tucked back in the rocks along Lockhart Basin road a few miles past the Hamburger Rock campground. I decided that if the space was open, I would camp there again. There were certainly better and more secluded camp spots in the nearby vicinity, but I was planning on meeting my sister and few friends there, so the spot had to be easily accessed by their 2wd vehicles.

    3/9/18- Hitting the road, Newspaper Rock, and Davis Canyon

    I hit the road by myself with the back of the truck loaded down with enough camping gear for 5 days. The truck did great on the 3 hour drive on the highway and I noticed a significant improvement with the new tie rods. After turning off onto the road that leads into the Needles District of Canyonlands, I stopped at Newspaper Rock, a collection of petroglyphs carved into the rock by the Ancestral Puebloans. I also got a good look at the massive amount of rear squat the truck had loaded down with the camping gear.

    Newspaper Rock:
    P1200239.jpg
    P1200235.jpg

    Holy squat Batman!:
    IMG_20180309_145248.jpg

    After the short visit at Newspaper Rock, I headed down the road a few more miles and turned off at the entrance to Davis and Lavender Canyons. I decided to head down Davis Canyon as it's the shorter of the two and I was running out of daylight. The road has a few rocky sections at the beginning, but follows a sandy wash after that. Nothing Ole' MG couldn't handle.

    At the entrance:
    IMG_20180309_163559.jpg
    P1200246.jpg
    P1200250.jpg
    P1200253.jpg

    Winding my way into Davis Canyon:
    P1200262.jpg
    P1200273.jpg

    End of the road:
    P1200279.jpg

    I pulled out of Davis Canyon and back onto the paved road until I turned off again onto Lockhart Basin Road. I passed the Hamburger Rock campground and found the spot I was planning on camping at. It wasn't occupied fortunately. The road to the space was a little sandy, but I figured with enough momentum, my buddy's Honda Fit could make it when he eventually arrived. I then continued down Lockhart Basin Road. I stopped by Indian Creek, only to see that it was completely dry. In years past, when there was water in the creek, I enjoyed jumping off the rocks into a couple of deep pools located just off the road. But it looked like that wasn't going to happen on this trip. I continued on, driving a for few miles before I decided to turn back and start making dinner.

    Dry Indian Creek:
    IMG_20180313_115111.jpg

    Drove the first few miles of Lockhart Basin Road:
    P1200325.jpg
    P1200331.jpg
    P1200334.jpg
    P1200344(Edited).jpg

    After making and enjoying dinner, I sat on the rocks above the campsite that overlooked the entrance to Lockhart Basin Road and waited for my friend to arrive. He eventually drove in, I flagged him down, and guided him up the sandy road to camp.

    3/10/18- Lavender Canyon

    The next day, my friend and I hopped in MG and headed into Lavender Canyon. The road follows a wide sandy wash for the most part, with a few narrower rocky sections thrown in. I left the truck in 2wd and, having completed the gray wire mod before leaving on the trip, locked the rear differential. In 2wd with the diff locked, I hauled through the wash, drifting at any opportunity. After a while, we came across a sign and gate for Upper Lavender, which required a backcountry National Parks pass to enter. So I parked the truck and we continued to hike a few miles past the gate.

    P1200448.jpg
    P1200451.jpg

    Very few people had driven beyond the gate:
    P1200366.jpg
    P1200381.jpg
    P1200403.jpg

    Some ruins we encountered:
    P1200406.jpg
    P1200433.jpg

    There were several small arches along the way:
    P1200445.jpg

    3/11/18- Into Canyonlands and Colorado River Overlook

    The following day, my sister, two friends and I all crammed into my truck and heading into Canyonlands National Park. We stopped at the Needles Visitors center and headed out on the 4x4 road that takes off from there and leads to a beautiful overlook of the Colorado River. I had been on this road previously with my father in his 1996 Taco, an excursion that led to a blown rear shock. I hoped that my cheap Gabriel rear shocks wouldn't suffer a similar fate (Spoiler: they didn't). The road itself starts out easy, mostly just sand, but gets significantly rougher as you get closer to the overlook. I parked the truck about a mile from the overlook and hiked the rest of the way and the road was very rocky and I didn't want to risk any damage to the truck.

    P1200453.jpg
    P1200459.jpg
    P1200465.jpg
    P1200475.jpg
    P1200494.jpg
    P1200521.jpg

    After visiting the overlook, we heading further into the park to see some of the other attractions. We stopped at Wooden Shoe Arch, the Cowboy Camp, Cave Springs, and Pothole Point. All of these were short hikes from the park's paved roads, but were definitely worth seeing nonetheless.

    Wooden Shoe Arch:
    P1200550.jpg

    Cowboy Camp:
    IMG_20180311_180416.jpg

    Cave Springs:
    IMG_20180311_180826.jpg

    Pothole Point:
    IMG_20180311_185653.jpg
    IMG_20180311_191923.jpg

    As the sun began to fade, we headed out of the park and back to the campsite to cook dinner and get a good night's sleep.

    3/12/18- Back into Canyonlands- Some hiking

    Figuring we'd take full advantage of the 7 day pass to Canyonlands, we decided to head back into the park to do some longer hikes. We chose to hike a couple of trails that take off near the base of Elephant Hill. Speaking of Elephant Hill, I got a first hand look at it, and it's gnarly. Definitely deserves the title as one of the most difficult 4x4 roads in Utah. I witnessed a motorbike descending the hill as well as a lifted JK Wrangler ascending it. It was quite entertaining to watch, but not something I think I would ever do in the Tacoma.

    We ended up hiking for about 5 hours on the Chesler Park and Druid Arch trails. Although tiring, it was well worth it for the spectacular views of the Needles.

    IMG_20180312_160748.jpg
    IMG_20180312_162928.jpg
    IMG_20180312_163837.jpg

    Views of the Needles:
    IMG_20180312_165747.jpg
    IMG_20180312_171008.jpg
    IMG_20180312_171451.jpg

    3/13/18- Farewell

    Finally, it came time to leave this amazing place. I had to get back to school being an engineer. The truck did excellent the entire trip and I was so glad I had a vehicle that could take me to these spectacular locations. I don't have many pictures from this day, but here are a few of the campsite and a poser shot with my truck and my buddy's Fit.

    Views from the rocks above the campsite:
    IMG_20180312_123744.jpg

    The campsite:
    IMG_20180312_130641(LPEDIT).jpg
    IMG_20180313_115334(LPEDIT).jpg
     
  11. Feb 5, 2019 at 8:42 PM
    #11
    aknickyota22

    aknickyota22 [OP] Well-Known Member

    Joined:
    Jul 20, 2017
    Member:
    #224589
    Messages:
    421
    Gender:
    Male
    First Name:
    Adam
    Durango, CO
    Vehicle:
    2000 Tacoma 4x4 TRD
    Bilstein Suspension, All Pro Baja Bumper, and more
    4/14/19-4/29/18- Wheeling with a 2nd Gen and Rear Lift

    I had a friend at college that owned a 2nd Gen 2013 Tacoma Double cab 4.0 auto with a small lift. He was from elsewhere in Colorado, but enjoyed wheeling. So I decided to show him some some local trails, even though most of them were still closed by snow.

    First, we made the decision to go up La Plata Canyon. I had a feeling it would be closed by snow closer to Kennebec Pass, but figured it would be worth it to check it out and see how far up we could make it. We made it over halfway to the summit before the snow got too deep to continue.

    These pictures were taken about a mile from the deep snow:
    P1200564(LPEDIT).jpg
    P1200565.jpg
    P1200572(LPEDIT).jpg

    An icy waterfall encountered along the way:
    P1200573(Edited).jpg

    Next, we chose to check out Madden Peak road. This road, due to being on a south facing ridge, was not closed by snow, but my friend had to leave early so we only made it a few miles up the relatively easy trail.

    The views were spectacular:
    P1200589.jpg

    A 1st Gen and 2nd Gen living in harmony:

    For reference, Mesa Verde National Park is located on the ridge directly above the 2nd Gen in this picture.
    P1200603(LPEDIT).jpg
    P1200604(LPEDIT).jpg

    Now solo, I decided to venture down Red Arrow Road near Echo Basin as it was only a few miles down the highway. As predicted, it was also closed by snow and mud, but I did make it a significant way down the road before hitting some deep snow/mud that caused me to turn back.

    P1200627.jpg

    P1200647.jpg

    4/27/18- Replacing the cracked air box

    My original air box had cracked where the hose fitting meets the box itself, a very common issue with the 3.4. I tried using JB plastic-weld, but that cracked too after a few weeks. So I went to the parts marketplace here on TW and got a great deal on one from a member. It fit perfectly and went in without issue. Thanks again @Sperrunner! I did loose the deck plate with the new air box, but it only really made noise anyways.

    Where the box cracked (not my picture):
    100_3254.jpg


    4/29/18- Rear lift

    The sagging stock rear leaf springs and Gabriel rear shocks just weren't cutting anymore, especially with the front lifted. While in Utah, the rear kept bottoming out on the bump stops with all my gear in the back, which was an issue. Originally, I wanted to go with a dedicated lift leaf pack, such as the OME Dakars, but after reevaluating my budget, I decided on a 1.5" Add a leaf from Wheeler's Offroad. For rear shocks, I chose Bilstein 5100's to match my front pair. I ordered some new U-bolts as mine were 18 years old and I was on my way.

    Unfortunately, I don't have any pictures of the install, but it went relatively smoothly. I took the wheels and tires off and supported the rear diff with a floor jack while I removed the U-bolts. Then I lowered the rear diff, which separated the leaf pack and I slipped the AAL in. I did have to remove a few brackets holding the brake line on as well as the e-brake cable in order to lower the diff. Assembly was the reverse of disassembly.

    After the install:
    IMG_20180430_105845.jpg
    IMG_20180430_105859.jpg
    IMG_20180504_154527(LPEDIT).jpg

    Put it to work a few days after install (no rear sag whatsoever):

    IMG_20180501_121617.jpg


    I forgot to take measurements before, but my measurements after installing the AAL are as follows:
    Driver Front: 22"
    Driver Rear: 23"
    Passenger Front: 22.5"
    Passenger Rear: 23.5"

    Overall, I was very happy with the Add a Leaf. It was inexpensive, easy to install, and gave enough lift to give the truck about an inch rake in the rear, which I liked. It did ride a little stiffer than before, but at the end of the day, it's a truck and I don't mind a truck-like ride. Eventually, I'll upgrade the rear to a new leaf pack such as Dakars, but for now, the AAL does it's job as a temporary solution.

     
    Last edited: Feb 5, 2019
    Sperrunner likes this.
  12. Feb 5, 2019 at 8:45 PM
    #12
    Sperrunner

    Sperrunner Respect the International Dibs Law

    Joined:
    Feb 23, 2018
    Member:
    #245334
    Messages:
    48,287
    Gender:
    Male
    First Name:
    Miguel
    Berkeley, Ca
    Vehicle:
    2016 ford transit
    Wd40, zipties, duck tape, and my hopes and dreams
    Shit i sold that to you hella long ago. Good to know it’s working strong still
     
  13. Feb 5, 2019 at 8:50 PM
    #13
    aknickyota22

    aknickyota22 [OP] Well-Known Member

    Joined:
    Jul 20, 2017
    Member:
    #224589
    Messages:
    421
    Gender:
    Male
    First Name:
    Adam
    Durango, CO
    Vehicle:
    2000 Tacoma 4x4 TRD
    Bilstein Suspension, All Pro Baja Bumper, and more
    Yeah, I'm just getting my build thread caught up with everything I've done to the truck. Yep, it's still working good!
     
    Sperrunner[QUOTED] likes this.
  14. Feb 9, 2019 at 4:20 PM
    #14
    aknickyota22

    aknickyota22 [OP] Well-Known Member

    Joined:
    Jul 20, 2017
    Member:
    #224589
    Messages:
    421
    Gender:
    Male
    First Name:
    Adam
    Durango, CO
    Vehicle:
    2000 Tacoma 4x4 TRD
    Bilstein Suspension, All Pro Baja Bumper, and more
    5/10/18-5/14/18- BPV Bracket and testing the rear lift

    After installing the rear lift, I noticed my brakes were not working like they used to. So I did some research and found that my rear brakes probably weren't doing much after the rear lift due to the location of the Brake Proportioning Valve. So I ordered a bracket to relocate the BPV to higher location from BAMF. I got the 3.5" one as my rear lift was pretty minimal. Link: http://bayareametalfab.3dcartstores.com/BPV-Bracket_p_19.html

    Painted it brown as that was the only paint I had:

    IMG_20180510_194156.jpg

    After installing the bracket, the rear brakes went back to working like they used to before the lift. Success.

    5/14/18- Old Lime Creek Road and Relay Creek Road

    Eager to see how the truck handled off road after installing the AAL and new rear shocks, I headed to Old Lime Creek Road. Lime creek road was the original road connecting Durango to Silverton, traversing over Coal Bank and Molas Passes. It was abandoned when HWY 550 (a.k.a The Million Dollar Highway) opened in the 1920's. An 11 mile stretch of the original road still remains and is maintained by the forest service. It's a relatively rough trail with a narrow shelf section that is only wide enough for one vehicle.

    At the south end of the road, near the trail head to Spud Lake:
    P1200694.jpg

    P1200702.jpg

    Along the narrow shelf portion of the road:
    P1200709.jpg
    P1200705.jpg

    Original stone barricades along the edge:
    P1200711.jpg

    P1200717.jpg

    P1200718.jpg

    Further along the road (US 550 can be seen in the top right of the photo):
    P1200768.jpg

    Twilight Peak:
    P1200760.jpg
    P1200775.jpg

    An old car that crashed along the highway in the 1950's:
    P1200776.jpg
    P1200789.jpg

    Tunnel blasted to allow Lime Creek to flow under the highway:
    P1200801.jpg
    P1200806.jpg

    Still itching to do a little more off roading, I headed south down the highway a few miles to Relay Creek Road, which can be accessed behind Purgatory Ski Resort. It's an easy road that is well maintained, but was fun nonetheless and provided some good photo opportunities.

    P1200848.jpg
    P1200856.jpg
    P1200858.jpg

    P1200861.jpg

    Showing off my cracked passenger marker light, damage left from an encounter with a Jeep (whoops):
    P1200866.jpg
    P1200870.jpg

    Overall, the new rear lift did well on the excursion. No more bottoming out in rough sections of the trail. I did, however, encounter one big problem; the AAL kept slipping out of the rest of the leaf pack. At one point, both ends of the AAL almost slipped completely out of the pack. I had to stop a few times along the trail(s), loosen the u-bolts, realign the AAL, and tighten the U-bolts back down.

    When I returned home, I looked and realized the U-bolts had loosened again. For some reason, they wouldn't stay tight, even though I was torquing them down to spec. So applied a hefty amount of lock tight to the threads and tightened them back down. They haven't come loose since and the AAL is still aligned correctly in the leaf pack, so it was a win in my book.
     
  15. Feb 14, 2019 at 6:50 PM
    #15
    aknickyota22

    aknickyota22 [OP] Well-Known Member

    Joined:
    Jul 20, 2017
    Member:
    #224589
    Messages:
    421
    Gender:
    Male
    First Name:
    Adam
    Durango, CO
    Vehicle:
    2000 Tacoma 4x4 TRD
    Bilstein Suspension, All Pro Baja Bumper, and more
    6/8/18-6/28/18- Brakes and some Mountain Passes

    My front rotors had been warped for several months and were causing a pretty serious vibration during braking. The truck still stopped fine, but I got fed up with the vibration and decided to replaced the brake pads and rotors. I chose Centric High Carbon Alloy rotors paired with Akebono Ceramic Pads. I ordered both from RockAuto along with a brake hardware kit.
    Links:
    https://www.rockauto.com/en/moreinfo.php?pk=2761052&cc=1364723&jsn=465 (Rotors)
    https://www.rockauto.com/en/moreinfo.php?pk=362277&cc=1364723&jsn=558 (Pads)
    https://www.rockauto.com/en/moreinfo.php?pk=2027392&cc=1364723&jsn=589 (Hardware)

    Old pads and hardware:
    IMG_20180607_150332.jpg

    New rotors installed:
    IMG_20180607_154359.jpg

    The install went nice and smooth. None of the caliper hardware holding in the pads were seized, so everything came apart easily. The old semi-metallic pads still had a good amount of life left in them, but I went ahead and replaced them anyways.

    I also exchanged the brake fluid in the master cylinder reservoir with new fluid. Eventually I will bleed the entire system and get all new fluid in there. After everything was put back together, I broke in the pads and enjoyed the lack of braking vibration. Stops were nice and smooth now, awesome!

    6/28/18- Clear Lake, Hurricane Pass, and California Pass

    Now that it was the middle of summer and the snow in the high country had melted off, I decided to run some local mountain passes near Silverton. First, I chose to head to Clear Lake. Clear Lake is a beautiful alpine lake that sits at about 12k feet. I had never been to it before and it's been on my bucket list to visit. It's accessed off a 10 mile 4x4 shelf road that takes off of South Mineral Road (The trail head to Ice Lakes, more spectacular alpine lakes, is also located off South Mineral Road). The 4x4 road isn't too rough, but does have some narrow shelf sections and some tight switchbacks.

    Clear Lake:
    P1210292.jpg
    P1210305(EDITED).jpg
    P1210340.jpg

    A waterfall that can be seen from the road:
    P1210372.jpg

    The haze/smoke was from a local wildfire (the 416 Fire, which burned 55,000 acres):

    P1210376.jpg

    On the way back down:
    P1210381.jpg
    P1210383.jpg

    Overall, the views and the lake were spectacular and the truck did excellent on the 4x4 road. Still having some time to kill, I next decided to head to Hurricane and California Passes. I had done these passes twice before, but never in my truck. They aren't overly difficult, but they do include some steep and narrow sections. The worst part was dealing with all the tourists in their rental JK Wranglers. Most have no idea how to drive off road and don't understand right of way on narrow portions of the road.

    I chose to run the passes west to east, starting on County Road 10, going over Hurricane Pass, then California Pass, and finally ending up in the Animas Forks ghost town. Another trail, Corkscrew Gulch, takes off from the ascent to Hurricane Pass and Poughkeepsie Gulch, known for "the Wall", takes off from the saddle between Hurricane and California Passes. One of these days, I'll do both those trails, but unfortunately I didn't have time on this trip.

    At the summit of Hurricane Pass (obligatory rental Jeep in top left of pic):
    P1210389.jpg

    Lake Como (the road leading to Poughkeepsie can also be seen):
    P1210385(EDITED).jpg
    P1210393.jpg
    P1210395.jpg

    P1210399.jpg
    P1210403(EDITED).jpg
    P1210404.jpg

    After coming off of Hurricane, I headed up California with the intention of stopping at the summit. Unfortunately, there were several Jeeps and side by sides parked there, leaving me no room to park, so I continued down.

    Coming down California Pass:
    P1210426.jpg
    P1210430.jpg
    P1210436(EDITED).jpg

    An old mine shaft encountered on the way down:
    P1210440.jpg

    After winding my way down off the mountain passes, I made a quick stop at Animas Forks, an old mining town established in the 1870's. I had visited many times before, but it's always worth the stop.

    P1210457.jpg
    P1210460.jpg

    I wonder who's nice looking white Tacoma that is in the background? :D
    P1210476.jpg
    P1210481(EDITED).jpg

    All in all, it was a good day and the truck once again fulfilled it's purpose of taking me to unbelievable places. I plan to go back next summer after the snow is melted and hit Corkscrew, Poughkeepsie, and Ophir Pass.
     
  16. Feb 21, 2019 at 7:47 PM
    #16
    aknickyota22

    aknickyota22 [OP] Well-Known Member

    Joined:
    Jul 20, 2017
    Member:
    #224589
    Messages:
    421
    Gender:
    Male
    First Name:
    Adam
    Durango, CO
    Vehicle:
    2000 Tacoma 4x4 TRD
    Bilstein Suspension, All Pro Baja Bumper, and more
    7/31/18-8/22/18- A little maintenance and the Alpine Loop

    My lower ball joints had been leaking a lot of grease for a few months, so I decided to check them and noticed they had a little play in them, almost unnoticeable though. But given the poor design of the ball joints on these trucks, I decided to replace them as they were original to the truck. I was in the process of moving out of my house into a new apartment without a garage as well as starting a new semester of school, so I decided to have a local shop do the work.

    While I had the truck at the shop, I figured I would have them replace the valve cover gaskets while they were there. They had been leaking since I got the truck, shortly after which I re-torqued the bolts and cleaned off the valve covers, which did slow the leak, but didn't stop it. I had the shop order all OEM Toyota parts because I didn't want to take a chance on aftermarket LBJ's (Insert LBJ debate here).

    The shop did a very good job installing everything. I would have done the work myself if I had more time and a place to work, but unfortunately I didn't. At least I didn't have to add oil between changes or worry about the LBJ's failing now, so it worked out well.

    I don't have any pictures of the work unfortunately.

    Random truck pic to make up for lack of maintenance photos :rolleyes::
    P1210813.jpg

    8/21/18-8/22/18- The Alpine Loop

    One of my best friends was coming into town for a week and wanted to do a little off-roading. Given that it was the end of August, I suggested the Alpine Loop as it wouldn't be open for that much longer due to snowfall. For those not familiar, the Alpine Loop is a drive that involves a series of 4x4 roads in Southwestern Colorado. It starts in Silverton, traverses over Cinnamon Pass into Lake City and then over Engineer Pass into Ouray.

    Our plan was to start the drive up to Silverton early the morning of the 21st, do the loop, and camp outside of Ouray. We would then take Imogene Pass from Ouray into Telluride and then head back to Durango (Spoiler alert: that last bit didn't happen). In addition to bringing Ole' MG, my friend's father had a 1980 Jeep CJ-5 that he decided to bring.

    This Jeep was a little bit on the rough side. The 258 AMC Inline-6 ran like a top and the 4-speed shifted pretty well, but that's about all that was good about it. The steering was sloppy, it had a death wobble above 30 mph, the brakes barely worked (we'd figure out why later), and the rust and bondo body work was unique to say the least. This was going to be a fun trip.

    Fair warning: This post is long and picture heavy :)

    8/21/18- Cinnamon Pass and (most of) Engineer Pass

    We met in Silverton early in the morning and headed up Country Road 2. We weren't on the road for 10 minutes when it started pouring down rain and hailing. This wasn't a problem for me, but did get my friend a little wet (aka soaked) in the Jeep with a leaky bikini top. By the time we got to the start of Cinnamon Pass, the rain had stopped, but it remained overcast. It was at this point that I realized I had forgotten my camera, so it looked like this was going to be a cell phone picture trip.

    Climbing up Cinnamon Pass:
    IMG_20180821_120320.jpg
    IMG_20180821_121547.jpg

    Cinnamon Pass isn't very challenging, so we made it to the summit pretty effortlessly. We had to deal with all the tourists in their rental side by sides at the top, but eventually we got the summit to ourselves and got a few photos, which really showed off the stellar condition of the CJ-5 :D.

    At the summit of Cinnamon:
    IMG_20180821_123917(LPEDIT).jpg
    IMG_20180821_123936(LPEDIT).jpg

    Heading down off the summit, I stuck the truck in 4lo Low (1st gear) in order to gain some engine braking. Meanwhile, my friend left the Jeep in 2wd and 1st gear, which provided plenty of engine braking and made me jealous of the low gearing and manual transmission of the CJ-5.

    Coming down Cinnamon, heading towards Lake City:
    IMG_20180821_130025.jpg
    IMG_20180821_130351.jpg

    A little Jeep flex:
    IMG_20180821_130810(LPEDIT).jpg

    Lake San Cristobal, which gives Lake City it's name:
    IMG_20180821_143814.jpg

    We made it into Lake City around lunchtime. Both rigs did excellent over Cinnamon, now it was time to see how they did crawling over Engineer, which is a little more challenging in sections. But first we had to get gas for the CJ as it was running a little rich and was thirsty. We also picked up some brake fluid as we had discovered that one reservoir in the Jeep's master cylinder was empty and the other was almost empty. After adding the fluid, the Jeep's braking capability improved and we were on our way once again.

    An old mining establishment near the start of Engineer where we stopped for lunch:
    IMG_20180821_152049.jpg

    A waterfall we encountered on the way up Engineer Pass:
    IMG_20180821_162500.jpg

    Nearing the summit:
    IMG_20180821_164724.jpg
    IMG_20180821_164731(LPEDIT).jpg

    After getting passed by a group of about 25 dirt bikes, we finally made it to the summit of Engineer. We chose to stay in the vehicles as it was cold and rainy. But the views were spectacular.

    Sitting at 12,800 feet:
    IMG_20180821_165953.jpg
    IMG_20180821_170007(CROP).jpg
    IMG_20180821_170021.jpg

    Next we started our steep descent down the pass, which reinforced my opinion that 1st gear is not geared low enough in the A340F transmission. The descent also had some tighter switchbacks, which were made a little more difficult in the Taco as it's about 5 feet longer than the Jeep, but ended up not being an issue.

    Getting a bit flexy on the switchbacks:
    IMG_20180821_171827.jpg


    After coming down Engineer, we chose to turn right and head towards Ouray instead of continuing back into Silverton. This section of the road is probably the roughest and was not made any less difficult by the rain and wet rocks.

    Taking a break before heading towards Ouray:
    IMG_20180821_180000.jpg
    IMG_20180821_180308.jpg

    Hitting some rocky sections, giving the IFS a workout:
    IMG_20180821_182743.jpg
    IMG_20180821_182749.jpg

    As we continued down, the weather worsened and became more and more rainy. The rocks on the trail became very wet and the poor tires on the Jeep weren't getting any grip. It slid down a small ledge, lifting the two right tires off the ground. The Jeep was sitting at such a steep angle that the carburetor flooded and stalled the engine. We managed to push the Jeep down the obstacle and eventually were able to get it started again.

    Just a little Tipsy:
    IMG_20180821_185459(LPEDIT).jpg


    Beauty shot:
    IMG_20180821_190703.jpg

    Coming down one of the many tight, rocky switchbacks, I chose the wrong line and ended up with two wheels off the ground, the right front and left rear. I was very close to the edge and wanting to make sure I didn't tip, my friend's father chose to hold down the rear left of my truck while I inched down. It was definitely a butt-clenching moment.

    Tipsy v2.0:
    IMG_20180821_191554(FACEEDIT).jpg
    IMG_20180821_191657(FACEEDIT).jpg

    A dense fog began to roll in:
    IMG_20180821_192447.jpg
    IMG_20180821_192650(LPEDIT).jpg
    IMG_20180821_193620.jpg
    IMG_20180821_194242.jpg

    The fog was becoming so thick and dense that it was hard to see, plus it was getting dark so we decided to pull over and camp just off the road. We weren't sure how far away from the highway (Red Mountain Pass) we were, but we were all tired and hitting the hay seemed like the best option. We awoke the next morning to some beautiful sights and realized we were only about 1.5 miles from the highway.

    8/22/18- The last 1.5 miles of Engineer Pass and Returning Home

    IMG_20180822_100312.jpg

    Nothing more beautiful than a 1st Gen right?:
    IMG_20180822_100704.jpg

    Since we were a little behind schedule and my friend had an unexpected doctor's appointment later in the afternoon, we decided to forgo Imogene Pass and head back to Durango over Lizard Head and through Mancos. My friend's dad decided to head back the other way through Silverton as it was shorter and the Jeep was downright scary on the highway.

    Atop Lizard Head Pass on the way home:
    IMG_20180822_130812.jpg

    In the end, it was one of my more exciting off-road excursions in the truck. It was challenging in sections and not everything went to plan, but I still had loads of fun. I hope to do Imogene (and Black Bear) sometime in the near future as I ran out of time on this trip.
     
    Tacofire98 likes this.
  17. Feb 26, 2019 at 8:17 PM
    #17
    aknickyota22

    aknickyota22 [OP] Well-Known Member

    Joined:
    Jul 20, 2017
    Member:
    #224589
    Messages:
    421
    Gender:
    Male
    First Name:
    Adam
    Durango, CO
    Vehicle:
    2000 Tacoma 4x4 TRD
    Bilstein Suspension, All Pro Baja Bumper, and more
    So because I'm a complete nerd, I decided to make a spreadsheet documenting all the purchases I have made on/for my truck since I bought it. It includes basically everything I have a receipt for and does include consumables such as fluids, oil, and gas. Here are the numbers for those who are interested (also added to 1st post):

    2000 Tacoma Costs 226.jpg
     
  18. Mar 19, 2019 at 10:10 PM
    #18
    aknickyota22

    aknickyota22 [OP] Well-Known Member

    Joined:
    Jul 20, 2017
    Member:
    #224589
    Messages:
    421
    Gender:
    Male
    First Name:
    Adam
    Durango, CO
    Vehicle:
    2000 Tacoma 4x4 TRD
    Bilstein Suspension, All Pro Baja Bumper, and more
    9/21/18-9/28/18- Cascade Divide Road and Bolam Pass

    Having started back up at school, I was once again itching to get out of class and do some more 4wheeling. I decided to head up a local road one weekend that I had never been on before, Cascade Divide Road. It's another moderately rough road that really just requires some ground clearance, but it did provide some amazing photo opportunities and allowed me an escape from classes.

    On the way up:
    P1210980.jpg

    P1210992.jpg

    P1220015.jpg

    Got some spectacular views of the backside of Engineer Mountain:
    P1220020.jpg
    P1220047.jpg
    P1220072.jpg

    Unfortunately, the truck had to get in the way of the views (or was it the other way around?) :D

    P1220078.jpg

    9/28/18- Bolam Pass

    The following weekend I decided to head out again and get some more trail time in the truck. This time I chose to do Bolam Pass. It's definitely rougher and more technical than Cascade Divide road, but nothing extreme by any means. I had been up the pass before, but only halfway and on ATV's. Plus I wanted to check out the remaining fall colors. So after class got out on a Friday I headed out.

    Views climbing up the south side:
    P1220123.jpg
    P1220159.jpg

    At the Graysill Mines, nearing the summit:
    P1220136.jpg
    P1220130.jpg
    P1220137.jpg

    At the summit:
    P1220176.jpg
    P1220182.jpg
    P1220186.jpg

    Snaking down the north side:
    P1220199.jpg
    P1220201.jpg

    Stopping to air up at the end and admiring the fall colors:
    P1220207.jpg
    P1220209.jpg

    I was glad to get out in the truck again and experience what nature had to offer. After airing the tires back up, I started the 2 hour journey back home to civilization.
     
  19. Mar 21, 2019 at 9:15 PM
    #19
    aknickyota22

    aknickyota22 [OP] Well-Known Member

    Joined:
    Jul 20, 2017
    Member:
    #224589
    Messages:
    421
    Gender:
    Male
    First Name:
    Adam
    Durango, CO
    Vehicle:
    2000 Tacoma 4x4 TRD
    Bilstein Suspension, All Pro Baja Bumper, and more
    10/7/18-11/6/18- Acquiring a new bumper and more random stuff

    I browse the TW parts marketplace on a regular basis, looking for any excuse to spend more money on my truck. I had been wanting an aftermarket front bumper for awhile, mostly due to the fact that I encounter a large amount of deer on the road, but didn't want to shell out $800-$1000 for one. I was browsing the parts marketplace one day when I came across a member that was local to me selling a never used All-Pro Baja bumper and IFS skid. I got in touch and ended up buying the bumper and skid as well as a CB and Firestik for a great price. Now I had to wait until I had some time off school to install the bumper and paint+install the skid. And since my truck was a 2000, I had to find someone to cut and weld the frame horns.

    Normally I don't like the look of tube bumpers, I much prefer plate bumpers such as the ARB or 4xInnovations, but for the price I couldn't pass it up. Of all the tube bumpers, I probably like the look of the All-Pro the best.

    Patiently waiting to be installed:
    IMG_20181019_165518.jpg

    10/21/18- Another quick attempt at La Plata Canyon

    Bored one weekend, I decided to drive up La Plata Canyon and see how far up I could make it. I knew there was plenty of snow up there and I probably wouldn't make it that far, but decided to try anyways.

    P1220279.jpg
    P1220244.jpg

    Ended up making up about 8 miles before I decided to turn around. The snow wasn't deep by any means, but it was really wet and slick and I kept losing traction. Took some cool photos though, so the trip was worth it.

    11/2/18- Chicken Creek and the Aspen Loop

    I decided to take another short trip out Chicken Creek Road and on some of the roads near the Aspen Loop by Mancos CO. None of these roads are rough, they are mostly just dirt roads with the exception of one spot on Chicken Creek that requires high clearance.

    P1220291.jpg
    P1220286.jpg

    11/6/18- 2nd check engine light- A misfire

    One evening I walked out to the truck to run to the grocery store. Got in and it started up no problem. Then it started to idle extremely rough. I decided to stick in gear and move forward a few feet to see what would happen. The truck started to buck pretty violently, so I parked it. Then the check engine light came on. Oh shit. I knew what this was. A misfire. My roommate had a code scanner, so plugged it in and got these codes back:

    IMG_20181106_155129.jpg

    Pretty much what I expected, but now I had to figure out what was causing it. I had replaced the spark plugs a few months previous so I figured that wasn't it. My next thought was either plug wires, coils, or fuel injectors. On a hunch, I decided to replace the plug wires as they were the cheapest and easiest to replace. I ran down to my local parts store, picked some up and installed them. Fired the truck up and it ran great. Check engine light went off and all was good. Awesome! I was kind of surprised the wires went bad as quickly as they did, the PO had replaced them only about 25,000 miles ago. But I was glad it was an easy, inexpensive fix.
     
  20. Mar 21, 2019 at 9:26 PM
    #20
    lambo

    lambo actually dumb

    Joined:
    Nov 11, 2016
    Member:
    #202133
    Messages:
    1,502
    First Name:
    Phil
    Aurora, CO
    Vehicle:
    2002 Double Cab TRD OR
    Nice truck! I'm super jealous you're out in Durango and way closer to the awesome parts of southwestern Colorado...

    Be careful... you might regret looking at all that money. I know I did which is why I stopped tracking that stuff :anonymous:
     

Products Discussed in

To Top