

-
Welcome to Tacoma World!
You are currently viewing as a guest! To get full-access, you need to register for a FREE account.
As a registered member, you’ll be able to:- Participate in all Tacoma discussion topics
- Communicate privately with other Tacoma owners from around the world
- Post your own photos in our Members Gallery
- Access all special features of the site
 Best Up to Date Install Pricing on UCAs 25470?
 2.5 lift
 Rear suspension help
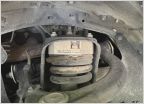 Some questions about swapping my suspension
 Wheeler's 3 Leaf Progressive AAL + Factory Overload
Quick question on bilstein 5100
Discussion in 'Suspension' started by imjohn, Feb 16, 2019.


