1. Welcome to Tacoma World!

    You are currently viewing as a guest! To get full-access, you need to register for a FREE account.

    As a registered member, you’ll be able to:
    • Participate in all Tacoma discussion topics
    • Communicate privately with other Tacoma owners from around the world
    • Post your own photos in our Members Gallery
    • Access all special features of the site

SDHQ Behind the Grill Mount / BD S8 Light Bar install

Discussion in 'Lighting' started by Ceriksson, Mar 3, 2019.

  1. Mar 3, 2019 at 3:48 PM
    #1
    Ceriksson

    Ceriksson [OP] Well-Known Member

    Joined:
    Oct 28, 2018
    Member:
    #270868
    Messages:
    83
    Gender:
    Male
    First Name:
    Clayton
    Vehicle:
    2017 Cement TRD Pro
    ARE Overland Cap, OEM roof rack
    Finished this project over the weekend.

    I decided to go behind the grill instead of the opening below the grill mainly to keep it more subtle and hidden and I also plan to eventually change the bumper and either move the light to the bumper or keep it above.

    [​IMG]
    [​IMG]

    Involved installing the SDHQ Behind the Grill Mount, a Baja Designs S8 30" light bar, and a CH4x4 OEM switch in my 17 Pro.

    Behind the Grill Mount was super easy.

    1. Remove the Grill. Two screws and two plastic push clips then pull off.

    Don't worry it didn't get recycled
    [​IMG]

    2. Remove the two plastic shrouds held on with one plastic push clip each.

    [​IMG]

    3. Remove 1 plastic push clip from the top of the bumper

    4. Screw in the mounts on each side. Bolts in in two spots: On the bottom with provided bolts and on the top using an existing bolt

    [​IMG][​IMG]

    5. The light bar was even easier to install, just put in the light bar's provided side bolts then slide the bolts/light onto the appropriate slot in the mount. For the Baja Designs S8 I had the choice up an upper and lower slot.

    [​IMG][​IMG][/url][​IMG]
     
    Last edited: Mar 3, 2019
  2. Mar 3, 2019 at 3:48 PM
    #2
    Ceriksson

    Ceriksson [OP] Well-Known Member

    Joined:
    Oct 28, 2018
    Member:
    #270868
    Messages:
    83
    Gender:
    Male
    First Name:
    Clayton
    Vehicle:
    2017 Cement TRD Pro
    ARE Overland Cap, OEM roof rack
    Ok so the wiring.

    I used a CH4x4 OEM style switch but in the case of the Baja Designs S8, it also has amber backlights as well so the harness has a second switch for those so I needed to also figure out where I was going to install that switch. I ended up putting that one in the only really decent spot (until I replace the cubby there with a 3 switch mount as I get more lights). That switch is at the very end of the little compartment and actuate it with my finger tip.

    [​IMG]
    [​IMG]

    Wiring was good and without any issues but am going to cover a few details that I found were not quite clear in other threads and youtube videos I watched to figure it out. Plus a few things I did that I feel worked well.

    1. Getting through the firewall
    2. Changing the switch to the OEM Style main switch and the amber backlight switch.

    Getting through the firewall: Before starting this project, this was the issue that gave me the most concern as I didn't want to screw anything up and the videos and threads I researched didn't quite give me the warm and fuzzy on simplicity.

    For this I used:
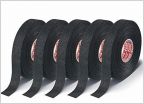
    Electrical Tape, A heavy duty tough 14" zip tie, an awl screw driver, fish tape

    Awl screwdriver:
    [​IMG]
    Fish Tape:
    [​IMG]
    Zip Tie - The really heavy duty type
    [​IMG]
    I couldn't get through the inner part of the boot/gasket whatever you want to call it and I had the choice of going around it or going through it. I decided to go through the rubber with a new hole. This method avoids pinching the wires on the edge of the hole and also maintains the weather proofing.

    How: Removed all of the switches off of the harness and taped them all together with electrical tape, and taped that to a heavy duty long zip tie (using the long end of the zip tie as a probe) making a tapering shape with the tape so it slides through the rubber easier.

    I then punched a small hole in the rubber firewall material using a pointed awl (Same width as your typical long necked screw driver. One person pushed the punch through and I directed from the inside of the cab getting the awl through in the right spot that I wanted.

    With the awl through I used the fish tape and followed the awl out the other side allowing the fish tape to feed through into the engine compartment.

    From here I taped the zip tie/switches to the fish tape and pulled it all back through the firewall until the switches and enough of the wire was through to work with.

    [​IMG]
    [​IMG]
    [​IMG]

    Installing the switches: For the CH4x4 OEM Switch I didn't want to have to cut my harness wires so we used a novel method and simply soldered on some male ends to the Switches wiring and just plugged them into the harness which had female connectors at the end. After that each of the connections was taped individually, then all three taped into a consolidated wire

    Jotting down and working out what wire went to what from the harness to the CH4x4 switch
    [​IMG]

    Wiring connections using male/female connectors
    [​IMG]

    For the Amber Backlight switch I kept the switch that came with the harness. Maybe in the future I"ll change it out to an OEM style as well or something but I didn't have much of an option to mount it and didn't want to screw up a visible area. We decided to put it at the end of the little card holder cubby as I could easily reach it with my finger tip. I couldn't put it in the sides, top, or bottom of that cubby due to lack of room for the wires.

    Drilled a hole into the plastic then shaped it carefully with a file
    [​IMG]
    [​IMG]

    Everything connected to the compartment and tucked away

    LOL yes I know the cubby doesn't go in that way, but best way to test it while keeping things visible
    [​IMG]
    [​IMG]
     
    Last edited: Mar 3, 2019
  3. Mar 4, 2019 at 12:59 PM
    #3
    OffroadAlliance.com

    OffroadAlliance.com Well-Known Member Vendor

    Joined:
    Nov 13, 2018
    Member:
    #336834
    Messages:
    561
    Gender:
    Male
    Brockton, MA
    Vehicle:
    2018 Tacoma TRD Pro
    Looks good and great write up. I have the same setup however with the TSS, couldn’t run a lower light bar so installed a pair of BD Squadrons.

    AA6C3AAD-6D75-429B-BE0D-CDA595F62F56.jpg
     
    hirod, genghis71, SCas and 2 others like this.
  4. Mar 4, 2019 at 1:08 PM
    #4
    Ceriksson

    Ceriksson [OP] Well-Known Member

    Joined:
    Oct 28, 2018
    Member:
    #270868
    Messages:
    83
    Gender:
    Male
    First Name:
    Clayton
    Vehicle:
    2017 Cement TRD Pro
    ARE Overland Cap, OEM roof rack
    Im still not fully decided on the light bar on top or bottom yet.

    Despite having a TSS-less truck, my grill still has that removable piece in the lower centre of the Pro grill. That piece is practically touching the light bar. Not sure if that is a cause for any heat based concern.

    The upper part has blocks most of the two outer LEDs on the bar and looks like it might block a little on the vertical side with the TOYOTA lettering.

    The Bottom part is wider so the ends of the light bar are unobscured but it blocks a bit out the center lights due to that removable piece.

    I think I'm going to try the upper part and see how it looks at night when I get home from work
     
  5. Mar 4, 2019 at 9:43 PM
    #5
    Ceriksson

    Ceriksson [OP] Well-Known Member

    Joined:
    Oct 28, 2018
    Member:
    #270868
    Messages:
    83
    Gender:
    Male
    First Name:
    Clayton
    Vehicle:
    2017 Cement TRD Pro
    ARE Overland Cap, OEM roof rack
    After work today I decided to move the light up to the top mount and aimed it as well then took it for a test drive after dark.

    Long story short, we have a winner! I love the throw and the combo beam pattern and it looks badass above the TOYOTA lettering on the grill.

    The S8 also has the bonus amber backlight feature which is a nice touch as well

    First pic shows the Low / High / High+S8
    [​IMG]

    [​IMG]

    [​IMG]

    [​IMG]

    [​IMG]
     
  6. Mar 5, 2019 at 10:39 AM
    #6
    OffroadAlliance.com

    OffroadAlliance.com Well-Known Member Vendor

    Joined:
    Nov 13, 2018
    Member:
    #336834
    Messages:
    561
    Gender:
    Male
    Brockton, MA
    Vehicle:
    2018 Tacoma TRD Pro
    The amber backlight feature is pretty cool!

    477BB355-1D8E-4264-985C-2CCF2E89F681.jpg
     
    hirod, BadCow and DavesTaco68 like this.
  7. Mar 5, 2019 at 2:13 PM
    #7
    Ceriksson

    Ceriksson [OP] Well-Known Member

    Joined:
    Oct 28, 2018
    Member:
    #270868
    Messages:
    83
    Gender:
    Male
    First Name:
    Clayton
    Vehicle:
    2017 Cement TRD Pro
    ARE Overland Cap, OEM roof rack
    It is but I'd like to wire it into the headlight low beam circuit
     
  8. Mar 5, 2019 at 5:40 PM
    #8
    OffroadAlliance.com

    OffroadAlliance.com Well-Known Member Vendor

    Joined:
    Nov 13, 2018
    Member:
    #336834
    Messages:
    561
    Gender:
    Male
    Brockton, MA
    Vehicle:
    2018 Tacoma TRD Pro
    The amber backlight feature is a real low power draw. You should be able to tap into the low beam wiring without issue.
     
  9. Mar 8, 2019 at 9:12 PM
    #9
    Lunchmeat79

    Lunchmeat79 Well-Known Member

    Joined:
    Sep 28, 2018
    Member:
    #267750
    Messages:
    220
    Gender:
    Male
    First Name:
    John
    Kansas
    Vehicle:
    '18 Off Road
    @OffroadAlliance I like that setup! I'm on an '18 also so working around tss also. Any chance you could post up a similar set of pics of the output sometime. I'm curious what those squadrons add to the mix. Maybe one with them and the headlights and no light bar. I have to make purchases as I have extra money so I think those would be a good way to start upgrading. I think these brackets may be my next upgrade.
     
  10. Mar 8, 2019 at 9:24 PM
    #10
    OffroadAlliance.com

    OffroadAlliance.com Well-Known Member Vendor

    Joined:
    Nov 13, 2018
    Member:
    #336834
    Messages:
    561
    Gender:
    Male
    Brockton, MA
    Vehicle:
    2018 Tacoma TRD Pro
    No output pics yet, but will work on getting some up ASAP.
     
    Lunchmeat79[QUOTED] likes this.
  11. Mar 17, 2019 at 8:54 AM
    #11
    ToomanyAndy

    ToomanyAndy Member

    Joined:
    Sep 26, 2016
    Member:
    #198319
    Messages:
    14
    Gender:
    Male
    First Name:
    Andrew
    Vehicle:
    2016 DCSB TRD OFF ROAD
    Thank you for this. I bought the mic tuning switch from Amazon, the light bar turns on when I pressed the button but turned off immediately once I released it. Worked great once I used the Cali raised switch though, phew
     
    Last edited: Mar 17, 2019
  12. Mar 20, 2019 at 8:55 PM
    #12
    Ceriksson

    Ceriksson [OP] Well-Known Member

    Joined:
    Oct 28, 2018
    Member:
    #270868
    Messages:
    83
    Gender:
    Male
    First Name:
    Clayton
    Vehicle:
    2017 Cement TRD Pro
    ARE Overland Cap, OEM roof rack
    So I got tired of having the Amber Backlights manually controlled. Kept either never using them or forgetting to turn them off when I parked.

    Thought for a while on what method I wanted to use to have the lights come on and off with to the headlights.

    I decided to take the simple way out. Used an add a fuse to the tail light circuit which turned out to be dead simple. The backlight circuit runs as a direct circuit from the battery so all I had to do was connect the add a circuit wire to the wire connection to the light on the harness.

    I removed the backlight switch on the harness and found the right wire connection then simply connected the two.

    The beauty of this setup is that I can easily reverse everything if I change my mind

    According to Baja Designs Technician, the 30" S8 Backlight feature pulls 1.8amps so I have inserted an additional 3amp fuse (smallest available) into the add a fuse on top of the 7.5amp tail light fuse.

    [​IMG]Baja Designs S8 Backlight add a circuit. 17 Tacoma TRD pro by ceriksson, on Flickr

    [​IMG]Baja Designs S8 Backlight add a circuit. 17 Tacoma TRD pro by ceriksson, on Flickr
     
    Last edited: Mar 21, 2019
  13. May 22, 2020 at 11:29 PM
    #13
    jaymz25

    jaymz25 Well-Known Member

    Joined:
    Apr 28, 2020
    Member:
    #326128
    Messages:
    404
    Gender:
    Male
    First Name:
    Edward
    Vehicle:
    2020 Midnight Black Metallic Tacoma TRD Pro
    can you disable the amber backlight feature?
     
  14. May 22, 2020 at 11:36 PM
    #14
    uncle ed

    uncle ed Well-Known Member

    Joined:
    Feb 8, 2019
    Member:
    #282302
    Messages:
    96
    Gender:
    Male
    First Name:
    Ed
    CA Eastern Sierra
    Vehicle:
    2007 & 2019
    Yes
    Don’t connect the green wire
     
  15. May 23, 2020 at 6:22 AM
    #15
    OffroadAlliance.com

    OffroadAlliance.com Well-Known Member Vendor

    Joined:
    Nov 13, 2018
    Member:
    #336834
    Messages:
    561
    Gender:
    Male
    Brockton, MA
    Vehicle:
    2018 Tacoma TRD Pro
    As uncle ed stated, yes. I've got the amber backlights on a separate switch. So very easy to turn them on or keep them off.
     
  16. Jan 3, 2024 at 5:12 PM
    #16
    4xThad

    4xThad Thad

    Joined:
    Apr 25, 2020
    Member:
    #325806
    Messages:
    653
    Gender:
    Male
    First Name:
    Thad
    Bend, OR
    Vehicle:
    2021 Cement Tacoma TRD OR DCLB; 2021 Blizzard Pearl 4Runner Limited; 2006 Tundra-SOLD
    Tint, DK ucas, Big Billies with Icon springs, SCS S6 wheels wrapped in Duratracs, an iKamper, a Smartcap, martin OR RR, roam boxes sometimes and a ski rack other times
    question, do I need to wire in the backlight to a fuse tap? or can I just let that wire, red 2, from the CH4x4 button, hang free?
     

Products Discussed in

To Top