

-
Welcome to Tacoma World!
You are currently viewing as a guest! To get full-access, you need to register for a FREE account.
As a registered member, you’ll be able to:- Participate in all Tacoma discussion topics
- Communicate privately with other Tacoma owners from around the world
- Post your own photos in our Members Gallery
- Access all special features of the site
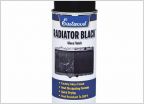 What is the best paint to use on the radiator
 Any ever try a straight pipe with stock cats on a 2nd gen V6 standard?
 To Flush or Not to Flush?
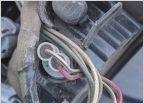 Wire Colors for Reverse Light
 Secondary Battery Charged via Bed Outlet
What Have You Done To Your 2nd Gen Tacoma Today?
Discussion in '2nd Gen. Tacomas (2005-2015)' started by kwalton, Feb 2, 2008.
Page 8617 of 12542
Page 8617 of 12542
Products Discussed in


