

-
Welcome to Tacoma World!
You are currently viewing as a guest! To get full-access, you need to register for a FREE account.
As a registered member, you’ll be able to:- Participate in all Tacoma discussion topics
- Communicate privately with other Tacoma owners from around the world
- Post your own photos in our Members Gallery
- Access all special features of the site
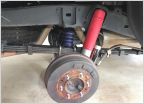 2016 Tacoma Sumo Springs vs Firestone 2407 Air Bags
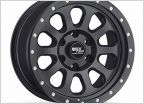 Anyone Using The RockTrix RT111 Wheels or RockTrix in General?
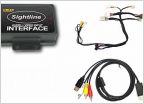 Aftermarket stereo install
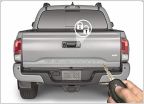 Automatic gate lock for ‘20
 LED Lighting Conversion
 I'm Sorry But What Size Tire Wheel With Kings
3rd Gen BHLM and light mods
Discussion in '3rd Gen. Tacomas (2016-2023)' started by Brick_26, Sep 14, 2016.
Page 26 of 51
Page 26 of 51
Products Discussed in


