1. Welcome to Tacoma World!

    You are currently viewing as a guest! To get full-access, you need to register for a FREE account.

    As a registered member, you’ll be able to:
    • Participate in all Tacoma discussion topics
    • Communicate privately with other Tacoma owners from around the world
    • Post your own photos in our Members Gallery
    • Access all special features of the site

3rd Gen JBL Full System Upgrade w/ Factory HU

Discussion in 'Audio & Video' started by jerzsubbie, Apr 20, 2019.

  1. Apr 20, 2019 at 3:26 PM
    #1
    jerzsubbie

    jerzsubbie [OP] Well-Known Member

    Joined:
    Aug 23, 2017
    Member:
    #227834
    Messages:
    977
    Gender:
    Male
    Davidson, NC
    Vehicle:
    ‘13 GX460
    From the day I bought my truck in Feb 2018, I was disappointed with the "premium" audio, but not for the reason you're probably thinking. Sure, the sound quality isn't the greatest but it was OK so that was my #3 complaint. #2 was the inability of a passenger to use the nav while driving. My biggest complaint was the fact that the JBL sub takes up the single largest interior storage space, by eliminating the large storage pocket behind the passenger-side & middle rear seats.

    Because of this, I set out to ditch the factory sub and replace the entire system while maintaining the factory HU since I actually like it both from a usability/function standpoint as well as aesthetically. After months of researching and picking @destin_meeks 's brain a bit, I finally decided to begin buying everything and go for it.

    Products used:
    PAC AmpPro AP4-TY12
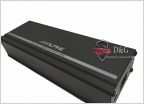
    Kicker Key compact 4ch amp
    JBL CLub 6x9 components; Rear
    JBL CLub 6.5 coaxials; Front
    Sound Ordnance B-8PTD 8" compact subwoofer; Under seat
    Stinger Competition series RCA's
    Knukonceptz 8ga OFC power & ground wiring
    Metra speaker ring and wire adapters
    Amazon Tweeter adapters LINK
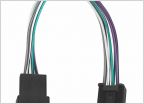
    Amazon 4pin electrical connectors LINK
    Misc electrical connectors, Tesa tape, mesh wire covering, zip ties etc.
    Total Cost - $550
    This includes shopping for the best deals, doing the work myself, and selling my JBL factory sub for $200 net of s&h

    IMG_E6795.jpg

    I started by replacing the door speakers which is pretty simple. I realized I forgot to order the tweeter adapters so I ordered those and just placed the tweeters in their place for the time being. To get to the tweeters you have to remove the A pillar covers, just be careful of the airbags. I had a friend help me for a little bit this day. No surprise the stock speakers are a joke.
    IMG_6838.jpg

    I mounted the crossovers with some HD velcro on the back side of the support on the left side of the picture. Running the tweeter wire wasn't too bad. Pulling the rubber grommet(?) made things MUCH easier and it wasn't difficult to put back in at all.
    IMG_6961.jpg

    <insert time lapse install video>

    I had a lot of things to do other than this upgrade on my truck and the wife had a few requests before we went on vacation, so I ended up working on this 2 different weekends.


    Next was determining where i would mount the kicker amp. Some people say they've mounted them in the dash and I like this idea so I went that route first. It definitely wasn't going to fit behind the HU with the PAC AmpPro in there. While the AmpPro is small, the wiring harness does take up a fair amount of space. Next I decided to see if there was any space behind/around the glovebox. There's no room there, don't even try! Taking off the passenger airbag panel below the glovebox was a PITA.
    IMG_6840.jpg

    I settled on mounting it as high up in the passenger footwell as possible. Normally I would do this, but the amp is so small that it actually works well. If I wasn't concerned with interior storage space, it would be better to mount the amp next to the factory amp.
    IMG_6876.jpg

    Because this whacky JBL system requires you to keep the JBL amp and I decided to use the factory speaker wiring, I had to make a wiring harness to go from the Kicker Key to the speaker wire outputs coming out of the JBL amp. This worked out really well and consisted of 4 pieces of 18g speaker wire with mesh wire covering, and I used heat shrink to identify each wire pair. On the end by the JBL amp, I decided to use some 4-pin connectors so that if for whatever crazy reason I or any future owner ever wanted to hook the factory amp back up, it would be easy. One connector for the front speakers, one for the rear. I soldered these then used heat shrink tubing.
    IMG_6868.jpg
    IMG_6873.jpg IMG_6880.jpg IMG_6853.jpg IMG_6872.jpg

    I ran the power wire into the cab through the large grommet in the passenger side. It wasn't too difficult, just taped the wire to a long phillips screwdriver and pushed it through the edge of the existing hole, where I had already felt with my fingers to ensure it was clear. I used an existing ground behind the passenger footwell kick panel. Then connected the power to the Kicker harness.
    IMG_6875.jpg

    At this point I had the tweeter adapter mounts. I only had to lightly sand the holes with a dremel sanding drum to get them the correct size. I then mounted the tweeters flush to the bottom of the plate and used a little E6000 adhesive to ensure they stay put despite them having a nice snug fit. I also countersunk the front mounting hole with a forstner bit for a little extra clearance.
    IMG_6874.jpg

    At this point, I hooked everything up, ran the Kicker Auto EQ and tested it out. The kicker EQ is pretty sensitive, so much so that I had to fold up the back seats and remove the extra stuff I had in there.

    I tried to see if I could get by without a sub and long story short I wasn't happy with it!
     
    Last edited: Apr 20, 2019
  2. Apr 20, 2019 at 3:27 PM
    #2
    jerzsubbie

    jerzsubbie [OP] Well-Known Member

    Joined:
    Aug 23, 2017
    Member:
    #227834
    Messages:
    977
    Gender:
    Male
    Davidson, NC
    Vehicle:
    ‘13 GX460
    I'm no audiophile, but do I do appreciate a well balanced full range sound. Without a sub I simply couldnt' get that. I even tried some Kicker CS 3-way 6x9's up front since they have a lower frequency response (30 vs JBL's 50hz) and while this was a mild improvement, the bass wasn't nearly strong enough. If I turned up the bass in the HU's EQ, it began to distort the sound more than is acceptable. I was surprised that the 3-way coaxials sounded great on the high end vs having tweeters in the dash, so I wouldn't discourage anyone from ditching the tweeters and going coaxials if they wanted to.

    I had a Kicker hideaway in my 2013 WRX but it blew 2mo after the warranty was up. Never pushed it too hard and it was tuned properly but I was still open to getting another for the Tacoma. However, given the ridiculous number of good reviews for the Sound Ordnance S-8BPTD and its $140 price tag, I decided to go that route.

    I wanted to install it under the passenger seat but recalled seeing where people said this wasn't possible. They are correct. There is a lateral support under the passenger seat that would prevent you from moving the seat forward or backward more than 1-2". Additionally there is a large bracket with multiple harnesses and electrical modules that would need to be bent up closer to the underside of the cushion.
    IMG_6967.jpg

    See, the bar would hit the sub and limit seat movement.
    IMG_6971.jpg

    Installing the sub under the driver's seat is much easier. You could getaway without modifying anything, but I decided to do a 1/2" spacer under the rear of the seat frame, similar to the seat spacer mod just a little shorter. This will allow me to use some plastic shims or 3D printed wedges to allow the under seat vents to still work a little bit. For now, as a test I just put in a couple hardwood 1/2 blocks under the seat frame and have the amp velcroed to the carpet.

    Because of the driver's seat mechanical front-to-rear adjustment, the sub can't go in long-way left-to-right, it must go long-way front-to-back, so wires towards the front and adjustment panel towards the back. The only downside to this is that even with the sub pushed as far forward as it can go, my weathertech mats are too long by about 3". Minor issue.
    IMG_6972.jpg

    Once I got that all figured out, I installed a fused power distribution block, ran wire to the SO sub along with the remote, both of which are in mesh wire covering, and of course the Stinger RCA's. BTW the Pac AmpPro's remote connection saved me the hassle of having to find another remote. I grounded the SO to the front seat frame bolt. I am going to install the bass control knob using a trick I saw in another thread where you use a blank switch cover so that the knob just sticks out of the cover.
    IMG_6976.jpg

    For my initial audio test I put the gain to 25%, turned the system on and it was literally music to my ears. A nice, full bodied sound without anything being too harsh, exactly what I was looking for! I am very happy with this setup now, I reclaimed my space, have excellent sound, and it only cost me about $550 (not bad in my book)!

    Let me know if you guys have any questions, I'll hopefully get my videos edited and posted in the next couple days as well as add a couple more pics.
     
    Last edited: Apr 20, 2019
  3. Apr 20, 2019 at 3:41 PM
    #3
    destin_meeks

    destin_meeks I used to fix people's crappy stereos

    Joined:
    Jul 14, 2017
    Member:
    #223997
    Messages:
    3,687
    Gender:
    Male
    First Name:
    Destin
    Tuscaloosa, AL
    Vehicle:
    2017 SSM DoubleCab TRD Off-Road 4x4
    Great post! Now to figure out a sub solution that keeps as much space available as possible!
     
  4. Apr 20, 2019 at 3:53 PM
    #4
    jerzsubbie

    jerzsubbie [OP] Well-Known Member

    Joined:
    Aug 23, 2017
    Member:
    #227834
    Messages:
    977
    Gender:
    Male
    Davidson, NC
    Vehicle:
    ‘13 GX460
    I did the SO sub just don’t have time to post about it without being told by my wife that I’m antisocial haha. I’ll finish later tonight.
     
    destin_meeks[QUOTED] likes this.
  5. Apr 21, 2019 at 6:04 AM
    #5
    Ibcop

    Ibcop Well-Known Member

    Joined:
    Jan 31, 2019
    Member:
    #281325
    Messages:
    99
    Gender:
    Male
    Nice write up. I'm in the research stage myself trying to determine what I want to do. Where did you get the black look for the power/ground wire?
     
  6. Apr 21, 2019 at 6:11 AM
    #6
    jerzsubbie

    jerzsubbie [OP] Well-Known Member

    Joined:
    Aug 23, 2017
    Member:
    #227834
    Messages:
    977
    Gender:
    Male
    Davidson, NC
    Vehicle:
    ‘13 GX460
    Ibcop[QUOTED] likes this.
  7. Apr 21, 2019 at 9:37 AM
    #7
    Ibcop

    Ibcop Well-Known Member

    Joined:
    Jan 31, 2019
    Member:
    #281325
    Messages:
    99
    Gender:
    Male
  8. Apr 21, 2019 at 9:47 AM
    #8
    jerzsubbie

    jerzsubbie [OP] Well-Known Member

    Joined:
    Aug 23, 2017
    Member:
    #227834
    Messages:
    977
    Gender:
    Male
    Davidson, NC
    Vehicle:
    ‘13 GX460
    Correct. The 1/4” fit well for 8ga plus 2 16ga wires. It would fit 4ga alone nice a snug. Keep in mind it’s somewhat expandable, like a Chinese finger trap. 1/2” would be a safe bet while providing some flexibility to add other wires in the loom.
     
    Ibcop[QUOTED] likes this.
  9. Apr 21, 2019 at 9:48 AM
    #9
    destin_meeks

    destin_meeks I used to fix people's crappy stereos

    Joined:
    Jul 14, 2017
    Member:
    #223997
    Messages:
    3,687
    Gender:
    Male
    First Name:
    Destin
    Tuscaloosa, AL
    Vehicle:
    2017 SSM DoubleCab TRD Off-Road 4x4
    Yeah ½” works well on 4. Be sure to get some 12” heat shrink as well to put over the ends and keep it all clean and secure.
     
    Ibcop[QUOTED] likes this.
  10. Apr 22, 2019 at 9:08 AM
    #10
    jerzsubbie

    jerzsubbie [OP] Well-Known Member

    Joined:
    Aug 23, 2017
    Member:
    #227834
    Messages:
    977
    Gender:
    Male
    Davidson, NC
    Vehicle:
    ‘13 GX460
    Here is the modified switch, only took like 20min to get a fit I was happy with. It sin there pretty snuggly but I added some E6000 adhesive on the edges for extra security.

    Just need to install it and run the wire tonight.
    2823B400-9B6B-4324-9A12-17FEED31F1D4.jpg
    84867F44-2F26-4096-8A8D-C613C915E1EB.jpg

    Update:
    Installed :)
    E0C505C9-CE3C-4C8A-A39A-7F874F77C04A.jpg
     
    Last edited: Apr 22, 2019
    CBP-AT-JFK and Ibcop like this.
  11. Oct 21, 2019 at 11:02 AM
    #11
    CyberJock13

    CyberJock13 Active Member

    Joined:
    Dec 5, 2018
    Member:
    #274946
    Messages:
    29
    Gender:
    Male
    First Name:
    BSly (916)
    Sacto, California
    Vehicle:
    2016 Black TRD 4x4 Sport
    275/70/18s, Fuel rims, OEM Audio+ with sub, Meso,
    Dam! Nice write-up with pictures?! Thank you so much for taking the time to put this together
     
    MrTreehorn and jerzsubbie[OP] like this.
  12. Oct 21, 2019 at 11:36 AM
    #12
    destin_meeks

    destin_meeks I used to fix people's crappy stereos

    Joined:
    Jul 14, 2017
    Member:
    #223997
    Messages:
    3,687
    Gender:
    Male
    First Name:
    Destin
    Tuscaloosa, AL
    Vehicle:
    2017 SSM DoubleCab TRD Off-Road 4x4
    Still a great post for anyone looking to upgrade the JBL system! Especially now that PAC makes the APH-TY04 harness to make the wiring at the factory amp location extremely easy! I would add in a roll of speed wire to simplify the run from the Key to the JBL amp for anyone looking at this project
     
    tacothyme and jerzsubbie[OP] like this.
  13. Oct 21, 2019 at 12:05 PM
    #13
    Bach88

    Bach88 Well-Known Member

    Joined:
    Feb 8, 2018
    Member:
    #243814
    Messages:
    81
    Gender:
    Male
    Florida
    Vehicle:
    2016 Tacoma OR DC

    You mounted crossovers in your doors? Crossovers are not in your list. Just curious why you would use a crossover with the key amp. Are you just trying to block bass from the door speakers?
     
  14. Oct 21, 2019 at 6:44 PM
    #14
    jerzsubbie

    jerzsubbie [OP] Well-Known Member

    Joined:
    Aug 23, 2017
    Member:
    #227834
    Messages:
    977
    Gender:
    Male
    Davidson, NC
    Vehicle:
    ‘13 GX460
    Not auxiliary crossovers. I used components up front and therefore they come with crossovers. If I use coaxials instead, I would not be utilizing the dash mounted tweeter location or I’d have to use a 6ch amp that allows for a 4ch front stage. I believe front components is a simple, clean, and effective way to go.
     
  15. Oct 22, 2019 at 3:41 PM
    #15
    Bach88

    Bach88 Well-Known Member

    Joined:
    Feb 8, 2018
    Member:
    #243814
    Messages:
    81
    Gender:
    Male
    Florida
    Vehicle:
    2016 Tacoma OR DC

    Makes sense now. Didn’t realize the tweets came with those speakers. Just assumed they had a cap on em like the subie and stock tweeters.
     
  16. Oct 30, 2019 at 12:55 PM
    #16
    Hooper89

    Hooper89 Well-Known Member

    Joined:
    Sep 13, 2019
    Member:
    #305186
    Messages:
    1,577
    Gender:
    Male
    Vehicle:
    2016 White TRD Sport
    I am thinking of putting new speakers like infinity components up front do you think the stock JBL amp would be OK with them?
     
  17. Oct 30, 2019 at 5:48 PM
    #17
    xporkxpiex

    xporkxpiex New Member

    Joined:
    Oct 14, 2019
    Member:
    #307997
    Messages:
    2
    Gender:
    Male
    Vehicle:
    2016 Tacoma Limited
    I have a very similar setup with the PAC AmpPro. I am getting alot of noise from the stock head unit or the amppro, its driving me crazy. I can only turn the amp up about 15% before crazy amounts of static is introduced. That only allows me to turn the volume up on the headunit all the way and its not even that loud plus it starts to distort around volume 50. Im at a loss, I would hate to get an aftermarket headunit
     
  18. Oct 30, 2019 at 5:51 PM
    #18
    Gingerbeard Man

    Gingerbeard Man Well-Known Member

    Joined:
    Aug 19, 2015
    Member:
    #162164
    Messages:
    2,810
    Gender:
    Male
    First Name:
    Jared
    North Dallas
    Vehicle:
    2016 MGM DCSB Sport 4x4
    Icon stage 3 tubular 285/70/17 Toyo ATII
  19. Oct 30, 2019 at 7:20 PM
    #19
    jerzsubbie

    jerzsubbie [OP] Well-Known Member

    Joined:
    Aug 23, 2017
    Member:
    #227834
    Messages:
    977
    Gender:
    Male
    Davidson, NC
    Vehicle:
    ‘13 GX460
    No. The JBL is the heart of the problem with the JBL “premium audio”. It has built in cross overs that may or may not work well with your infinity speakers (JBL and infinity are owned by the same company), but you also need to confirm the impedance of the infinity speakers is compatible with the JBL amp. It’s possible that they’ll work, it’s possible that they’ll work well, but I can’t imagine it would be ideal and/or really worth the effort.
     
  20. Oct 30, 2019 at 7:22 PM
    #20
    jerzsubbie

    jerzsubbie [OP] Well-Known Member

    Joined:
    Aug 23, 2017
    Member:
    #227834
    Messages:
    977
    Gender:
    Male
    Davidson, NC
    Vehicle:
    ‘13 GX460
    I have to admit, while I’ve run the Kicker AutoEQ and sub x-over, I have not properly set the gains on either the sub or kicker amp. Because of this, I’ve refrained from turning the volume beyond 42, which is what I would consider 75%.
     
To Top