1. Welcome to Tacoma World!

    You are currently viewing as a guest! To get full-access, you need to register for a FREE account.

    As a registered member, you’ll be able to:
    • Participate in all Tacoma discussion topics
    • Communicate privately with other Tacoma owners from around the world
    • Post your own photos in our Members Gallery
    • Access all special features of the site

Light Racing UCA installation video & side by side comparison

Discussion in '2nd Gen. Tacomas (2005-2015)' started by freedomriding, Sep 21, 2015.

  1. Nov 10, 2015 at 11:04 AM
    #41
    Ostrichsak

    Ostrichsak Don't taze me bro!

    Joined:
    Apr 5, 2012
    Member:
    #76327
    Messages:
    9,122
    Gender:
    Male
    First Name:
    Jer
    Northern Colorado, USA
    Vehicle:
    Supercharged '10 Tacoma 4x4 TRD
    TRD Supercharger + too much stuff to list. Click sig pic
    Without getting into too many details that's what I mean was that angles are different due to manufacturing variances. This isn't a 1.5" long bolt we're talking about after all so it wouldn't take much variance to make something that long quite a bit off at the extent of it's length upon removal. Mine absolutely sucked on the passenger side and when I had read about the install I read that the battery side was worse. I was dreading the battery side but it was actually cake by comparison. Also, had I had another set of hands it may have been much easier but trying to pry from the bottom while pulling from the top by yourself is akin to witchcraft if you can accomplish it. In my case, witchcraft took LOTS of time & cussing. lulz
     
  2. Nov 10, 2015 at 1:40 PM
    #42
    nd4spdbh

    nd4spdbh Well-Known Member

    Joined:
    Oct 7, 2013
    Member:
    #114055
    Messages:
    14,595
    Gender:
    Male
    SoCal
    Vehicle:
    13 DCSB TRD OR v6 Auto
    hahaha yeah, mine went fairly easy, didnt even have to remove the battery!!!

    i am a 2013 though, so the front clip did change a smidge.

    overall though, i had her aligned, got 3.4* of caster EASY, and perfect toe (just a smidge in) and perfect camber (just a smidge negative). Alignment guy took an hour n a half and was SUPER meticulous. Literally mirroring both sides within a few hundredts of a degree. Truck drives like a freight train down the road and wheel centers nice n quick.
     
  3. Nov 10, 2015 at 1:58 PM
    #43
    Up2NoGood

    Up2NoGood Well-Known Member

    Joined:
    Jun 23, 2014
    Member:
    #132511
    Messages:
    3,302
    Gender:
    Male
    First Name:
    Jaimes
    BC, Canada
    Vehicle:
    2014 TRD Sport DCLB
    Damn that sounds good. Did they give you any grief about the LR UCA's and the additional adjustments on the arms? That is my one concern about going with LR is that it might be hard to find someone who actually cares to learn something new when doing an alignment with them.

    Unfortunately unlike the US there is no lifetime alignment deals available in Canada so it could start to add up pretty quick if the shops get confused by them.
     
  4. Nov 10, 2015 at 2:10 PM
    #44
    OZ-T

    OZ-T I hate my neighbour

    Joined:
    Dec 15, 2009
    Member:
    #27584
    Messages:
    50,587
    Gender:
    Male
    First Name:
    Peter North
    British Columbia
    Vehicle:
    Mag Grey 09 Trd Sport DCLB 4x4
    OME 885x , OME shocks and Dakars , Wheelers SuperBumps front and rear , 275/70/17 Hankook ATm , OEM bed mat , Weathertech digifit floor liners , Weathertech in-channel vents , headache rack , Leer 100RCC commercial canopy , TRD bedside decals removed , Devil Horns by Andres , HomerTaco Satoshi
    I got mine aligned at Toyota in Duncan , I just brought in the install sheet and explained to the tech how they work and he let me come in to the bay when they were doing the alignment to make sure it was all done how I wanted it

    They said they would charge me the extra time it took to do the alignment over their regular alloted time up front which I thought was fair enough and agreed to before starting
     
  5. Nov 10, 2015 at 2:13 PM
    #45
    Up2NoGood

    Up2NoGood Well-Known Member

    Joined:
    Jun 23, 2014
    Member:
    #132511
    Messages:
    3,302
    Gender:
    Male
    First Name:
    Jaimes
    BC, Canada
    Vehicle:
    2014 TRD Sport DCLB
    Yeah that sounds completely fair. I'm pretty surprised Toyota would adjust above their spec in caster.... or did you just keep it within their specs?
     
  6. Nov 10, 2015 at 2:14 PM
    #46
    OZ-T

    OZ-T I hate my neighbour

    Joined:
    Dec 15, 2009
    Member:
    #27584
    Messages:
    50,587
    Gender:
    Male
    First Name:
    Peter North
    British Columbia
    Vehicle:
    Mag Grey 09 Trd Sport DCLB 4x4
    OME 885x , OME shocks and Dakars , Wheelers SuperBumps front and rear , 275/70/17 Hankook ATm , OEM bed mat , Weathertech digifit floor liners , Weathertech in-channel vents , headache rack , Leer 100RCC commercial canopy , TRD bedside decals removed , Devil Horns by Andres , HomerTaco Satoshi
    I went 3,0,0

    I think they had me sign sonething acknowledging that I was requesting specs outside of their range
     
  7. Nov 10, 2015 at 2:18 PM
    #47
    Up2NoGood

    Up2NoGood Well-Known Member

    Joined:
    Jun 23, 2014
    Member:
    #132511
    Messages:
    3,302
    Gender:
    Male
    First Name:
    Jaimes
    BC, Canada
    Vehicle:
    2014 TRD Sport DCLB
    Might have to check with Toyota if they would be okay doing the same. I don't have a great deal of confidence in the one local tire shop here that is capable of doing alignments.

    Do you know how important it is to get an alignment right after messing with the suspension. I basically have one local option for alignments which I would rather not use and the next closest is about a 45 minute drive (on the highway).
     
  8. Nov 10, 2015 at 2:20 PM
    #48
    Up2NoGood

    Up2NoGood Well-Known Member

    Joined:
    Jun 23, 2014
    Member:
    #132511
    Messages:
    3,302
    Gender:
    Male
    First Name:
    Jaimes
    BC, Canada
    Vehicle:
    2014 TRD Sport DCLB
    Don't want to be that idiot wandering all over the place lol. Just not sure what to expect and how close I can get it myself so that I can drive somewhere to have it properly aligned.
     
  9. Nov 10, 2015 at 2:20 PM
    #49
    OZ-T

    OZ-T I hate my neighbour

    Joined:
    Dec 15, 2009
    Member:
    #27584
    Messages:
    50,587
    Gender:
    Male
    First Name:
    Peter North
    British Columbia
    Vehicle:
    Mag Grey 09 Trd Sport DCLB 4x4
    OME 885x , OME shocks and Dakars , Wheelers SuperBumps front and rear , 275/70/17 Hankook ATm , OEM bed mat , Weathertech digifit floor liners , Weathertech in-channel vents , headache rack , Leer 100RCC commercial canopy , TRD bedside decals removed , Devil Horns by Andres , HomerTaco Satoshi
    You have to get an alignment after any suspension alteration and get the VSC zero point recalibrated

    If you're just driving a short distance with it close you should be fine
     
  10. Nov 10, 2015 at 3:38 PM
    #50
    nd4spdbh

    nd4spdbh Well-Known Member

    Joined:
    Oct 7, 2013
    Member:
    #114055
    Messages:
    14,595
    Gender:
    Male
    SoCal
    Vehicle:
    13 DCSB TRD OR v6 Auto

    Nope no grief, he understood exactly how the UCA's worked as he had seen em many times before. like stated the dude knew what he was doing.

    Best way you can do is install the UCA's in the 0 (+2* of caster) setting (ball joint spun center, position "D" i think). Then slide the ball joint all the way to the outside of the UCA, then back in about 1/4 of an inch. This will allow the alignment guy play in all directions. I installed them this way, then got toe close by adjusting the tie rods (simply measured the difference between the track width between front and rear side of the front tires and got it to where the font measurement was about a 3/16ths of an inch LESS than the measurement taken on the backside of the tire, to get a lil toe in). My guy didnt need to touch the upper ball joint on my truck to slide it in or out to get my perfect measurements.
     
    Whitecloud and Up2NoGood[QUOTED] like this.
  11. Nov 10, 2015 at 3:52 PM
    #51
    YotaDriver631

    YotaDriver631 Well-Known Member

    Joined:
    Jul 20, 2015
    Member:
    #159905
    Messages:
    499
    Gender:
    Male
    Vehicle:
    '18 Taco
    I can go anywhere from 1.5-4 degrees positive castor on my truck with it lifted 2.75" in the front but I'm unsure of what is optimal. I will be doing the alignment in my shop (BMW Dealership) at night this week so I have all the time in the world to fiddle with it. I have toe SLIGHTLY in (front tires driving into each other a few minutes) and camber SLIGHTLY in (tires leaning slightly in to one another a few minutes) as well, but still unsure about castor. Spec is 2 degrees but I hear about people with around 3 or more..

    Edit: Oh yeah I have ball joints both at D setting which is recommended from LR

    Edit X2: Forgot to mention, but when I am turning full lock both ways I really feel and hear the tires digging into the pavement and have to give gas to move the truck. I don't remember it being like this before lift/uca/KO2's but I have a feeling it has to do with the castor leaning the wheel into the ground at very low speeds and changing toe and camber in relation to the other side and truck in general.
     
    Last edited: Nov 10, 2015
  12. Nov 10, 2015 at 3:55 PM
    #52
    Up2NoGood

    Up2NoGood Well-Known Member

    Joined:
    Jun 23, 2014
    Member:
    #132511
    Messages:
    3,302
    Gender:
    Male
    First Name:
    Jaimes
    BC, Canada
    Vehicle:
    2014 TRD Sport DCLB
    Most report good results if you can get your castor up to about 3 degrees. No personal experience in this yet, but it does seem like that is what the large majority agree on.
     
  13. Nov 10, 2015 at 3:57 PM
    #53
    Up2NoGood

    Up2NoGood Well-Known Member

    Joined:
    Jun 23, 2014
    Member:
    #132511
    Messages:
    3,302
    Gender:
    Male
    First Name:
    Jaimes
    BC, Canada
    Vehicle:
    2014 TRD Sport DCLB
    Thanks for the tips. I'll be doing a lift in spring time but trying to start educating myself in advance.
     
  14. Nov 10, 2015 at 4:32 PM
    #54
    nd4spdbh

    nd4spdbh Well-Known Member

    Joined:
    Oct 7, 2013
    Member:
    #114055
    Messages:
    14,595
    Gender:
    Male
    SoCal
    Vehicle:
    13 DCSB TRD OR v6 Auto

    Yup you are right, the extra caster can mess with the ackermann angles at lock... but its not a big deal at all.

    Run at 3-3.5* of caster, Steering will feel a lil heavier, but DAMN i love how well my truck tracks now, and just seems to auto center without ANY effort.

    .1* of toe in per side (.2* total)

    Then a smidge of negative camber (top of the tires in), i am right at .4* of negative camber and this should make tire wear nice n even.
     
    YotaDriver631[QUOTED] likes this.
  15. Nov 11, 2015 at 7:02 PM
    #55
    Sommes

    Sommes Active Member

    Joined:
    Oct 18, 2010
    Member:
    #44874
    Messages:
    41
    Gender:
    Male
    Canada
    Vehicle:
    08 Mica TRD OFF-ROAD
    okay so just to double check before install this weekend:

    do i also grease the UCA bolt prior to installing in sleeves and tighten bolt while suspended by jack? Or are you supposed to tighten UCA bolt with full truck weight back down on the ground similar to LCA bolts as to not stress the bushings (i think i read that somewhere) ? Thanks!
     
  16. Nov 11, 2015 at 7:19 PM
    #56
    03FR500

    03FR500 Well-Known Member

    Joined:
    May 31, 2015
    Member:
    #156432
    Messages:
    45
    Gender:
    Male
    Vehicle:
    '05 DCSB TRD-OR
    3" lift, 17" rims, 285/70/17 tires
    Don't grease the bolt, only the interface between the sleeve and the bushing. Not sure what the instructions say but I prefer to have the UCA at the ride height position before torquing the UCA bolt.
     
  17. Nov 11, 2015 at 7:31 PM
    #57
    Sommes

    Sommes Active Member

    Joined:
    Oct 18, 2010
    Member:
    #44874
    Messages:
    41
    Gender:
    Male
    Canada
    Vehicle:
    08 Mica TRD OFF-ROAD
    Perfect. I agree, Torquing at ride hight makes sense to me.
     
  18. Sep 28, 2016 at 3:40 PM
    #58
    quetzal

    quetzal Well-Known Member

    Joined:
    Apr 19, 2014
    Member:
    #128011
    Messages:
    1,490
    Gender:
    Male
    First Name:
    Mario
    Long Beach, CA
    Vehicle:
    '02 XtraCab SR5 TRD 4x4 5spd
    All-Pro UCAs, King 2.5 C/Os, All-Pro Expo Leafs, Bilstein 10" Shocks
  19. Jan 20, 2019 at 5:50 PM
    #59
    Clwrz

    Clwrz Well-Known Member

    Joined:
    Jan 29, 2017
    Member:
    #209049
    Messages:
    484
    Gender:
    Male
    First Name:
    Ryan
    San Diego, CA
    Vehicle:
    2007 Silver Double Cab Tacoma TRD Sport
    What size socket is that top nut?
     
  20. Apr 25, 2019 at 12:34 AM
    #60
    arrakis429

    arrakis429 Waiting for the Mets to repeat 1986

    Joined:
    Jun 16, 2012
    Member:
    #80785
    Messages:
    426
    Gender:
    Male
    First Name:
    Ben
    Springfield, OR
    Vehicle:
    2016 Quicksand TRD Sport ACLB 3.5L 6MT (OVTuned)
    Fuel Mavericks w/ Falken Wildpeak AT3W 285/70/17 (Soon to be SCS Ray 10 w/ Falken Wildpeark AT4W 255/80/17) Leer 100 Topper + Prinsu Cabrack Cali raised Bed stiffeners RCI Sliders RCI skids Bilstein 6112 Front 5/4 w/ Eibach 700lb Coils SPC LR UCA's Bilstein 5160 Rear OME Dakar HD Leafs Wheeler's UBolt Flip w/ Bumpstops N2 Designs MT remote starter OVTuned ARB Awning w/ Windbreak and Deluxe 'Room' SpartanXCustoms Amber Scoop light Pelfreybilt Aluminum Front Plate Bumper w/ CaliRaised 32” light bar and Baja Designs Amber Squadrons Wide Cornering Warn Zeon 10s Platinum Winch 2Lo Mod URD Stage 3 Clutch with Heavy flywheel Accumulator delete mod TacoGarage Dash Multimount Warfab Phantom Rear Bumper OVTune Dump tubes
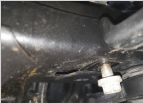
    I know this is an old thread - but maybe someone is still lurking here? I installed my SPC UCA's without the "supplied offset washers" as I bought them secondhand and was told I could use my OE washers. Anyway, after a painful install I found this thread and wonder how screwed I am. I installed the OE washers - on the outsides of the UCA - dish facing in. Here is a picture, tell me if I should go back in there and also somehow procure some SPC washers..
    IMG_20190425_002814.jpg IMG_20190425_002736.jpg
     

Products Discussed in

To Top