1. Welcome to Tacoma World!

    You are currently viewing as a guest! To get full-access, you need to register for a FREE account.

    As a registered member, you’ll be able to:
    • Participate in all Tacoma discussion topics
    • Communicate privately with other Tacoma owners from around the world
    • Post your own photos in our Members Gallery
    • Access all special features of the site

eimkeith's '03 Taco(s)

Discussion in '1st Gen. Builds (1995-2004)' started by eimkeith, May 15, 2019.

  1. May 15, 2019 at 11:34 AM
    #1
    eimkeith

    eimkeith [OP] Well-Known Member

    Joined:
    Jan 8, 2017
    Member:
    #206925
    Messages:
    452
    Gender:
    Male
    First Name:
    J Keith
    Vehicle:
    '96 4Runner, '03 Taco
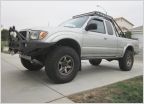
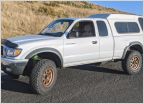
    EDIT - the black extracab has been sold; the remainder of the thread will be the doublecab that replaced it (unless the new owner wants to post here with the changes he's making - absolutely welcome)

    [​IMG]
    (current photo)


    Hi there. I bought my 2003 Tacoma at the end of last year to serve as a daily driver while I'm finishing my 3rd gen 4Runner build (which keeps getting delayed because I make some products for 3rd gens and the half-assembled 4Runner is super convenient when I need to measure or fit something...)

    My ultimate goal when I was looking for a Tacoma was to have a solid platform on which to build a weekend crawler after the 4Runner is back in service; I knew I wanted either an extra cab or double cab, a 5spd, 3.4, and as little rust as possible. I also knew that I'd be bobbing the bed and cutting the fender openings for larger tires, so I was pretty flexible about body condition.

    I ended up buying a well-priced, 2003 TRD package extra cab with a factory replacement frame, nice interior, and an appropriate amount of body damage. Pretty much perfect for what I was after, except it's an automatic - which is correctable. ;)

    The truck was bone stock - including original Toyota-branded Bilsteins (!!). I threw on a set of 4Runner wheels with better tires immediately after purchase, and made it the daily driver. At some point, the remaining front marker light fell out on the interstate, but other than that, no real surprises besides it needing an alignment (more on this in post#4).

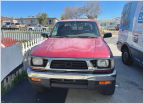
    Here it is right after I got it,
    [​IMG]

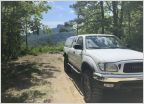
    and here it is later at Uwharrie months later - still completely stock aside from the wheels:

    [​IMG]
    (thanks Devon for that photo)

    After I took it to Uwharrie, it kind of sunk in that it'd be quicker to prep the Taco for weekend wheeling than the 4Runner, so my "plan" to build the Taco after the 4Runner was sort of corrupted.
     
    Last edited: Sep 23, 2023
    jubei and Reh5108 like this.
  2. May 15, 2019 at 11:58 AM
    #2
    eimkeith

    eimkeith [OP] Well-Known Member

    Joined:
    Jan 8, 2017
    Member:
    #206925
    Messages:
    452
    Gender:
    Male
    First Name:
    J Keith
    Vehicle:
    '96 4Runner, '03 Taco
    So the first orders of business are raising the fuel tank, and making sliders. But let me back up a minute.

    After I bought the Taco, I found a rolled '96 3.4/5spd on Craigslist and I bought it (for $600, then sold the rear axle for $200, so I'm into it for $400 now) as a parts donor for a 5spd conversion. I wasn't aware at the time that I need a 2003 ECU specifically to even consider this conversion, but I think I got a lot of what I'll need, so it's still a sound purchase. Plus, the frame is straight, so it has become the product development platform for the Tacoma stuff - this is how that donor truck looks today:

    [​IMG]
    (the 1st gen in the background is for my wife; it will get the 3.4 out of the donor Taco at some point.)

    So I've started on the fuel tank lift, using the '03 for general measurements, and the '96 for fitment. Right off it's clear that raising the tank 2" is beneficial:

    [​IMG]
    (2" is the most I'm comfortable lifting the tank without a body lift, due to the clearance of the hard fuel lines coming out of the tank under the bed floor)

    On the 3rd Gen 4Runner I've had to relocate the tank to gain clearance, using an F150 aux tank in the spare tire location (I have a neat bracket/crossmember kit for that.) On the Tacomas, however, the fuel tank crossmember is bolted into the frame, and there is enough overhead clearance to raise it 2"

    [​IMG]

    Here the crossmember has been unbolted and removed, and I'm mocking up the upper lift bracket (in blue) on one end (it will locate back down on the original holes for alignment before welding)

    [​IMG]

    [​IMG]

    I've drawn up 6 components to lift the tank: the upper lift bracket shown above (one on each side of the top of the crossmember to attach to the top of the frame), a left and right lower lift bracket which will double as a weld-in frame reinforcement (also self-locating on the original frame holes), a front lift bracket, and a tank strap tab to shorten the factory strap:

    [​IMG]

    [​IMG]

    [​IMG]

    [​IMG]

    [​IMG]
    (BTW, the blue stuff is 3D printed to check fitment.)

    Aside from these 6 parts, I'll need to fold over a pinch weld at the back of the cab,
    clearance a section of bed support above the tank by 30mm, and relocate the 2003 evap stuff that is located above the rear of the tank (it's probably going in the spare tire area when I bob the bed)

    [​IMG]

    I'll make a short run of these lift brackets in case anyone else wants to lift their tank as well. I'm intending to keep the factory skid, but I don't see any reason that this wouldn't work with aftermarket skids as well?
     
    Last edited: May 15, 2019
    RoaminRoman, slander and Reh5108 like this.
  3. May 15, 2019 at 12:09 PM
    #3
    eimkeith

    eimkeith [OP] Well-Known Member

    Joined:
    Jan 8, 2017
    Member:
    #206925
    Messages:
    452
    Gender:
    Male
    First Name:
    J Keith
    Vehicle:
    '96 4Runner, '03 Taco
    Regarding sliders: As I'm already working on sliders for the 3rd gen 4Runner, I thought they'd easily adapt to the Taco frame, and that's correct. More on that later; I'm still modeling baseplates for the legs at the moment. :)
     
  4. May 15, 2019 at 12:20 PM
    #4
    eimkeith

    eimkeith [OP] Well-Known Member

    Joined:
    Jan 8, 2017
    Member:
    #206925
    Messages:
    452
    Gender:
    Male
    First Name:
    J Keith
    Vehicle:
    '96 4Runner, '03 Taco
    So, remember the alignment concern from the original post? I've been looking at the rear wheel centering in the wheel well on both sides of the truck since I bought it, and the left side clearly has the wheel further rearward than the right. Also, my friend Devon has confirmed that my truck crabs to the right; so I was pretty sure the axle wasn't perpendicular to the frame, and today I confirmed that.

    Here's the driver's side:

    [​IMG]

    and here's the passenger:

    [​IMG]
    (you see it too, right?)

    Well, the machine confirmed the issue (not that I needed the machine to confirm that)

    [​IMG]

    [​IMG]

    [​IMG]

    Clearly the rear axle is angled such that the thrust angle is off to the right, yeah? I suspected a bad leaf spring, poorly installed axle (not on centering pin, maybe?), or possibly even mis-matched springs...

    But it turns out that the passenger side leaf spring mount is welded on almost 7mm further back on the frame than the driver's side mount. On the Toyota factory replacement frame!

    o_O

    Has anyone else seen this, or am I just particularly lucky?
     
  5. May 15, 2019 at 12:33 PM
    #5
    eimkeith

    eimkeith [OP] Well-Known Member

    Joined:
    Jan 8, 2017
    Member:
    #206925
    Messages:
    452
    Gender:
    Male
    First Name:
    J Keith
    Vehicle:
    '96 4Runner, '03 Taco
    Ok, so I have to cut off & reposition the passenger leaf spring mounts. So be it. On to more exciting things.

    My goal was to run 35s without much lift, so I spent an afternoon verifying that this was doable.

    [​IMG]

    [​IMG]

    good enough to move forward!

    I'd previously picked up this modified FJ80 rear axle from a TW member (4.56, locked) and I've recently gotten this 'lovingly, lightly-used' front LT kit from SRQ, so those are the broad strokes of my suspension strategy for the moment. I'm thinking 16" Methods (trying to get those off of another member, actually) :)

    [​IMG]

    [​IMG]

    I'm not crazy about leaf springs, but I'm thinking either stock with an AAL and overload spring deletion, or Deavers? I'm also looking into extended shackles with the upper eye relocated into the middle of the frame rail to keep the ride height low (need to do more research there.) Shocks will be outboarded.

    If you guys have advice/recommendations here, I'm glad to hear it.
     
    slander likes this.
  6. May 27, 2019 at 5:59 AM
    #6
    eimkeith

    eimkeith [OP] Well-Known Member

    Joined:
    Jan 8, 2017
    Member:
    #206925
    Messages:
    452
    Gender:
    Male
    First Name:
    J Keith
    Vehicle:
    '96 4Runner, '03 Taco
    Got started on bobbing the bed yesterday.

    It took 2.5 hrs to get the Line-X off before I could even begin.

    [​IMG]

    [​IMG]

    I opted to go double cab length, so I started by measuring back from the front edge of the bedrails by the cab 1730mm - this put my cut line far enough inside the depressions in the wall of the bed at the rear that I wouldn't be cutting into the curve (I'll get a picture of that later) 1730 lands about 190mm from the rear edge of the bed (ignore the gold line):

    [​IMG]

    [​IMG]

    First cut:

    [​IMG]

    second cut:

    [​IMG]

    If you look closely at the photo above, you'll see that 13" forward of the initial 1730mm cut line lands right at the major bed support. Literally right at the edge. So, don't make your initial cut closer to the front than 1730 if you intend to shorten the bed by the full 13 inches. (Just an FYI for anyone researching this before bobbing their Tacoma extracab.)

    While I had easy access I pulled the spare tire mounts & winch (left the crossmember in there for the time being)

    Test fitting:

    [​IMG]

    [​IMG]

    You can see here that 13 inches also lands right at the shackle mounts, which isn't the best thing... I'm looking at extending the shackle length so that I can place the mount further forward and higher (in the middle of the frame rail, actually) so that I maintain the same shackle angle and ride height. This should also give me more droop travel, right? At that point, I can cut the frame shorter than the factory shackle mounts allow currently.

    Remember that I'd discovered that the factory welded the passenger front leaf mount too far rearward, causing the truck to have terrible thrust angle? You can see the effect on the shackle angles between the driver and passenger side in these photos (passenger side much flatter, as that spring is positioned rearward relative to the other.)

    Another note that would have been useful to know when I was researching bed bobs - you'll need to loosen/pull the fender liner at the rear of the wheel well (and remove the mud flap frame) to allow the bedsides to contour inward at the bottom to align with the bed corners - sort of a minor dovetail :) .

    Like so:

    [​IMG]

    [​IMG]

    That's what 6.5 hours of my Saturday looks like.

    I'm going to try to finish up the gapping and welding today so that I can drive this thing tomorrow (it's my daily driver.) I've got a 3/16 or so gap at the passenger outer panel join at the bottom - my bedsides were both dented badly in the section that I cut out, so my scribed line wasn't perpendicular to the top of the bed when the tension in the panel was released after the cut was made. Now that I've positioned the panels I can scribe a new cut line to close the gap by moving the rear piece forward accordingly. I'm at 63 3/8" length at the moment, so I have room to creep it in and stay 63.0+

    I'll probably also look at remounting the stock bumper for temporary use until I can draw up a high clearance plate bumper for it.
     
    RoaminRoman and Ritchie like this.
  7. Jun 1, 2019 at 5:08 AM
    #7
    eimkeith

    eimkeith [OP] Well-Known Member

    Joined:
    Jan 8, 2017
    Member:
    #206925
    Messages:
    452
    Gender:
    Male
    First Name:
    J Keith
    Vehicle:
    '96 4Runner, '03 Taco
    snuck in 3.5 more hours this week and got the bed welding done (I'm 16 hours into the bob project so far.)

    [​IMG]

    [​IMG]

    [​IMG]

    Going back to the shop this morning to work on the frame cuts & bumper mounting.

    [​IMG]

    Hope this stuff is entertaining someone.
     
  8. Jun 3, 2019 at 3:06 PM
    #8
    presto

    presto Well-Known Member

    Joined:
    May 9, 2011
    Member:
    #56375
    Messages:
    2,243
    Gender:
    Male
    First Name:
    Topher
    san francisco
    Vehicle:
    2000 T4R 4x4
    Fully armored on 33’s
    Looks good man! Subb’d. Im over on t4r as well (T4topher)
     
    eimkeith[OP] likes this.
  9. Jun 3, 2019 at 3:26 PM
    #9
    eimkeith

    eimkeith [OP] Well-Known Member

    Joined:
    Jan 8, 2017
    Member:
    #206925
    Messages:
    452
    Gender:
    Male
    First Name:
    J Keith
    Vehicle:
    '96 4Runner, '03 Taco
    thanks! I put in another 3.5 hrs yesterday and got it to this point:

    [​IMG]

    [​IMG]

    I love it.

    also, I'm playing around with frame cap ideas - I cut 8.25" out of the frame back there, so I want to reinforce the shackle sleeves, as well as add a threaded mount for bumper use if needed...

    [​IMG]
     
    Wulf, RoaminRoman and presto[QUOTED] like this.
  10. Jun 3, 2019 at 5:28 PM
    #10
    Squeaky Penguin

    Squeaky Penguin Nothing Ventured, Nothing Gained

    Joined:
    Apr 5, 2012
    Member:
    #76340
    Messages:
    9,777
    Gender:
    Male
    First Name:
    Brett
    Steamboat Springs, Colorado
    Vehicle:
    '01 4WD, SR5, TRD & '13 TRDOR AC
    Lots of dust and custom dents, Check Build
    Solid work. :thumbsup:

    @Reh5108 check out the fuel tank raising setup. I may be interested in a set.
     
    Reh5108 and eimkeith[OP] like this.
  11. Jun 3, 2019 at 5:41 PM
    #11
    eimkeith

    eimkeith [OP] Well-Known Member

    Joined:
    Jan 8, 2017
    Member:
    #206925
    Messages:
    452
    Gender:
    Male
    First Name:
    J Keith
    Vehicle:
    '96 4Runner, '03 Taco
    thanks.
     
  12. Jun 4, 2019 at 1:30 PM
    #12
    Reh5108

    Reh5108 Well-Known Member

    Joined:
    Feb 18, 2013
    Member:
    #97832
    Messages:
    5,621
    Gender:
    Male
    First Name:
    Ryan
    Idaho
    Vehicle:
    2004 SR5 4X4 2.7L Extra Cab
    OME lift, 4x sliders, Demello rear bumper, custom front bumper, Engo 9000lb winch
    You mean my jerry cans? My tank isn't raised yet.


    @eimkeith I might be interested in a kit to raise the tank also. My tank is beat to shit. I think my frame box plates might interfere slightly with the spacer in your kit but that can easily be fixed with a grinder. Solid work too by the way!
     
    eimkeith[OP] likes this.
  13. Jun 4, 2019 at 1:55 PM
    #13
    eimkeith

    eimkeith [OP] Well-Known Member

    Joined:
    Jan 8, 2017
    Member:
    #206925
    Messages:
    452
    Gender:
    Male
    First Name:
    J Keith
    Vehicle:
    '96 4Runner, '03 Taco

    Thanks! I guess I should draw up some boxing plates to fit around the raised crossmember.
     
    Reh5108[QUOTED] likes this.
  14. Jun 4, 2019 at 7:49 PM
    #14
    Reh5108

    Reh5108 Well-Known Member

    Joined:
    Feb 18, 2013
    Member:
    #97832
    Messages:
    5,621
    Gender:
    Male
    First Name:
    Ryan
    Idaho
    Vehicle:
    2004 SR5 4X4 2.7L Extra Cab
    OME lift, 4x sliders, Demello rear bumper, custom front bumper, Engo 9000lb winch
    @jubei and @cynicalrider might be interested in this also. I know I've talked to them a bit about raising the gas tank.
     
    jubei and eimkeith[OP] like this.
  15. Jun 4, 2019 at 8:08 PM
    #15
    eimkeith

    eimkeith [OP] Well-Known Member

    Joined:
    Jan 8, 2017
    Member:
    #206925
    Messages:
    452
    Gender:
    Male
    First Name:
    J Keith
    Vehicle:
    '96 4Runner, '03 Taco
    the more the merrier!
     
    Reh5108[QUOTED] likes this.
  16. Jun 5, 2019 at 3:39 AM
    #16
    cynicalrider

    cynicalrider #NFG

    Joined:
    Jul 25, 2012
    Member:
    #83399
    Messages:
    16,465
    Gender:
    Male
    Jersey
    Vehicle:
    01 SR5 TRD 4x4, '23 Bronco Wildtrak, 2017 HSQV FE350
    Drop bracket lift and booger welds
    :popcorn: yeah I plan on raising mine, already cut the crossmember out. Gotta give this a read later.
     
    Reh5108 likes this.
  17. Jun 5, 2019 at 6:01 AM
    #17
    ToyRyd04

    ToyRyd04 Taco Transformer

    Joined:
    Aug 5, 2011
    Member:
    #61217
    Messages:
    1,794
    Gender:
    Male
    First Name:
    Greg
    Perryville, MD
    Vehicle:
    '04 PreRunner
    SAS'd PreRunner Diamond Axles Crawlbox
    Cut or unbolt? :spy: is it in good shape?
     
  18. Jun 5, 2019 at 7:00 AM
    #18
    cynicalrider

    cynicalrider #NFG

    Joined:
    Jul 25, 2012
    Member:
    #83399
    Messages:
    16,465
    Gender:
    Male
    Jersey
    Vehicle:
    01 SR5 TRD 4x4, '23 Bronco Wildtrak, 2017 HSQV FE350
    Drop bracket lift and booger welds
    I had to cut the bitch out. Apparently I'm retarded or had too many beers in me when it was time to take it out because I could not figure out how to get it out.

    [​IMG]Untitled by Michael Halat, on Flickr

    I was just going to weld the crossmember back in 2" higher, and cut the front mount and throw a piece of 2x2" tube and do the same to that mount. Then all that's left to worry about is the gas tank strap.
     
    ToyRyd04[QUOTED] likes this.
  19. Jun 5, 2019 at 8:10 AM
    #19
    eimkeith

    eimkeith [OP] Well-Known Member

    Joined:
    Jan 8, 2017
    Member:
    #206925
    Messages:
    452
    Gender:
    Male
    First Name:
    J Keith
    Vehicle:
    '96 4Runner, '03 Taco

    If folks are willing to cut & re-weld, I might be able to make a simpler kit... thoughts?

    - not sure if it would still be self-locating, though...
     
  20. Jun 5, 2019 at 8:41 AM
    #20
    cynicalrider

    cynicalrider #NFG

    Joined:
    Jul 25, 2012
    Member:
    #83399
    Messages:
    16,465
    Gender:
    Male
    Jersey
    Vehicle:
    01 SR5 TRD 4x4, '23 Bronco Wildtrak, 2017 HSQV FE350
    Drop bracket lift and booger welds
    I think you are definitely on a better track for the average joe. Simple bolt in installation is better for almost everyone. I am just tackling it now while I have the bed off and decided that the trail gear frame plates were not enough for me. I am going to be boxing the entire length of the frame, including the area the gas tank crossmember is.

    Also how did you get that crossmember out? I tried twisting it in both directions with no luck.
     

Products Discussed in

To Top