1. Welcome to Tacoma World!

    You are currently viewing as a guest! To get full-access, you need to register for a FREE account.

    As a registered member, you’ll be able to:
    • Participate in all Tacoma discussion topics
    • Communicate privately with other Tacoma owners from around the world
    • Post your own photos in our Members Gallery
    • Access all special features of the site

2012 Cadillac 4-note Horn Install w/Supercharger

Discussion in '2nd Gen. Tacomas (2005-2015)' started by Beers, May 31, 2019.

  1. May 31, 2019 at 8:18 PM
    #1
    Beers

    Beers [OP] Well-Known Member

    Joined:
    May 17, 2012
    Member:
    #79038
    Messages:
    516
    Gender:
    Male
    Colorado
    Vehicle:
    12 TRD OR
    I recently added the 4-note Cadillac horns to my 2012 Tacoma with the supercharger and thought I would do a write-up on it. There has been a lot of interest with the horn kits sold in another thread along with options for where to mount these horns. However in this instance there are some additional obstacles due to the supercharger components as well as less room deeper in the engine compartment with the emissions pump that was new in the 2012 model.

    I wanted this install to accomplish a few things. It needed to be clean with no drilling required. Another goal was to find a spot for the horns that does not block the intercooler at all. The air conditioning has always felt a little weak and I am thinking horns in front of the intercooler and in front of the condenser is not helping this situation. By keeping the horns clear of both I can increase airflow a little and hopefully help that situation out.

    First step was to remove the grille which was very easy, just remove two screws and two plastic push pins on top then work out the plastic clips along the lower portion. There are larger tabs near the headlights and smaller ones lining the lower part of the grille that if gently pulled up on will release.


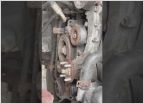
    As you can see one of the popular spots to mount these along the lower frame or in front of the radiator are all taken up by supercharger components.


    Over towards the right headlight I noticed not only some space behind the grille but also a tube stabilizing bracket as well as an existing hole in the painted metal. I used some 1/8" thick, 3/4" wide steel from Home Depot to create this crude bracket. Each drilled hole is 1/4". The bracket is bent so it extends forward 2" to mount the horns with the horn hole roughly 2" down from the upper mount hole. The upper part of the bracket is attached with a piece of 1/4" all-thread cut to 4 3/4" in length and secured with a nut and lock washer on the bracket side and a washer plus nut on the backside. The lower part is secured with the existing bolt for the bracket that was already in place. Since these horns use their own bracket as the ground this setup allows everything to stay grounded once secured.


    For space I mounted two horns in the engine bay and two just behind the right headlight. The two horns in the engine bay are secured to the all-thread with nuts and lock washers. I did grind a little paint away from the horn brackets where the washers will make contact to ensure there would be a good ground. Space them as needed and angle to clear the electric plug that is not visible in the picture but you will find located just under the horns. I did make some minor bending adjustments so it all fit the way I needed it to.


    Just in case there are any variances in the horns and their wire connectors check to make sure any connectors you have that came with the horns will reach before making any cuts to the brackets.

    The two other horns required their brackets to be cut so they would fit in the space and clear the frame as well as the tube. In addition to cutting the top part of the bracket off I had to cut an angle on one of the horns so they could be mounted at a greater angle to each other. There was a lot of paint on these so I cleaned the paint off the brackets where they contacted each other as well as the backside of the rear horn bracket for positive ground contact. I used a 1" long, 1/4" bolt with a nylock nut to secure the horns.


    The horns came with connectors that I spliced into a single common 12 gauge wire which was ran across the top part of the radiator towards the battery within a wire loom. This is held up with zip ties through two unused holes near the horns as well as some attachments to other wire looms I found along the way.


    The stock horns were removed and the common power wire to them was cut and then extended with a single 14 gauge wire and a crimp connector. I decided to leave the stock horn bolts in place and use one of them for the relay ground. This required a 5/16" ring connector. I chose an all weather one which sealed with a heat gun considering the location. Both the ground and the original horn power wire were able to be fed into the wire loom that contained the Cadillac horns power wire.


    To the driver's side of the radiator there is a relay mounted with a single M6-1.00 12mm bolt. This was too short to use as is so I replaced it with a longer 20mm bolt. This extended enough on the backside that I could mount the relay for the horns on the back side.


    I ran the three (ground, original horn power, Cadillac power) wires down from above the radiator to the relay location. I added another fused 12 gauge power wire also in a wire loom between the battery and the relay, routing it along the existing wire looms and just under the battery location. This wire also got a 5/16" weather sealed ring connector to attach to the positive battery connection. Each end of the wires got a connector added and then hooked up to the relay before installing the fuse and testing it all out.


    The horns work great and are WAY louder than the stock ones. Hopefully this helps out others who are looking to do an install in a different location.
     
  2. May 31, 2019 at 8:25 PM
    #2
    BartMaster1234

    BartMaster1234 Well-Known Member

    Joined:
    Aug 21, 2016
    Member:
    #195197
    Messages:
    45,867
    Gender:
    Male
    First Name:
    Tyler
    Pittsburgh, Pennsylvania
    Vehicle:
    1998 PreRunner 4x4 2.7l Supercharged
    Flux Capacitor
    I know exactly where those horns came from, there is a seller on eBay who puts them out. I can tell because he just sprays paint over the dirt, scum, and existing paint job as evident by the final finish.
     
    This site contains affiliate links for which the site may be compensated.
    #2
  3. May 31, 2019 at 8:26 PM
    #3
    Beers

    Beers [OP] Well-Known Member

    Joined:
    May 17, 2012
    Member:
    #79038
    Messages:
    516
    Gender:
    Male
    Colorado
    Vehicle:
    12 TRD OR
    Yeah, I bought those over 4 years ago. Not a great finish but it works. I did post a link on your thread so if anyone has a supercharger and was trying to decide if they could fit they would see there is an option and then buy some. :D
     
    This site contains affiliate links for which the site may be compensated.
    #3
  4. May 31, 2019 at 8:27 PM
    #4
    BartMaster1234

    BartMaster1234 Well-Known Member

    Joined:
    Aug 21, 2016
    Member:
    #195197
    Messages:
    45,867
    Gender:
    Male
    First Name:
    Tyler
    Pittsburgh, Pennsylvania
    Vehicle:
    1998 PreRunner 4x4 2.7l Supercharged
    Flux Capacitor
    Thanks for sharing, interesting mounting method.
     
  5. May 31, 2019 at 8:30 PM
    #5
    BartMaster1234

    BartMaster1234 Well-Known Member

    Joined:
    Aug 21, 2016
    Member:
    #195197
    Messages:
    45,867
    Gender:
    Male
    First Name:
    Tyler
    Pittsburgh, Pennsylvania
    Vehicle:
    1998 PreRunner 4x4 2.7l Supercharged
    Flux Capacitor
    I'm guessing the Supercharger snout sticks into the area where my bracket would usually mount.
     
  6. May 31, 2019 at 8:31 PM
    #6
    Beers

    Beers [OP] Well-Known Member

    Joined:
    May 17, 2012
    Member:
    #79038
    Messages:
    516
    Gender:
    Male
    Colorado
    Vehicle:
    12 TRD OR
    The supercharger has components mounted in areas where most people are mounting these horns. So this is another method to work around the additional parts.
     
  7. May 31, 2019 at 8:32 PM
    #7
    Beers

    Beers [OP] Well-Known Member

    Joined:
    May 17, 2012
    Member:
    #79038
    Messages:
    516
    Gender:
    Male
    Colorado
    Vehicle:
    12 TRD OR
    The intercooler pump is located down where you have one of your mount options.
     

Products Discussed in

To Top