

-
Welcome to Tacoma World!
You are currently viewing as a guest! To get full-access, you need to register for a FREE account.
As a registered member, you’ll be able to:- Participate in all Tacoma discussion topics
- Communicate privately with other Tacoma owners from around the world
- Post your own photos in our Members Gallery
- Access all special features of the site
 Fuel Pump electrical connector
 Wrong plug for overhead console temperature gage
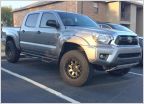 Hankook Dynapro AT-M
 Driver side window stuck
Ran through high water, over hood. Idler Pulleys wrecked.
Discussion in '2nd Gen. Tacomas (2005-2015)' started by teslabolt77, Jul 9, 2019.

