

-
Welcome to Tacoma World!
You are currently viewing as a guest! To get full-access, you need to register for a FREE account.
As a registered member, you’ll be able to:- Participate in all Tacoma discussion topics
- Communicate privately with other Tacoma owners from around the world
- Post your own photos in our Members Gallery
- Access all special features of the site
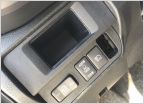 Cubby Carling Switch Mod..my version
 Fridge... what one?
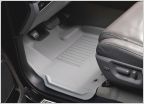 Best bang for the buck on floor liners?
 Meadowlark for our best friends.
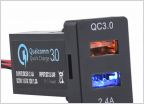 USB charging port
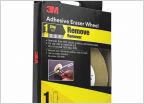 Pin Stripe removal issue
Seized LCA and alignment issue
Discussion in '3rd Gen. Tacomas (2016-2023)' started by littlefish, Jul 26, 2019.
Page 3 of 4
Page 3 of 4


