

-
Welcome to Tacoma World!
You are currently viewing as a guest! To get full-access, you need to register for a FREE account.
As a registered member, you’ll be able to:- Participate in all Tacoma discussion topics
- Communicate privately with other Tacoma owners from around the world
- Post your own photos in our Members Gallery
- Access all special features of the site
 How hard is it to swap out your front bumper . . . .
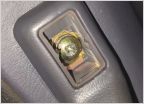 Any suggestions on getting these JIS screws out?
 Shocks (advice please)
 Exhaust kit recommendation for DT Headers?
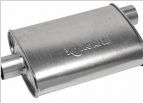 Which Dynomax to get???
 98 Taco Rear Leaf Springs
Removal of spare tire assembly.
Discussion in '1st Gen. Tacomas (1995-2004)' started by JJ04TACO, Aug 28, 2019.


