1. Welcome to Tacoma World!

    You are currently viewing as a guest! To get full-access, you need to register for a FREE account.

    As a registered member, you’ll be able to:
    • Participate in all Tacoma discussion topics
    • Communicate privately with other Tacoma owners from around the world
    • Post your own photos in our Members Gallery
    • Access all special features of the site

moisture inside head light lens

Discussion in '2nd Gen. Tacomas (2005-2015)' started by kmkopp2011, Oct 9, 2019.

  1. Oct 9, 2019 at 5:59 AM
    #1
    kmkopp2011

    kmkopp2011 [OP] Member

    Joined:
    Apr 15, 2019
    Member:
    #290235
    Messages:
    17
    Gender:
    Male
    First Name:
    KYLE
    Vehicle:
    2012 PYRITE MICA TACOMA SR5
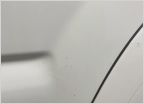
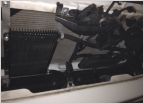
    I noticed the other day that I've been getting a lot of moisture inside my driver side lens, wondering if this broken black plastic piece is the reason, I haven't seen any other cracks. Not sure how I would fix this. Any thoughts?

    lense 2.jpg
     
  2. Oct 9, 2019 at 6:01 AM
    #2
    boogie3478

    boogie3478 Well-Known Member

    Joined:
    Oct 12, 2014
    Member:
    #140179
    Messages:
    26,396
    Gender:
    Male
    Vehicle:
    14 TRD Off-Road V6
    All the mods
    Check to make sure all of your bulbs are secure in the slots. Are those still the factory headlights housings?
     
  3. Oct 9, 2019 at 6:02 AM
    #3
    T4RFTMFW

    T4RFTMFW Well-Known Member

    Joined:
    Jul 23, 2014
    Member:
    #134525
    Messages:
    69,755
    That piece isn’t part of the headlight.
     
  4. Oct 9, 2019 at 6:06 AM
    #4
    kmkopp2011

    kmkopp2011 [OP] Member

    Joined:
    Apr 15, 2019
    Member:
    #290235
    Messages:
    17
    Gender:
    Male
    First Name:
    KYLE
    Vehicle:
    2012 PYRITE MICA TACOMA SR5
    I believe they are factory headlight housings, I bought the truck used a year ago so I have to check with the dealership. So the black broken piece has nothing to do with sealing the lens?
     
  5. Oct 9, 2019 at 9:53 AM
    #5
    Skyway

    Skyway Well-Known Member

    Joined:
    Jun 28, 2016
    Member:
    #190731
    Messages:
    2,947
    Gender:
    Male
    First Name:
    Ande'
    St.Pete
    Vehicle:
    White 2009 regular cab
    Drill small holes in the bottom face.
    Problem solved.
     
  6. Oct 9, 2019 at 9:58 AM
    #6
    Texas Aggie

    Texas Aggie Well-Known Member

    Joined:
    Nov 30, 2014
    Member:
    #143376
    Messages:
    219
    Gender:
    Male
    First Name:
    Michael
    TEXAS
    Vehicle:
    2013 SR5 4x4 Lifted
    King 2.5's Front and Rear 700# coil, 2" wheelers aal, 315/75R16 BFG KM3's Pelfreybilt Front and Rear Steel Bumpers, All Pro Sliders, 4.56 Gears
    We have a winner! Did this on a previous vehicle and it worked great. You only need two (roughly 1/8”) holes per headlight.
     
    Skyway[QUOTED] likes this.
  7. Oct 9, 2019 at 10:20 AM
    #7
    TegoTaco

    TegoTaco Well-Known Member

    Joined:
    Sep 29, 2016
    Member:
    #198555
    Messages:
    7,289
    Gender:
    Male
    Ontario, Canada
    Vehicle:
    ‘13 SUPERCHARGED DCLB TRD SPORT
    Silica gel packs, don’t drill holes!
     
    Last edited: Oct 9, 2019
    lynyrd3 and Skyway like this.
  8. Oct 9, 2019 at 11:48 AM
    #8
    muddog321

    muddog321 Well-Known Member

    Joined:
    Dec 22, 2009
    Member:
    #27973
    Messages:
    1,136
    Gender:
    Male
    FL
    Vehicle:
    09 Tacoma DCSB 4wd TRD Off-Road w/e-locker Pyrite Mica
    TW 1-piece driveshaft with 1310 u-joints All Pro and Budbuilt skid plates OME Dakar rear springs 3" with 5100 5100 front set at 1.75" (3rd groove up) with stock springs Falken Wildpeak A/T3W 265/70R16 2018 TRD Offroad wheels 16x7J with +25mm offset Powerstop rotors with Z36 pads and rebuilt with OEM caliper kit Complete rebuilt rear brakes drums, shoes, springs, wheel cylinders Rebuilt rear diff with Yukon 3.73 ring/pinion Denso 130A rebuilt alternator AGM 24F Battery New OEM idlers and tensioner assembly New AC compressor New PS hose and flushed Walker SS Quiet Flow muffler Denso Iridium long life plugs #3421 (SK20HR11) OEM coolant, cap, and thermostat NAPA CV axles and new seals ECGS bushing Rhino front guard Shortened mud flaps Alziria Black Tail Lights Nilight Headlights X-Bull Traction Boards Maaco full single stage paint job 2023 Nat CV to Knuckle seals 710573 New SKF wheel bearings/hubs BR930978 New Moog stabilizer links K80946 & 948 New MOOG K80819 Suspension Stabilizer Bar Bushing 28mm New Dorman rear wheel bearings using complete axles 926-139 & 140 New Radiator support bushings Dorman 924-267 (front body mounts)
    Best way is to remove all bulbs and use a blow dryer to dry the inside (easier out of vehicle but can de done in). Check the main bulb big rubber seal. Check the vents if open plastic tube type they always will get water in (some aftermarket have them) so don't waste your time replace them and lots of posts on what to get and checkout headlight depot. Silicon seal the seams after dry. Yes check for exterior cracks.
    If you drill any holes they cannot be where oncoming rain water will be forced back up into them at 70 mph - I never drilled mine but replaced. But if they are getting old why not drill before forced to replace as a stopgap.
     
  9. Oct 12, 2019 at 9:17 AM
    #9
    kmkopp2011

    kmkopp2011 [OP] Member

    Joined:
    Apr 15, 2019
    Member:
    #290235
    Messages:
    17
    Gender:
    Male
    First Name:
    KYLE
    Vehicle:
    2012 PYRITE MICA TACOMA SR5
    so do I need to take the housing off to drill holes? Or just drill on the outside towards the bottom of the housing?
     
    Skyway[QUOTED] likes this.
  10. Oct 12, 2019 at 1:47 PM
    #10
    TegoTaco

    TegoTaco Well-Known Member

    Joined:
    Sep 29, 2016
    Member:
    #198555
    Messages:
    7,289
    Gender:
    Male
    Ontario, Canada
    Vehicle:
    ‘13 SUPERCHARGED DCLB TRD SPORT
    Looks like it’s bad water damage inside of it. Just replace the lights. :)
     
  11. Oct 12, 2019 at 3:38 PM
    #11
    Too Stroked

    Too Stroked Well-Known Member

    Joined:
    Jan 24, 2017
    Member:
    #208501
    Messages:
    3,913
    Gender:
    Male
    First Name:
    Tom
    South shore of Lake Ontario
    Vehicle:
    2021 4Runner SR5 Premium
    If that were the solution, I think the factory would have done it. What you are proposing is a "fix" to a problem that should not happen in the first place. Moisture inside an OEM headlight housing is a sign of a leak that wasn't there to begin with. As others have said, check to make sure the bulbs are seated properly. If they're not, that's how the water got in. If so, use any of the methods others have suggested (other than drilling holes) to get the moisture out.

    BTW, holes are just as likely to let water in as they are to let it drain out.
     
  12. Oct 22, 2019 at 4:09 PM
    #12
    Skyway

    Skyway Well-Known Member

    Joined:
    Jun 28, 2016
    Member:
    #190731
    Messages:
    2,947
    Gender:
    Male
    First Name:
    Ande'
    St.Pete
    Vehicle:
    White 2009 regular cab
    :facepalm: I just drilled holes in the lower face of the housing with-out removing the lights.
    The lights are aftermarket replacements... not an OEM headlight.
    They crack when closing the hood I suppose.
    They ain't cracked on the bottom side.
     
  13. Oct 22, 2019 at 4:13 PM
    #13
    Too Stroked

    Too Stroked Well-Known Member

    Joined:
    Jan 24, 2017
    Member:
    #208501
    Messages:
    3,913
    Gender:
    Male
    First Name:
    Tom
    South shore of Lake Ontario
    Vehicle:
    2021 4Runner SR5 Premium
    I can pretty much guarantee that during your next drive in the rain, water will be forced into the housings.
     
  14. Oct 22, 2019 at 4:41 PM
    #14
    knottyrope

    knottyrope Well-Known Member

    Joined:
    Apr 13, 2017
    Member:
    #216122
    Messages:
    2,289
    Gender:
    Female
    First Name:
    Knotty
    Bahstun
    Vehicle:
    09 Taco CCLB 4x4 SR5 4.0
    Pads, rotors, ujoints, 5900K Super White Xenon HID Halogen Bulb Fog Light
    Remove light assy and drill hole in bottom. Blow out with dry air. Keep lights on to dry out.
     
    Skyway likes this.

Products Discussed in

To Top