1. Welcome to Tacoma World!

    You are currently viewing as a guest! To get full-access, you need to register for a FREE account.

    As a registered member, you’ll be able to:
    • Participate in all Tacoma discussion topics
    • Communicate privately with other Tacoma owners from around the world
    • Post your own photos in our Members Gallery
    • Access all special features of the site

Brute Force Fab HC Bumper install

Discussion in 'Armor' started by jamestkirk, Aug 3, 2019.

  1. Aug 3, 2019 at 1:39 PM
    #1
    jamestkirk

    jamestkirk [OP] Well-Known Member

    Joined:
    Aug 15, 2012
    Member:
    #84864
    Messages:
    174
    Gender:
    Male
    Moab Utah
    Vehicle:
    1999 Pre Runner 2017 TRD OR
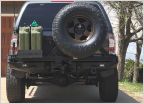
    I've scoured the site and the net in general to find comments on the installation of a HC rear bumper from Brute Force Fab. I didn't find much. I thought I'd but together some photo's of the process....

    [​IMG]
    I've seen posts asking about where to cut. My cut seems to have worked out good. It's just below the base of the light about 18 1/8" down from the bed rail. The cut is made so that you have some of that indented section of the bedside remaining. The forward section of the cut, as it moves across the fender flare, is a little bit off. I chose to leave it at 18 3/8". I can always shave more off if I need to to level out the 'wings' of the bumper.
    [​IMG]
    [​IMG]
    There's a small piece of plastic below the light that gets removed. The rear of the bedside attaches to the flange pictured. The bedside gets detached there in order to remove the cut piece.
    [​IMG]
    THE BRACKET
    [​IMG]

    Every bumper is shipped with a bracket created by BFF to replace the stock one that supported the wheel well and bedside.(wish I had a shot of the stock bracket) I had such a hard time envisioning how the new bracket attached. I finally figured it out. Nifty. It pinches the bedside underneath the fender flare.
    [​IMG]
    WRESTLING
    I wish I had some shots of the rigging I set up to hold the bumper in place. I was in a roofed carport and I had ratchet straps connected to the ceiling! 2 floor jacks! Maybe, I'll recreate that scene and snap some shots. Nonetheless, it's best to have three people to grapple with this thing. Two to hold it up and tweak it. One to screw in the bolts. There's plenty of room for adjustment in the bolt holes. The bolt at the most forward position needs a larger washer. It's getting sucked into the slot. I need to change that.
    [​IMG]
    [​IMG]
    Once installed, I'm concerned about the bumper rubbing up on the bracket. Not sure what I need to do here...?
    [​IMG]

    Next up: Wiring!

    -Kirk Out
    [​IMG]
     
    Last edited: Aug 3, 2019
  2. Oct 26, 2019 at 12:02 PM
    #2
    kevinlambchops

    kevinlambchops Well-Known Member

    Joined:
    Jul 3, 2016
    Member:
    #191103
    Messages:
    544
    Does anyone know where I can purchase this bedside bracket? I could contact BFF but hes a busy guy so I dont want to bother him for a small bracket. Itd be easier if I can order from somewhere. TIA
     
  3. Oct 28, 2019 at 7:58 AM
    #3
    pro2aaf

    pro2aaf Well-Known Member

    Joined:
    Jul 7, 2018
    Member:
    #258634
    Messages:
    82
    Gender:
    Male
    I've not seen it for sale anywhere, i'd just call up BFF 559-900-6564
     
  4. Sep 5, 2020 at 8:31 AM
    #4
    Sideways1

    Sideways1 Old Dirt Rider

    Joined:
    May 24, 2015
    Member:
    #155902
    Messages:
    1,230
    Gender:
    Male
    First Name:
    Dan
    Portland Oregon
    Vehicle:
    2015 TRD Sport 4x4 DCLB Pyrite Mica
    ADS 2.5 with Extended travel/ADS 2.5 Piggyback rear. Dakars. Pelfreybilt Aluminum front bumper,Skid and Brute Force Fab HC rear bumper. 5 x SCS Stealth 6's in Matte Bronze wrapped in Nitto Ridge Grapplers. Wet Okole front and rear seat covers. Wilco Bed Rail Tire Carrier. Light Racing Upper Control Arms. Marshall Fabrications sliders with kick out. Mobtown Tailgate Reinforcement Skin. hyper15125 retrofits. And many many odds and ends.
    Put the thinner bracket on top of the thicker bracket?

    Be Safe

    Dan
     
  5. Jun 4, 2021 at 11:42 PM
    #5
    taco_boy

    taco_boy Antiplastidipper

    Joined:
    Apr 9, 2018
    Member:
    #249981
    Messages:
    347
    Gender:
    Male
    California/Land of the Fee
    Vehicle:
    2018 Tacoma TRD On Road MT
    Noob Taco owner
    I apologize for the old thread revival but thanks so much for this! This is actually what I'm going to be doing in the next few days. I know this is asking too much, but do you don't by any chance happen to have the front bumper install as well?
     
    tonytoshiba likes this.
  6. Nov 20, 2022 at 3:50 PM
    #6
    Ddptrd4x4

    Ddptrd4x4 New Member

    Joined:
    Nov 20, 2022
    Member:
    #411133
    Messages:
    1
    Gender:
    Male
    Did you document the wiring for this?
     
  7. Dec 8, 2022 at 12:49 AM
    #7
    BurlyJim

    BurlyJim Well-Known Member

    Joined:
    Sep 19, 2020
    Member:
    #341293
    Messages:
    68
    Gender:
    Male
    First Name:
    Sheridan
    SoCal
    Vehicle:
    2021 AG TRDOR 4x4 M/T LT
    Nice fender brackets, i'll have to use a similar design for my fiberglass mounts once I do a high clearance rear bumper, which removes the lower glass mounts.
     

Products Discussed in

To Top