

-
Welcome to Tacoma World!
You are currently viewing as a guest! To get full-access, you need to register for a FREE account.
As a registered member, you’ll be able to:- Participate in all Tacoma discussion topics
- Communicate privately with other Tacoma owners from around the world
- Post your own photos in our Members Gallery
- Access all special features of the site
Quick Links: Truck automatically switching into H4 from H2.
  2nd Gen MESO Customs 3rd (Third) Brake Light Info
  Adding intermittent wipers - What other models will work on an 07?
  U joint wont take grease
 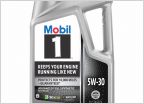 Mobil 1 5W- 30 $10.88
  A new way to clean inside your frame. (i.e the boxed frame section up front & cross members)
Cleaning the Rear Drum Brake Assembly...
Discussion in '2nd Gen. Tacomas (2005-2015)' started by NeverB4, Oct 29, 2019.
Page 1 of 2
Page 1 of 2

