

-
Welcome to Tacoma World!
You are currently viewing as a guest! To get full-access, you need to register for a FREE account.
As a registered member, you’ll be able to:- Participate in all Tacoma discussion topics
- Communicate privately with other Tacoma owners from around the world
- Post your own photos in our Members Gallery
- Access all special features of the site
 Alpine ILX-W670 steering wheel controls - anyone figure this out yet?
 Adding Aux/3.5mm Audio Support to 3rd Gen Tacoma (2020–2023)
 High pass settings for door speakers
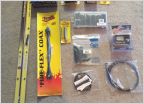 CB Install Cobra 75 WX ST
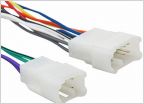 Which metra wire harness for 07 access cab
who installed their own stereo from crutchfield...
Discussion in 'Audio & Video' started by linkfeeney, Sep 20, 2010.
Page 2 of 4
Page 2 of 4


