1. Welcome to Tacoma World!

    You are currently viewing as a guest! To get full-access, you need to register for a FREE account.

    As a registered member, you’ll be able to:
    • Participate in all Tacoma discussion topics
    • Communicate privately with other Tacoma owners from around the world
    • Post your own photos in our Members Gallery
    • Access all special features of the site

Supersuks 2010 Tacoma Audio Build

Discussion in 'Audio & Video' started by supersuk, Sep 9, 2010.

  1. Sep 22, 2010 at 1:29 PM
    #21
    ToyoDrew

    ToyoDrew Well-Known Member

    Joined:
    Sep 14, 2010
    Member:
    #43262
    Messages:
    1,378
    Gender:
    Male
    Texas
    Vehicle:
    17 Inferno TRD-OR DCSB 4x4 (SOLD)
    OVTune, Hertz spkrs & JBL MS-8 DSP, Turn-as-Tail mod, LEDs everywhere, MESOJDM Turn Signal, Bakflip Revolver X2, Pop-n-Lock, Yakima roof rack, & many minor mods
    I haven't worked with fiberglass, but when I worked with bondo, sanding a curved surface was just as big of a pain as you seem to be having. lol I was very surprised how long it took me...
     
  2. Sep 22, 2010 at 1:44 PM
    #22
    supersuk

    supersuk [OP] Well-Known Member

    Joined:
    Apr 3, 2009
    Member:
    #15529
    Messages:
    111
    Gender:
    Male
    Honolulu, HI
    Vehicle:
    2010 Dcab TRD Sport Magnetic Gray
    Sounds!
    I know what you mean. All I did last night was sand and apply more filler then sand. At least its looking a lot better now. Just need to knock down some high spots and feather the edges and it should be ready for some paint!
     
  3. Sep 22, 2010 at 7:20 PM
    #23
    rscecil007

    rscecil007 Well-Known Member

    Joined:
    Mar 12, 2009
    Member:
    #14605
    Messages:
    191
    Gender:
    Male
    Seattle
    Vehicle:
    06 4x4 TRD Sport Access Cab
    Goodyear Duratracs 265/70R17's, Bed mat & extra d-rings, Weathertech floor liners, Husky Liner for rear seat area, Biceman Illuminated 4x4 Switch, Pioneer 800 PRS, Hybrid Audio L6 and L1V2, JL 13TW5 in a Mr. Marv box, JL HD900/5
    sweet, can't wait to see them finished.

    Can you me a favor? Can you take some pics of your install process when you put them in? I'm more interested in what the area behind your kicks looks like before you start, and what all you have to move (wires/harnesses,etc) and where you move it to, in order to make room for the speakers and the kicks to work.

    From what I've looked at, behind the passenger side doesn't look bad. The drivers side looks to be a real adventure...:D

    My tweeters should be here next week, so I'm going to start glassing them into my a-pillar panels. Should really help, the stock locations are horrible.
     
  4. Sep 22, 2010 at 7:35 PM
    #24
    supersuk

    supersuk [OP] Well-Known Member

    Joined:
    Apr 3, 2009
    Member:
    #15529
    Messages:
    111
    Gender:
    Male
    Honolulu, HI
    Vehicle:
    2010 Dcab TRD Sport Magnetic Gray
    Sounds!
    The way I constructed my kicks allow me to install it without moving anything. All I have to do is push the wiring in about a 1/2" or so which is an easy task with some zipties. I'll take some pics when I get home.
     
  5. Sep 22, 2010 at 7:40 PM
    #25
    rscecil007

    rscecil007 Well-Known Member

    Joined:
    Mar 12, 2009
    Member:
    #14605
    Messages:
    191
    Gender:
    Male
    Seattle
    Vehicle:
    06 4x4 TRD Sport Access Cab
    Goodyear Duratracs 265/70R17's, Bed mat & extra d-rings, Weathertech floor liners, Husky Liner for rear seat area, Biceman Illuminated 4x4 Switch, Pioneer 800 PRS, Hybrid Audio L6 and L1V2, JL 13TW5 in a Mr. Marv box, JL HD900/5
    Oh nice! That will help tremendously.
     
  6. Sep 23, 2010 at 10:32 AM
    #26
    supersuk

    supersuk [OP] Well-Known Member

    Joined:
    Apr 3, 2009
    Member:
    #15529
    Messages:
    111
    Gender:
    Male
    Honolulu, HI
    Vehicle:
    2010 Dcab TRD Sport Magnetic Gray
    Sounds!
    Ok, here is the kick panel installed and showing the wires. You can see that I have a lot of clearance where the speaker magnet would go. Hope these pics help...lmk if you need more specific angles or locations.

    [​IMG]

    [​IMG]

    [​IMG]
     
  7. Sep 23, 2010 at 10:38 AM
    #27
    supersuk

    supersuk [OP] Well-Known Member

    Joined:
    Apr 3, 2009
    Member:
    #15529
    Messages:
    111
    Gender:
    Male
    Honolulu, HI
    Vehicle:
    2010 Dcab TRD Sport Magnetic Gray
    Sounds!
    I bought this memory closed cell foam sanding block made by motorcraft and it helps with sanding curves so much! It seriously helped me to knock down high spots in the curves and make it look more smooth. Don't know how I sanded without this thing!
     
  8. Sep 23, 2010 at 10:52 AM
    #28
    rscecil007

    rscecil007 Well-Known Member

    Joined:
    Mar 12, 2009
    Member:
    #14605
    Messages:
    191
    Gender:
    Male
    Seattle
    Vehicle:
    06 4x4 TRD Sport Access Cab
    Goodyear Duratracs 265/70R17's, Bed mat & extra d-rings, Weathertech floor liners, Husky Liner for rear seat area, Biceman Illuminated 4x4 Switch, Pioneer 800 PRS, Hybrid Audio L6 and L1V2, JL 13TW5 in a Mr. Marv box, JL HD900/5
    Awesome, thank you! You still have full use of your e-brake (looks like it from the pics).

    How did you go about aiming yours? Are both aimed at the overhead light or something similar?
     
  9. Sep 23, 2010 at 11:03 AM
    #29
    supersuk

    supersuk [OP] Well-Known Member

    Joined:
    Apr 3, 2009
    Member:
    #15529
    Messages:
    111
    Gender:
    Male
    Honolulu, HI
    Vehicle:
    2010 Dcab TRD Sport Magnetic Gray
    Sounds!
    Yes, I have full use of everything. Even the footrest, although I have to put my foot on it at an angle. Still useful. hahaha I aimed the speakers to each person head, meaning driver side aimed to the passenger left ear and the passenger side aimed to the driver right ear. I estimate the driver side is about 15-20 degrees off-axis at most. These mids have pretty decent off axis response up to 4-5kish, which is where I plan to cross them over. I only aimed them this way to give me more room for my feet.
     
  10. Sep 23, 2010 at 5:15 PM
    #30
    ItalynStylion

    ItalynStylion Sounds Gooooood

    Joined:
    Jun 15, 2009
    Member:
    #18467
    Messages:
    5,926
    Gender:
    Male
    First Name:
    Steven
    DFW, Tx.
    Vehicle:
    09 Double Cab TRD Sport 4x4
    That makes so much sense...why do I not own one!?!


    Kicks look good man. I think they'll turn out very nicely!
     
  11. Sep 28, 2010 at 12:35 PM
    #31
    supersuk

    supersuk [OP] Well-Known Member

    Joined:
    Apr 3, 2009
    Member:
    #15529
    Messages:
    111
    Gender:
    Male
    Honolulu, HI
    Vehicle:
    2010 Dcab TRD Sport Magnetic Gray
    Sounds!
    I worked on the pods more this weekend and got around to making the other one. So far one is complete and ready for paint while the other just had 1 layer of chopped mat applied. I will apply filler during the course of this week and hopefully will be ready for paint by Sunday.

    I auditioned the pods for a little while and so far they sound pretty good. I'm really impressed with the Peerless HDS Exclusive mids. They have a level of detail that I haven't heard in other speakers and are very smooth. Using two channels of the JL Audio 300/4 to power the speakers, they get plenty loud and don't sound strained at all. In its current state, the stage is pulled to the right. Most likely because the right kick has a direct line of sight to my right ear. The left kick is somewhat blocked by my steering wheel, but I can still see it. Hopefully with some tuning it'll have a solid center image. After I finish making the tweeter pods, hopefully it'll raise the stage a little. Right now its about chest height. I don't have any pics yet, but will in a couple days.
     
  12. Oct 6, 2010 at 2:42 PM
    #32
    supersuk

    supersuk [OP] Well-Known Member

    Joined:
    Apr 3, 2009
    Member:
    #15529
    Messages:
    111
    Gender:
    Male
    Honolulu, HI
    Vehicle:
    2010 Dcab TRD Sport Magnetic Gray
    Sounds!
    So last week and this week has been a sad week since one of my channels on my PXA-H700 went dead. I removed it and sent it back to alpine for repairs. Its a good thing I had a PXA-H100 lying around and decided to install it to try out the imprint feature. This is how I hooked everything up:

    Front: Hooked this up to the JL 300/4 using only two channels of input to actively crossover the mid and high.
    Rear: Hooked this up to the JL 300/2 for the midbass
    Sub: Hooked this up to the JL 250/1 for the sub

    This is the only way I could figure out to connect all my components and let the imprint unit auto tune everything. I used all 6 recommended test positions from the imprint software using a 42" camera tripod made by targus to hold the mic in the correct positions. The amp gain settings were untouched from the previous install using the PXA-H100

    Here is my findings:
    1. The highs are a little to bright for my tastes, just like everyone says. I attenuated the tweeters a little by adjusting the gains on the amp.
    2. The bass is def there. Its defined and hits pretty hard. Almost makes my sub sound like its in a sealed enclosure.
    3. The center image has been set pretty well, however the sweet spot is very small. Most people say that the image gets pulled to the right. My head needs to be right at the center of the headrest for the perfect center image. If not, it sounds as if the center image gets shifted more towards the right.
    4. The Midbass is a little too strong. This could be due to resonances in my doors since I didn't apply the sound deadener yet. I'm just too lazy.

    Overall, i'm pretty happy with the results. Just wish I could adjust the eq after running the imprint...I'll mess around with this even more when I find some time. I know i'm prolly missing a lot more info, but if you have any questions just ask.
     
  13. Oct 6, 2010 at 4:28 PM
    #33
    ItalynStylion

    ItalynStylion Sounds Gooooood

    Joined:
    Jun 15, 2009
    Member:
    #18467
    Messages:
    5,926
    Gender:
    Male
    First Name:
    Steven
    DFW, Tx.
    Vehicle:
    09 Double Cab TRD Sport 4x4
    I think Npdang did a lot of different testing/tweaking with imprint to get some very different results. I know it's not what you plan to run in the long run but you might check out some of his threads on the subject to figure out how to make the most of it till you get your other unit back.
     
  14. Oct 6, 2010 at 5:59 PM
    #34
    supersuk

    supersuk [OP] Well-Known Member

    Joined:
    Apr 3, 2009
    Member:
    #15529
    Messages:
    111
    Gender:
    Male
    Honolulu, HI
    Vehicle:
    2010 Dcab TRD Sport Magnetic Gray
    Sounds!
    I read as much of the imprint posts as I could on DIY and applied every method possible. The best result came from the software suggestions using all 6 positions. All the others the treble was blazing hot, the bass was just missing and the midbass was weak. What I also learned was that the first mic position is the most important. Make sure that the mic is exactly where your head will normally be while driving. One time I started with the mic in the center of the vehicle and all the other measurements where the imprint told me to put it and the image was exactly in the center of the vehicle above the center console. So I just assumed that is the most crucial measurement.

    Its pretty cool technology, but would be even more cooler if all those frequency points, phase, and time alignment could be user adjustable! Then we would have the best processor possible! I wonder if someone can crack the software so that we can send our own data to the PXA-H100. Its all set up in a certain way in excel and can be viewed by the user. It saves every run you do with the imprint by date.
     
  15. Oct 6, 2010 at 6:18 PM
    #35
    supersuk

    supersuk [OP] Well-Known Member

    Joined:
    Apr 3, 2009
    Member:
    #15529
    Messages:
    111
    Gender:
    Male
    Honolulu, HI
    Vehicle:
    2010 Dcab TRD Sport Magnetic Gray
    Sounds!
    Italian - I tried out the reference disk and that really helped me point out flaws of my system! Its an awesome disk and i'm happy to have it! Thank you.
     
  16. Oct 6, 2010 at 7:03 PM
    #36
    ItalynStylion

    ItalynStylion Sounds Gooooood

    Joined:
    Jun 15, 2009
    Member:
    #18467
    Messages:
    5,926
    Gender:
    Male
    First Name:
    Steven
    DFW, Tx.
    Vehicle:
    09 Double Cab TRD Sport 4x4
    You're welcome man! Not only is it good to find the flaws but it's also great to see what your system can really do!

    Starting with a good recording is key to getting the most out of it and you really have a lot to choose from on there.
     
  17. Oct 11, 2010 at 12:13 PM
    #37
    supersuk

    supersuk [OP] Well-Known Member

    Joined:
    Apr 3, 2009
    Member:
    #15529
    Messages:
    111
    Gender:
    Male
    Honolulu, HI
    Vehicle:
    2010 Dcab TRD Sport Magnetic Gray
    Sounds!
    Over the weekend, I was able to begin the final process of finishing the right kick panel and getting it ready for paint. Not done yet since I did run out of time. However it is coming out pretty nice.

    As for the tweeters, I temporarily mounted them in the OEM tweeter locations until I finish the tweeter pods. Hopefully the upcoming weekend? Anyways, here's some pics:

    [​IMG]

    [​IMG]

    [​IMG]
     
  18. Oct 11, 2010 at 7:11 PM
    #38
    cmytacoma

    cmytacoma Well-Known Member

    Joined:
    Jul 11, 2008
    Member:
    #7874
    Messages:
    414
    Humboldt county NORCAL
    Vehicle:
    05 black DC LB sport
    Eclipse AVN 6620, Diamond audio 4.5" component in kicks, center channel with same mid and 2 tweets, infinity kappa perfect component 6.1 in front doors, kappa 6.1 coax in rear, sx900.4, fosgate power 1000, 06 L7 in ported box. BHLM, custom made sliders,
    [​IMG]
    [​IMG]
    I totally cheated though and bought these off of audio dave on DIY about 2.5 years ago! they sound amazing and he recomended the dayton 8s for the door and sound awesome...i also have the dayton HO's but 2 in a sealed box. how much and could would u build a ported dual ten box for me? id relocate the the amp to the other cubby under drivers side seat. sx 900.4 in passenger side under seat storage compartment!
     
  19. Oct 11, 2010 at 7:12 PM
    #39
    THXEY

    THXEY Panda Jerk

    Joined:
    Dec 15, 2008
    Member:
    #11614
    Messages:
    12,669
    Gender:
    Male
    First Name:
    Jacob
    San Diego
    Vehicle:
    2013 Subaru WRX
    STi Short Shifter.OEM floor illumination kit. Rally Armor Mud Flaps. BC BR Coilovers. Invidia N1 Exhaust
    sweet!!! thats so sick i wanna do that too
     
  20. Oct 11, 2010 at 7:18 PM
    #40
    supersuk

    supersuk [OP] Well-Known Member

    Joined:
    Apr 3, 2009
    Member:
    #15529
    Messages:
    111
    Gender:
    Male
    Honolulu, HI
    Vehicle:
    2010 Dcab TRD Sport Magnetic Gray
    Sounds!
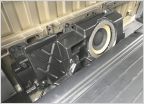
    I don't think you could fit two of these ported back there...One box already takes up almost half of the space and you'd have to have enough room for the ports. Maybe some clever design would work though. Possibly a sub on each side with ports going through the center firing up. That could possibly work if I tune it higher then 30hz which would allow a shorter port. Instead of using two small round ports, i'd have to use square or rectangular. Honestly, I wouldn't mind having two of these subs back there!

    Now you got me thinking. I wanna design that...I'll let you know what I come up with, but its not a priority right now. This would probably gonna cost you an arm and a leg to ship over to you from hawaii.
     

Products Discussed in

To Top