

-
Welcome to Tacoma World!
You are currently viewing as a guest! To get full-access, you need to register for a FREE account.
As a registered member, you’ll be able to:- Participate in all Tacoma discussion topics
- Communicate privately with other Tacoma owners from around the world
- Post your own photos in our Members Gallery
- Access all special features of the site
 Feeler: Extended Cab Clip-on Rear Window Multi-Purpose Shelf
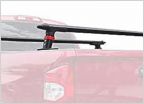 Bed Rack Delima, looking for opinions??
 Anyone daily a Marlin Crawler 1200lb?
 Positive battery terminal
 00' Coolant Specs
LCA Bushings: OEM, Energy Suspension, Whiteline
Discussion in '1st Gen. Tacomas (1995-2004)' started by alphabravo, Oct 8, 2015.
Page 13 of 15
Page 13 of 15


