

-
Welcome to Tacoma World!
You are currently viewing as a guest! To get full-access, you need to register for a FREE account.
As a registered member, you’ll be able to:- Participate in all Tacoma discussion topics
- Communicate privately with other Tacoma owners from around the world
- Post your own photos in our Members Gallery
- Access all special features of the site
 Taking off TRD Stickers
 2021 Speaker upgrade (Please help)
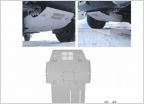 KUAFU Skid plate?
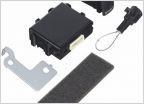 How to change the sensitivity of my alarm?
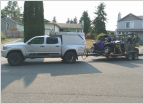 Leaf spring recommendation
 3rd Gen Recovery Gear Thread
Installing Morimoto HID Headlights - installation guide?
Discussion in '3rd Gen. Tacomas (2016-2023)' started by MGMTaco17, Jan 29, 2017.
Page 5 of 6
Page 5 of 6


