

-
Welcome to Tacoma World!
You are currently viewing as a guest! To get full-access, you need to register for a FREE account.
As a registered member, you’ll be able to:- Participate in all Tacoma discussion topics
- Communicate privately with other Tacoma owners from around the world
- Post your own photos in our Members Gallery
- Access all special features of the site
 Older Alpine CDA-7893 with steering controls??
 Help Building a New System
 Underseat subwoofer question
 Troubles after installing a Kenwood DDx616
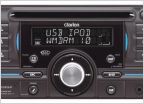 Anyone using this Clarion?
 JOYING Android Head Unit: Apple Carplay / Android Auto Info Thread ( US-JY-TO160N4GS-1 with Canbus)
Midnight Installs
Discussion in 'Audio & Video' started by TurboGT, Oct 5, 2010.


