-
Welcome to Tacoma World!
You are currently viewing as a guest! To get full-access, you need to register for a FREE account.
As a registered member, you’ll be able to:- Participate in all Tacoma discussion topics
- Communicate privately with other Tacoma owners from around the world
- Post your own photos in our Members Gallery
- Access all special features of the site
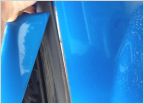 Bed rail caps rubbing paint
 Rumbling Vibrations coming from under 2015 Tacoma PreRunner V6
 HELP make it look awesome. budget is 1500$
 Caliper piston seized?
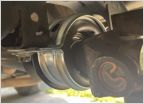 Carrier bearing not aligned Please help
2nd Gen Tacoma Tailgate Lock Installation
Discussion in '2nd Gen. Tacomas (2005-2015)' started by KTJO 4x4, Feb 15, 2020.
- Thread Status:
- Not open for further replies.
- Thread Status:
- Not open for further replies.