1. Welcome to Tacoma World!

    You are currently viewing as a guest! To get full-access, you need to register for a FREE account.

    As a registered member, you’ll be able to:
    • Participate in all Tacoma discussion topics
    • Communicate privately with other Tacoma owners from around the world
    • Post your own photos in our Members Gallery
    • Access all special features of the site

My Off Road Worthy 5x8 Camper Build

Discussion in 'Other Builds' started by jmanscotch, Sep 25, 2018.

  1. Jan 28, 2020 at 8:41 PM
    #41
    jmanscotch

    jmanscotch [OP] Well-Known Member

    Joined:
    Jul 12, 2016
    Member:
    #191851
    Messages:
    874
    Gender:
    Male
    First Name:
    Jake
    Colorado Springs
    Vehicle:
    2021 TRD OR DCLB
  2. Feb 22, 2020 at 8:47 PM
    #42
    jmanscotch

    jmanscotch [OP] Well-Known Member

    Joined:
    Jul 12, 2016
    Member:
    #191851
    Messages:
    874
    Gender:
    Male
    First Name:
    Jake
    Colorado Springs
    Vehicle:
    2021 TRD OR DCLB
  3. Feb 22, 2020 at 8:49 PM
    #43
    POOLGUY

    POOLGUY Well-Known Member

    Joined:
    Feb 19, 2013
    Member:
    #97958
    Messages:
    11,134
    Gender:
    Male
    First Name:
    JEFF
    ALABAMA
    Vehicle:
    2008 TRD Sport 6sp, 2015 TRD Offroad 6sp
    Dobinsons suspension
    :thumbsup:

    Specs?
     
  4. Feb 22, 2020 at 11:28 PM
    #44
    jmanscotch

    jmanscotch [OP] Well-Known Member

    Joined:
    Jul 12, 2016
    Member:
    #191851
    Messages:
    874
    Gender:
    Male
    First Name:
    Jake
    Colorado Springs
    Vehicle:
    2021 TRD OR DCLB
    2010 Lexus GX 460 - Base (essentially a 4runner with some added luxury)
    4.6 L V8 w/ 6 speed trans
    Stock for now, but already spent so much on mods that my card company froze funds for suspicious activity.

    Wheels, tires, lift and sliders all ordered. Crawl control, multi terrain select and a few other OE retrofits planned.

    Overall plan is to build it like the Tacoma as that served my needs well, essentially an “OEM ++” type build, not the ultra rock bouncer or overland focused thing, just nice and capable for a weekend beast.

    I originally sought out a GX 470. I test drove a few that were very affordable, but started focusing on the nicer, low mileage ones. Not only were they few and far between (and out of state), but for a lower mileage one, I was looking at the same kinda price as a newer GX 460...so I searched for a few and found this one in Texas at CarMax. Had it shipped to town (for free, thanks CarMax) and test drove it last week and bought it that day. Now that I see the light, I’m not sure why you’d buy the GX 470 honestly. Unless the higher mileage and thus lower budget ones is a focus. Good 470s and good 460s are about equal cost, yet the 460 has loads more to offer. More modern safety and features, more fuel efficient V8, more modern styling, more upgradable features from modern 4Runners.

    So far very happy, except the wife saying it’s an old mans car lol.
     
    Last edited: Feb 22, 2020
    Kolunatic and POOLGUY[QUOTED] like this.
  5. Feb 23, 2020 at 4:12 AM
    #45
    POOLGUY

    POOLGUY Well-Known Member

    Joined:
    Feb 19, 2013
    Member:
    #97958
    Messages:
    11,134
    Gender:
    Male
    First Name:
    JEFF
    ALABAMA
    Vehicle:
    2008 TRD Sport 6sp, 2015 TRD Offroad 6sp
    Dobinsons suspension
    Nice!

    it might be an old mans ride now, after you do all of your mods. She will be sing a different tune.

    if you do separate build tread, please link it here for the ones who want to follow.
     
    jmanscotch[OP] likes this.
  6. Feb 23, 2020 at 4:42 AM
    #46
    Plain Jane Taco

    Plain Jane Taco Well-Known Member

    Joined:
    Apr 19, 2009
    Member:
    #16179
    Messages:
    40,279
    Gender:
    Male
    USA
    The 460s don't have that pesky timing belt either....like the 470s. In other parts of the world the GX is known as the Prado Land Cruiser. Very capable vehicle. Toyota basically through tuxedo on it along with a Lexus badge and called it a day. 99% of GX owners have no clue what they have. The only off road action most see is that little patch of grass at the corner of the driveway when they cut in too tight.
     
  7. Mar 2, 2020 at 10:36 AM
    #47
    jmanscotch

    jmanscotch [OP] Well-Known Member

    Joined:
    Jul 12, 2016
    Member:
    #191851
    Messages:
    874
    Gender:
    Male
    First Name:
    Jake
    Colorado Springs
    Vehicle:
    2021 TRD OR DCLB
    Wheels and tires mounted. 285/70R17 Falken Wildpeaks on SCS Stealth 6 17x8.5 -10mm offset in dark matte bronze.

    Rubs up front when turning, but the 2.5” lift, JBA UCAs and some trimming will fix that soon.

    6AE70A9D-5DBE-4680-BC22-16BCE743256E.jpg 99380797-31A3-4E8B-899A-44E2371BB514.jpg
     
  8. Jun 20, 2020 at 9:34 PM
    #48
    jmanscotch

    jmanscotch [OP] Well-Known Member

    Joined:
    Jul 12, 2016
    Member:
    #191851
    Messages:
    874
    Gender:
    Male
    First Name:
    Jake
    Colorado Springs
    Vehicle:
    2021 TRD OR DCLB
    She needed a lift, so I went for a 3" Dobinsons lift kit with JBA UCAs, came out pretty nice. Little firmer ride, got rid of some of the nose dive while braking but retained most of the ride quality.

    [​IMG]
    [​IMG]

    Started by seeing if the camper would fit 33's...it does. The tires on it are starting to dry rot, I bought them dirt cheap second hand, so it's time to replace them and I'm a fan of carrying less spare tires and thus all tires (rig and trailer) matching. I've had to talk myself out of spending $450 just to have wheels that match the rig...that's stupid, right...right? The ProComp black wheels should be just fine, though they do take a different wheel lug key than the rig and I would like to only carry one...no, no that's silly. I'll just match the tire sizes.
    [​IMG]

    I've begun tackling the interior and some other maintenance items on the camper. We spent all last summer and winter on house projects and I'm ready to finish up some things and get back out there this summer.

    First thing on the list was replacing the roof vent. I originally didn't splurge on a big name vent fan setup and I've kinda regretted it since. The dirt cheap option I went for was ok, but has taken a beating off road and needed replaced. I used the opportunity to upgrade to a Fan-Tastic Vent 1250 series (has reversible fan direction).

    Let me say, cleaning off the old EternaBond vent sealer was a mess and a chore. The stuff works great, but that also makes it a mini-nightmare to remove.

    [​IMG]

    I attacked it with a few different approaches and ultimately, using a razor blade and "skinning" it, like one would process an animal, was the fastest approach and left behind just as much sticky goo as all other methods.

    [​IMG]

    Done with the mess and new vent brim sealant on. Then new vent in place and new ExternaBond for a weatherproof seal.

    [​IMG]
    [​IMG]

    Next I tackled a little annoyance we had while using the camper; the doors swinging shut when you wanted them to remain open. Easy fix was some spring loaded door catches. The corners of the catch arm were a little too sharp considering they catch on the weather seal of the door, so I added some shrink wrap to the 1/2 inch catch arm section and will just try to be careful to not rip the doors weather seal.

    [​IMG]
    [​IMG]

    Next item was to address the ceiling and figure it out so we can move on to building out the galley area. We've been rocking it with just exposed insulation, which has been fine. Here's how it looks, as a reminder. You can peek our green tape galley designing.

    [​IMG]

    I contemplated many different approaches on how to achieve a ceiling covering, many different materials and methods, ultimately deciding on using a vehicle headliner material and adhering it with 3M spray adhesive. It helped me avoid any screws into metal framing (causing a heat sink and thus sometimes dripping moisture from the ceiling) and was light weight and forgiving, but not perfect. The ceiling isn't smooth, plenty of ripples, uneven joints etc but we can get over the cosmetic imperfections and enjoy the ease and function.

    Pretty straight forward. Ordered a roll of black headliner, with padding, off Amazon (about $50 for a 5' by 9' section). I used some wiring hiding tube stuff, it's like a half circle tube with double sided tape on one side, to help route the vent fan wiring to behind the galley wall, which is where I'll be placing a little junction box for all the cabin wiring (battery and such will be in the galley, just need an actual junction point a little closer to the switches we'll be installing).

    Here's the final product.

    [​IMG]

    The wiring tube installed between the ceiling and headliner:

    [​IMG]

    How it turned out with the vent surround installed

    [​IMG]

    The headliner option isn't perfect by any means, but I'm still happy we went this route. I'll get some 1/2 or 1/4 inch 45 degree trim edge fillers and line the space between the top of the side walls and where the headliner stops for a nice finished look and to stop the headliner from pealing up from the edge.

    [​IMG]

    The front section, at the head of the trailer, is all kinds of curves and was never going to be perfect. It turned out with a lot less wrinkles and bulges then I imagined though. Not too concerned with perfection on the headliner, as it'll serve as an improved cosmetic form as well as a nice improvement to the acoustics inside the trailer.

    [​IMG]

    The last thing I tackled today was the area that's going top be between the "headboard" and the ceiling. I used some white plastic shiny flexible board stuff, the kind that's used in more industrial kitchens on walls and such. It's cheap, flexible, sturdy enough and easy to clean. Hard to see in the photo, but it has a finishing trim on the top to create a clean line at the headliner transition and I kept all but 4 bolts below the line which will be seen when the headboard is built.

    [​IMG]

    That's it for today, off to play some tomorrow.

    Cheers!
     
    baldridge, SuperBad and POOLGUY like this.
  9. Jun 21, 2020 at 4:59 AM
    #49
    POOLGUY

    POOLGUY Well-Known Member

    Joined:
    Feb 19, 2013
    Member:
    #97958
    Messages:
    11,134
    Gender:
    Male
    First Name:
    JEFF
    ALABAMA
    Vehicle:
    2008 TRD Sport 6sp, 2015 TRD Offroad 6sp
    Dobinsons suspension
    Are you still running the wheel adapters, or have you switch out the axle on the trailer?
     
  10. Jun 21, 2020 at 6:56 AM
    #50
    jmanscotch

    jmanscotch [OP] Well-Known Member

    Joined:
    Jul 12, 2016
    Member:
    #191851
    Messages:
    874
    Gender:
    Male
    First Name:
    Jake
    Colorado Springs
    Vehicle:
    2021 TRD OR DCLB
    Haven’t yet but it’s on my short list of things to order.

    I have changed my mind and decided to go with trailer brakes though. Don’t need them, weighing in at 1,300 lbs or so, but think they’ll improve the experience enough to be worth the expense. Plus, if I’m buying a new axle, it only makes sense to upgrade now and not regret it later.
     
    POOLGUY[QUOTED] likes this.
  11. Jul 21, 2020 at 6:22 AM
    #51
    jmanscotch

    jmanscotch [OP] Well-Known Member

    Joined:
    Jul 12, 2016
    Member:
    #191851
    Messages:
    874
    Gender:
    Male
    First Name:
    Jake
    Colorado Springs
    Vehicle:
    2021 TRD OR DCLB
    Working through the interior buildout still. Started with building a headboard of sorts that'll house some "secret" storage, cup holders, general item bin and a dual USB charging port.

    Mocking it up, going to finished it out with some trim and caulk soon. Uses the curved space at the front of the trailer and not much more.

    [​IMG]
    [​IMG]


    Then remove the stainless bin and you get access to some out of sight storage for whatever (probably extra blankets mostly).

    [​IMG]


    I threw together a galley area that fit some of our basic needs. I am going to fine tune it, add some shelving, nets, cubbies, etc but this is a good start to use and adapt from. Still need to finish staining and sealing/caulking everything.

    Looking into the back of the trailer, main working surface is about 19" deep with room for electrical and battery underneath.

    [​IMG]


    I made a top storage shelf that'll house the foldable table, camping chairs and other misc. Will adapt some eye-lets and bungee cords for securing them during travels.

    [​IMG]


    Up top, you'll see how I'm routing my electric. I wanted to keep it out of the way of getting snagged but also keep it relatively accessible so I could troubleshoot/repair and add on in the future. Some plastic trim painted black and tacked on between the wood sidewall and headliner does the trick. Then the wiring from the porch lights and ceiling fan are routed down protective tubing and will terminate at a control center going inside on the inside of the galley wall.

    [​IMG]


    How the interior sleeping space is turning out so far:

    [​IMG]
    [​IMG]


    More soon.
     
    POOLGUY, Scott B. and SuperBad like this.
  12. Aug 1, 2020 at 10:10 PM
    #52
    jmanscotch

    jmanscotch [OP] Well-Known Member

    Joined:
    Jul 12, 2016
    Member:
    #191851
    Messages:
    874
    Gender:
    Male
    First Name:
    Jake
    Colorado Springs
    Vehicle:
    2021 TRD OR DCLB
    Pushing through some big and little items to try to get this project done once and for all.

    Finished building out the galley and storage and stained and cleared it all. I ran out of stain with about four square foot remaining and the only thing more annoying then that is when I returned with the new quart of stain, I climbed into the trailer and started staining again and immediately dropped the ENTIRE can of stain on the carpet, sweet Jesus.

    [​IMG]

    Now I had to run and get another new quart of stain and have to plan for new carpet as well.

    Galley and sleeping quarters wrapped up with stain.

    [​IMG]
    [​IMG]

    Wrapped that fiasco up and started in on other finishing touches, like a faux marble galley counter top and a white backsplash, cut holes for galley and rear light switches and battery monitor display.

    [​IMG]

    Then it's time to dive into the electrical side. As a reminder, I've gone with all 12 volt DC power in the trailer, no 120 volt AC at all, for wiring simplicity and the fact that we just don't need anything that runs off AC.

    We stopped at Batteries Plus and grabbed a 105 amp hour deep cycle AGM battery with a 30 month warranty for about $300 out the door (no core). I then went about placing it in the center of the rear galley lower deck and installed the switch, main 30 amp fuse and misc other items I've had laying around for the last two years.

    [​IMG]
    [​IMG]

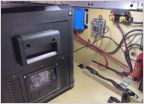
    I also wired in a Battery Tender plug, as it's how we'll recharge the battery for a while before we move to solar. I also bought a RV battery monitor that monitors total use versus charging changes, in amp hours, percentages and such, a great unit for about $45. With the deep cycle battery, you don't want to drain it more than 50% and this helps me monitor that more precisely than battery voltage alone. I also got to see how much current each item I run draws.

    Here's it showing the % remaining battery

    [​IMG]

    Random note, here's what each item I have draws for current:

    Fantastic Vent Fan on High - 1.8 amps
    Medium - 1.4 amps
    Low - 1.0 amps

    LED light ring around fan - 0.8 amps
    Footwell LED lights (2 12") - 1.0 amps (both total)
    Porch lights (sides/back) - 0.250 amps (each)

    USB charge port with iphone plugged in - 0.8 amps

    Obviously, before I could measure those outputs, I had to finishing wiring the switches and everything inside the cabin, here's some of what that looked like. Gotta clean up a few little things on the wiring, but almost done.

    [​IMG]


    The lighting lights it all up very well. Everything is on it's own switch: Fan mounted LED ring, footwell LEDs, porch lights on the drivers, passengers and galley side and one to illuminate the galley space as well.

    [​IMG]
    [​IMG][​IMG]
    [​IMG]


    Dual-dual USB charging ports in the headboard as well.

    [​IMG]


    Will finish some wiring clean up, trim, caulk and other things soon, then new tires and we're going to get out and use it a bit before customizing the galley space some more. Some other interior and exterior changes coming.

    Cheers
     
    Last edited: Aug 2, 2020
  13. Aug 3, 2020 at 7:51 AM
    #53
    665.0coupe

    665.0coupe Well-Known Member

    Joined:
    Jul 10, 2019
    Member:
    #298803
    Messages:
    127
    Gender:
    Male
    First Name:
    Luke
    Kansas
    Vehicle:
    2020 DCSB OR MT
    What is the distance from the headboard to the galley? How tall of a person could sleep in it?
     
  14. Aug 3, 2020 at 9:11 AM
    #54
    jmanscotch

    jmanscotch [OP] Well-Known Member

    Joined:
    Jul 12, 2016
    Member:
    #191851
    Messages:
    874
    Gender:
    Male
    First Name:
    Jake
    Colorado Springs
    Vehicle:
    2021 TRD OR DCLB
    It’s 74.5” from headboard to toeboard, so technically speaking, it’ll fit someone 6’2.5” tall. It’s also 56.5” wide.

    I’m 6’1” and expect to use the 1.5” of clearance more by my head. Also, I don’t sleep 100% sprawled out, I’m a side sleeper and naturally coil up a little, but if I need to stretch some, there’s room for that as well as room to fit the sheets and such on the bed easily.
     
    665.0coupe[QUOTED] likes this.
  15. Aug 3, 2020 at 9:28 AM
    #55
    665.0coupe

    665.0coupe Well-Known Member

    Joined:
    Jul 10, 2019
    Member:
    #298803
    Messages:
    127
    Gender:
    Male
    First Name:
    Luke
    Kansas
    Vehicle:
    2020 DCSB OR MT
    Thanks, your camper looks great! I'm about 5'7" or 5'8" so that would work for me, but I don't know I would want it as tight as 1.5"!

    Keep us up dated!
     
  16. Aug 3, 2020 at 9:56 AM
    #56
    jmanscotch

    jmanscotch [OP] Well-Known Member

    Joined:
    Jul 12, 2016
    Member:
    #191851
    Messages:
    874
    Gender:
    Male
    First Name:
    Jake
    Colorado Springs
    Vehicle:
    2021 TRD OR DCLB
    Appreciate it.

    Yeah it’s a bit tight, but fits a full/double sized bed perfectly and that’s what I based it off of. Plus, every inch I didn’t oversized it was one more inch of storage in the lower galley, so it’s a constant compromise.
     
  17. Aug 10, 2020 at 8:45 AM
    #57
    jmanscotch

    jmanscotch [OP] Well-Known Member

    Joined:
    Jul 12, 2016
    Member:
    #191851
    Messages:
    874
    Gender:
    Male
    First Name:
    Jake
    Colorado Springs
    Vehicle:
    2021 TRD OR DCLB
    Well, trailer is all wrapped up, pending some little storage solution tweaks and maintenance. Pulled it out of the garage and cleaned it up and she’s ready for some weekend-overlanding.

    As you can see, I caved and got the matching wheels and tires on the camper, thanks @SCSPerformance for a rad setup. Your “blemished” wheels make perfect trailer wheels.

    In the next month or so when we’re out camping next, I’ll probably record a walk around video of everything to celebrate the end the two year build journey and try to detail anything I’ve missed along the way.

    Cheers!

    Jake

    3615CF1A-46B4-4C5B-98AF-F6F3EC6C692E.jpg 6F9AA4B5-A85B-4B73-8AA0-6B3E85C29AD3.jpg
     
    Last edited: Aug 12, 2020
  18. Aug 10, 2020 at 10:53 AM
    #58
    Naveronski

    Naveronski Well-Known Member

    Joined:
    Sep 14, 2013
    Member:
    #112501
    Messages:
    9,469
    Gender:
    Male
    Fort Worth
    Vehicle:
    2014 MGM DCSB TRD:OR
    I saw you replaced your a-frame couple with a receiver hitch, but then changed it again.

    Who made the second/current setup you're using?
     
  19. Aug 10, 2020 at 11:11 AM
    #59
    jmanscotch

    jmanscotch [OP] Well-Known Member

    Joined:
    Jul 12, 2016
    Member:
    #191851
    Messages:
    874
    Gender:
    Male
    First Name:
    Jake
    Colorado Springs
    Vehicle:
    2021 TRD OR DCLB
    I only swapped from the stock A-frame standard ball hitch to the extended tongue with the lock and roll hitch.

    The a-frame to receiver tube adapter I ran came from Adventure Trailers and was this piece, which is laying upside down in the pic:

    EA0F1A96-DA15-4D4E-A1DE-6F063DF9FC6B.jpg


    Here’s the complete combo labeled to help break it down. AT a-frame adapter -to- standard receiver tube extension -to- lock-n-roll hutch:

    5D356B2E-B59F-4DD8-82F1-94D078304B6D.jpg
     
  20. Aug 10, 2020 at 11:15 AM
    #60
    Naveronski

    Naveronski Well-Known Member

    Joined:
    Sep 14, 2013
    Member:
    #112501
    Messages:
    9,469
    Gender:
    Male
    Fort Worth
    Vehicle:
    2014 MGM DCSB TRD:OR
    Oh! Okay. I saw the short receiver tube in the first pic, longer tube in the second pic, and that prompted the question.
     

Products Discussed in

To Top