

-
Welcome to Tacoma World!
You are currently viewing as a guest! To get full-access, you need to register for a FREE account.
As a registered member, you’ll be able to:- Participate in all Tacoma discussion topics
- Communicate privately with other Tacoma owners from around the world
- Post your own photos in our Members Gallery
- Access all special features of the site
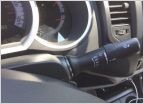 Intermittent Wiper Mod complete
 2012 TRD Sport Wheel bearing noise/replacement
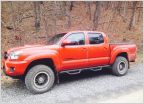 T0678CC nerf bars
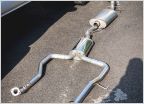 P0157 Code Help
 Grill fog light dilema???
 TRD beadlock wheels center cap sizing
Block Heater Install (My Experience, 2012 TRD Sport)
Discussion in '2nd Gen. Tacomas (2005-2015)' started by Colinator4321, Feb 29, 2020.

