

-
Welcome to Tacoma World!
You are currently viewing as a guest! To get full-access, you need to register for a FREE account.
As a registered member, you’ll be able to:- Participate in all Tacoma discussion topics
- Communicate privately with other Tacoma owners from around the world
- Post your own photos in our Members Gallery
- Access all special features of the site
 NoeWiy's MGM Build
 Chuks Cement TRDOR
 TacoProMatt's 2017 Cement Tacoma Pro
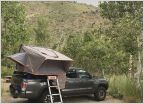 Kyle_’s Build Thread
 2020 Tacoma SR5
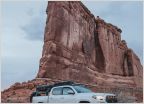 Dirty Deeds Overland Tacoma Build
Hodakaguy's Overland Tacoma Builds - on to new adventures.
Discussion in '3rd Gen. Builds (2016-2023)' started by Hodakaguy, Jan 12, 2018.
Page 17 of 18
Page 17 of 18


