1. Welcome to Tacoma World!

    You are currently viewing as a guest! To get full-access, you need to register for a FREE account.

    As a registered member, you’ll be able to:
    • Participate in all Tacoma discussion topics
    • Communicate privately with other Tacoma owners from around the world
    • Post your own photos in our Members Gallery
    • Access all special features of the site

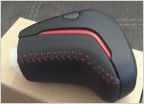
ECT Stealth PRO shift knob

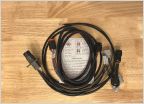
Discussion in '3rd Gen Tacoma Parts Marketplace (2016-2023)' started by MESO, Mar 8, 2019.

  1. Mar 14, 2020 at 4:21 PM
    #2241
    baldbeardedtaco

    baldbeardedtaco Well-Known Member

    Joined:
    Sep 4, 2018
    Member:
    #265223
    Messages:
    3,321
    Gender:
    Male
    FL
    Vehicle:
    18 TRD Sport DCSB MGM
    That’s not the same part number for the connectors I got so I’m not sure the pins will work. These are the pins for the connector I used IL-AG5-PC1-5000 (pin) and IL-AG5-C1-5000 (socket) this link may help (it’s the female connector for my setup)
    https://www.digikey.com/product-detail/en/IL-AG5-5P-S3C1/670-2209-ND/2044116?utm_cid=1205537&so=63334776&mkt_tok=eyJpIjoiWkRNME9EY3hNemt5T0dKbCIsInQiOiJiVHkxbEFOZ2FUelU0cVB6XC8ySEFOZU4xRlM2bVlzdVdrM1hHOU9WVTZySTMyN0FWU3FiRXE3Sm1SSGNrZm02QnkzQnBJbUVEanpIXC9RTHR1elNSaWhGZ0pYaG1Ja2M4aXRJMnRYWDZPSjhTbTNWaTU2ZXNrZzh3NHRoKzBjY3ZXIn0=

    not like I would be much help identifying the connector you have but if you put up a picture someone may help or try searching that part number on the link above- it lists mating and associated parts near the bottom. you dont need both male and female connectors?

    what part of the panhandle?
     
  2. Mar 14, 2020 at 4:23 PM
    #2242
    caribe makaira

    caribe makaira Well-Known Member

    Joined:
    Feb 13, 2011
    Member:
    #51121
    Messages:
    11,753
    Gender:
    Male
    Caribbean, Puerto Rico
    Vehicle:
    05 PreRunner TRD Offroad AutoTrans
    Hood Struts, My version Fogs always ON, Map & Overhead Light Mod,
    This site contains affiliate links for which the site may be compensated.
    Pilvr83[QUOTED] likes this.
  3. Mar 14, 2020 at 4:32 PM
    #2243
    airmac_11

    airmac_11 Well-Known Member

    Joined:
    Nov 13, 2018
    Member:
    #272596
    Messages:
    265
    Gender:
    Male
    Vehicle:
    2019 Cement DCSB Premium/ Tech TRD 4x4 Sport
    Great write up- wish there was a video. I’m such a noob that I need more hand-holding connect my MESO 3rd Brake Light “bed cam” to the MESO shifter .
     
    CttAznRanger likes this.
  4. Mar 14, 2020 at 4:48 PM
    #2244
    baldbeardedtaco

    baldbeardedtaco Well-Known Member

    Joined:
    Sep 4, 2018
    Member:
    #265223
    Messages:
    3,321
    Gender:
    Male
    FL
    Vehicle:
    18 TRD Sport DCSB MGM
    I wouldnt say it’s a write up, just some proud pictures along the way :D

    couldn’t have done it without @caribe makaira help on figuring out the wiring and @VicNic3 on sourcing the connectors. As far as the pins/sockets, again the non professional way because lack of proper crimper, I just used the needle nose pliers. If you look at the terminals it has 2 tangs (whatever there called) 1 holds/crimps the bare wire and the other holds/crimps the insulated wire. I’m also a self taught solder. Mine was also easy because the original camera switch was also momentary.
     
  5. Mar 14, 2020 at 5:25 PM
    #2245
    CttAznRanger

    CttAznRanger Crazy NE Asian with the Cali Lean (temporary)

    Joined:
    Dec 3, 2018
    Member:
    #274702
    Messages:
    4,737
    Gender:
    Male
    First Name:
    Brandon
    Boston, MA
    Vehicle:
    2018 Tacoma TRD Sport
    You NEED to do a detailed install with parts and stuff. This is exactly what I want to do, except with more cameras and stuff.
     
    BOMBS likes this.
  6. Mar 14, 2020 at 7:52 PM
    #2246
    BOMBS

    BOMBS Well-Known Member

    Joined:
    Jun 22, 2018
    Member:
    #257154
    Messages:
    1,418
    Gender:
    Male
    Vehicle:
    2017 Black Tacoma TRD Off Road
    I concur.
     
  7. Mar 14, 2020 at 8:07 PM
    #2247
    baldbeardedtaco

    baldbeardedtaco Well-Known Member

    Joined:
    Sep 4, 2018
    Member:
    #265223
    Messages:
    3,321
    Gender:
    Male
    FL
    Vehicle:
    18 TRD Sport DCSB MGM
    I didn’t take any more pictures than already posted and trying to explain using pliers on the pins/sockets is well just hard to explain but if you look at them in hand you’ll get it. YouTube on soldering is really how I learned yrs back. As far as which wires to tap- if you click the back arrow on one of my posts (or on @caribe makaira post) and follow our interaction he is the one that helped me identify the correct wires (for this kit I only had 3)

    the parts I used and the steps I took are specific to the beat sonic front camera kit (not sure if the parts are similar to any other front camera kit, although I know the switch function is different then most front/anytime camera kit) the beat sonic includes a switch that is momentary so tapping into this was probably the easiest. If your camera switch is not then you’ll have to follow some of the posts instructions on using the pactr7 module thing (unless you plan on holding the button to keep on). Which you’ll probably also need to add more cameras and stuff. That is above me
     
  8. Mar 14, 2020 at 8:13 PM
    #2248
    baldbeardedtaco

    baldbeardedtaco Well-Known Member

    Joined:
    Sep 4, 2018
    Member:
    #265223
    Messages:
    3,321
    Gender:
    Male
    FL
    Vehicle:
    18 TRD Sport DCSB MGM
    These are the parts I used (m/f connectors and the associated pins/sockets) not oem parts but neither is my front camera kit and I think 2 connectors ea m/f (1 pair for possible future use) and 10 pins and sockets (needed only 3 ea) was like 5 bucks I think and 5$ shipping

    (Again, these are the connectors for the beat sonic camera kit switch)
    image.jpg image.jpg
     
    CttAznRanger, VicNic3 and BOMBS like this.
  9. Mar 15, 2020 at 11:00 AM
    #2249
    RushT

    RushT Amateur Everythingist

    Joined:
    Dec 10, 2017
    Member:
    #238171
    Messages:
    5,650
    Gender:
    Male
    North Texas
    Vehicle:
    '18 DCSB TRDOR Inferno
    I wonder if this is possible with the germese lab kit. There’s no separate switch, but there’s gotta be a signal wire to the HU somewhere in their harness.
     
  10. Mar 15, 2020 at 1:48 PM
    #2250
    baldbeardedtaco

    baldbeardedtaco Well-Known Member

    Joined:
    Sep 4, 2018
    Member:
    #265223
    Messages:
    3,321
    Gender:
    Male
    FL
    Vehicle:
    18 TRD Sport DCSB MGM
    I have no idea. Is that the steering wheel controlled unit? Might try emailing the company asking if they can help identify the right wires for an additional switch
     
  11. Mar 15, 2020 at 2:22 PM
    #2251
    caribe makaira

    caribe makaira Well-Known Member

    Joined:
    Feb 13, 2011
    Member:
    #51121
    Messages:
    11,753
    Gender:
    Male
    Caribbean, Puerto Rico
    Vehicle:
    05 PreRunner TRD Offroad AutoTrans
    Hood Struts, My version Fogs always ON, Map & Overhead Light Mod,
    Yes
     
    CttAznRanger[QUOTED] likes this.
  12. Mar 15, 2020 at 6:34 PM
    #2252
    CttAznRanger

    CttAznRanger Crazy NE Asian with the Cali Lean (temporary)

    Joined:
    Dec 3, 2018
    Member:
    #274702
    Messages:
    4,737
    Gender:
    Male
    First Name:
    Brandon
    Boston, MA
    Vehicle:
    2018 Tacoma TRD Sport
    Any in depth write-up on how to go about it? I'm kinda pressed for time at the moment, so I don't have time to dive into research and trial and error.
     
  13. Mar 15, 2020 at 8:10 PM
    #2253
    caribe makaira

    caribe makaira Well-Known Member

    Joined:
    Feb 13, 2011
    Member:
    #51121
    Messages:
    11,753
    Gender:
    Male
    Caribbean, Puerto Rico
    Vehicle:
    05 PreRunner TRD Offroad AutoTrans
    Hood Struts, My version Fogs always ON, Map & Overhead Light Mod,
    If you can get MESO to make you one like this, it be a snap...

    upload_2020-3-15_23-10-25.jpg
     
  14. Mar 17, 2020 at 1:12 AM
    #2254
    baldbeardedtaco

    baldbeardedtaco Well-Known Member

    Joined:
    Sep 4, 2018
    Member:
    #265223
    Messages:
    3,321
    Gender:
    Male
    FL
    Vehicle:
    18 TRD Sport DCSB MGM
    I’m not quite sure if this is what you guys were wanting (add this to the posts I’ve already made) this is more on the pins and sockets without a proper crimper.

    after looking at my add on harness, I wish I did a couple things differently (nothing wrong with it functionally just My ocd) mainly I wished I matched the white/yellow from Meso’s connector instead of red/green and then was thinking I can de pin Meso’s connector to eliminate the solder connection (still need to do this part)

    original ED7DB587-C144-49E6-983E-CA1B6A6559DB.jpg
    New D9905BAE-7223-46EA-9B64-21E7986429EF.jpg

    so I decided to take a few pictures of the process I took for the pins/sockets. Take note of the stripped wire and insulation in relation to the pin (or socket) 5E2200CC-01A5-4EA5-B1CE-B1A1197C814D.jpg

    Then make the 1st bend over the insulation 5406E160-882A-4700-9DE9-EBEEF5D51C1C.jpg

    follow up with the 2nd bend over the insulation. Then repeat over the bare wire. Be careful with the needle nose pliers to not damage the terminal but at the same time crimp it so it’s secured (overlap the tangs). F778517B-7088-4071-A7DB-CD536665A1AD.jpg

    For the doubled up wires you have to strip more wire where you’d originally want insulation (in order to fit). I placed the wires on top of each other rather than side by side in order to fit into the connector.25B39449-6380-4F7B-9438-9B1634209CAB.jpg

    because I wanted to make sure 1 of the wires didn’t pull out I soldered these. 8A6FEC90-D173-463B-B30B-705DCDBD698D.jpg
    59FC5106-743C-477B-84B2-BDEBDC0F2254.jpg

    I then added heatshrink on the double wires (not sure it’s really needed but I felt better about it since I couldn’t crimp onto the insulation and didn’t want a weak point with possibly bending and breaking the wires over time). Don’t cover the pin/socket though so it fits into the connector. 74E2FC3B-3BE9-45EF-9D93-D62155DECE68.jpg
    And then insert into the housing. 44AD2A84-F0BD-47BC-8D0B-40B56583F5F9.jpg
     
  15. Mar 17, 2020 at 5:12 AM
    #2255
    caribe makaira

    caribe makaira Well-Known Member

    Joined:
    Feb 13, 2011
    Member:
    #51121
    Messages:
    11,753
    Gender:
    Male
    Caribbean, Puerto Rico
    Vehicle:
    05 PreRunner TRD Offroad AutoTrans
    Hood Struts, My version Fogs always ON, Map & Overhead Light Mod,
    upload_2020-3-17_8-12-19.jpg
     
  16. Mar 17, 2020 at 9:45 AM
    #2256
    MESO

    MESO [OP] Major Modder Vendor

    Joined:
    Feb 16, 2015
    Member:
    #148809
    Messages:
    16,294
    Gender:
    Male
    State of Jefferson
    Vehicle:
    2016 DCLB TRD HELLCAT SWAP
    Love seeing everyone's ideas for hooking up the other stealth switch. Good info!
    P.S I will have another big batch of COMPLETE STEALTH KNOBS-BLACK available later today:D
     
  17. Mar 17, 2020 at 9:59 AM
    #2257
    hyrule_trd

    hyrule_trd It’s a Secret to Everybody

    Joined:
    Jan 26, 2020
    Member:
    #317260
    Messages:
    9,880
    Gender:
    Male
    First Name:
    Eric
    Harford County, MD
    Vehicle:
    2020 Black TRD OR
    Ironman Stage 1 Foam Cell Pro lift kit, 255/85/16 Cooper ST Maxx, SCS BR6 Wheels, SPC UCA, Heated seats, MESO TRD start button, Meso Total Tail v1, Meso V5 mirror white DRL turns, bed decal, ditch and hidden bumper lights, screen protech, RAV4 radio knobs, steering wheel anytime camera kit, dash cam, ECGS bushing, Timbren Active Off Road bump stops with Wheelers flip kit. 35% Xpel CS Ceramic Tint, KD Max Tune, SumoSprings front bump stops, RRW Sliders ‌ ‌ ▲ ▲‌ ▲
    ohhh, I’ll be watching for that!
     
    MESO[QUOTED][OP] likes this.
  18. Mar 17, 2020 at 2:37 PM
    #2258
    VoodooHead2020

    VoodooHead2020 Active Member

    Joined:
    Feb 4, 2020
    Member:
    #318236
    Messages:
    28
    Gender:
    Male
    First Name:
    Adam
    Vehicle:
    2020 Voodoo Limited Tacoma Double cab
    Nothing yet lol
    They are up on the website:)
    I scored mine Hell yeah
    Only one more Meso Mod needed (puddle pods) gotta get some more money now,lol
     
    MESO[OP] and Tacospike like this.
  19. Mar 17, 2020 at 3:05 PM
    #2259
    johhen

    johhen Member

    Joined:
    Jan 6, 2020
    Member:
    #315278
    Messages:
    15
    Gender:
    Male
    Shut up and take my money!

    Got one! :)
     
    VoodooHead2020 likes this.
  20. Mar 17, 2020 at 4:54 PM
    #2260
    Canadianguy91

    Canadianguy91 Well-Known Member

    Joined:
    Mar 18, 2017
    Member:
    #213622
    Messages:
    2,219
    Gender:
    Male
    First Name:
    Sean
    Halton Hills, Ontario, Canada
    Vehicle:
    2016 Limited
    Krown undercoating, Protect a plate, blindspot mirrors, Reese stainless steel towing ball, Bakflip MX4 tonneau cover, Tufskinz tailgate letter inserts, Console organiser, Tinted windows, LED interiors, Bed lights, Hood lights, Black Canadian flag decal (@bfeth), Oem bed mat, WeatherTech floor liners, Arctic Claw XSI tires, Recovery Shackle, Ultimate LED turn signals V3 @mesojdm, OEM TRD Off-Road tow hook, Bilstein 5100's with ARB's Old Man Emu 2887 coils, ICON progressive add a leaf, General Grabber ATX tires, Fuel ripper rims, Auxbeam F-16 H11 Led headlights, Borla S-type catback exhaust with black tip, custom powertray, vinyl badge inlays, (@rrentrop), Rear diff breather mod, Redarc trailer break controller https://m.youtube.com/watch?v=qqN7m1pc6AA
    I want one bad but 300, ouchhhh
     
To Top