1. Welcome to Tacoma World!

    You are currently viewing as a guest! To get full-access, you need to register for a FREE account.

    As a registered member, you’ll be able to:
    • Participate in all Tacoma discussion topics
    • Communicate privately with other Tacoma owners from around the world
    • Post your own photos in our Members Gallery
    • Access all special features of the site

Front brake pads and rotors replacement...

Discussion in '1st Gen. Tacomas (1995-2004)' started by Killer, Oct 21, 2010.

  1. Oct 21, 2010 at 8:13 AM
    #1
    Killer

    Killer [OP] Well-Known Member

    Joined:
    May 19, 2010
    Member:
    #37417
    Messages:
    595
    Gender:
    Male
    Mobile, Al.
    Vehicle:
    98 4x4 TRD V6 3.4L SR5 XCab Gold with Tan Int
    19,000 Original Miles, Factory Alarm, Factory Tow Package, Low Profile UWS Black Tool Box, 20ft. of Dynamat Xtreme, Pioneer Double Din DVD 3200BT, IPod Holder, Q Form Kick Panels, 3 Pairs of MB Quart component speakers, JL Audio Stealthbox, Alpine PDX-5 amp, PIAA Foglights, WeatherTech Floor Mats, Maxxis Big Horn Mud Tires 32 x 11.5 R x 15, Wet Okole Seat Cover for 60/40 Bench, 5100's Front & Rear, Wheeler's Single Leaf AAL, Warn 8,000 Winch, Warn Transformer Brush Guard, Stebel Nautilus Compact Horn
    I am going to tackle front brake pads and rotors Saturday (for the first time on my 1998 4x4 Tacoma). Anyone have any advice or instructions?
     
  2. Oct 21, 2010 at 9:46 AM
    #2
    fireturk41

    fireturk41 I like to break shit!

    Joined:
    Dec 23, 2008
    Member:
    #11857
    Messages:
    4,840
    Gender:
    Male
    First Name:
    Kevin
    High Point, NC
    Vehicle:
    280k miles
    SAS, Locked front rear, Ufab sliders and bumpers, air compressor, 35" BFG KM2 on steelies and 36" TSLs
    dont mess up?
     
  3. Oct 21, 2010 at 9:52 AM
    #3
    steve o 77

    steve o 77 braaap

    Joined:
    Nov 29, 2009
    Member:
    #26726
    Messages:
    19,924
    Gender:
    Male
    First Name:
    Steven
    In a corn field, OH
    Vehicle:
    1990 Chevy Siveraydo
    245k+ miles, rust, working AC, bald eagles
    Its extremely easy.
    My only tip is to pop the cap off the master cylinder and use some big channel locks to compress the pistons back into the caliper to fit the thicker pads and rotor. Have someone watch the master cylinder to make sure it doesn't overflow.
     
  4. Oct 21, 2010 at 9:54 AM
    #4
    stucksucksnayota

    stucksucksnayota Well-Known Member

    Joined:
    Sep 29, 2007
    Member:
    #2863
    Messages:
    622
    Gender:
    Male
    First Name:
    Barry
    Fort Smith, Arkansas
    Vehicle:
    14 Taco 4x4 TRD Sport DCSB
    OEM roof rack, Shorty antenna (eBay), soft tonneau cover, K&N drop in air filter, bed mat, interior LED lights, 5100's, MT tires to come soon!!!
    This will make it alot easier I have never used channel locks I use a big C clap but I think channe locks would be easier!

    Good luck
     
  5. Oct 21, 2010 at 10:30 AM
    #5
    Mod

    Mod Well-Known Member

    Joined:
    Jul 29, 2010
    Member:
    #40950
    Messages:
    1,787
    Gender:
    Male
    CR, WA
    Vehicle:
    1999 8 port 3RZ 4WD SR5
    stock
    Are your rotors warped?? (pulsing pedal). If not,,there is no reason to replace them or have them turned. the thicker the rotor,,the better they dissipate/absorb heat. You can unidirectional them with a 3m brillo disk and die grinder for new pad break-in. Hose down the rotor with break kleen before reinstall. if they are warped,,well,,they will always pulse and eat pads faster.

    Just replaced the front OEM pads on my 99 Taco a few weeks back (171k mileage). the rear shoes are still looking good.

    Use some of this stuff on the backside of the pads that directly contact the caliper, lay on a nice layer. follow the directions. you can get it at napa or ?? I tossed the anti squeal shims that came with the pads,,never had good luck with those things.
    http://www.crcindustries.com/auto/content/prod_detail.aspx?PN=05016&S=N

    Good info from Steve o, compress those pistons almost completely into the caliper before sliding the new pads in. Pop the cap on the MC and make sure you dont overspooge fluid all over the inner fender. you might have to pull some out to prevent this. a big rubber battery filler squeeze bulb works nice for that.

    Have a bungie or HD zip tie ready, to support the caliper as you work on other stuff. you dont want that heavy caliper dangling on the used brake hose, you could crack the inside and have caliper stick issues.

    Clean up the slider pins and shims well, so that the caliper can self align easily. if not the caliper can stick/hang up and burn one pad faster than the other. some folks smear a thin layer of white grease or bearing grease on those pins and shims, just so it can self align better. dont get crazy with the grease, a little bit goes along ways, and you dont want any dropping on the new pads.

    hope this helps.
     
  6. Oct 21, 2010 at 11:38 AM
    #6
    steve o 77

    steve o 77 braaap

    Joined:
    Nov 29, 2009
    Member:
    #26726
    Messages:
    19,924
    Gender:
    Male
    First Name:
    Steven
    In a corn field, OH
    Vehicle:
    1990 Chevy Siveraydo
    245k+ miles, rust, working AC, bald eagles
    good info. I just like to get them turned if I can feel ridges on the rotor with my finger. It is a heavily debated topic though so just do what you want OP.

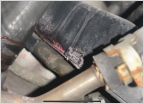
    Just thought I'd post a pic of how I supported my caliper when I was replacing one of my wheel studs.
    [​IMG]
     
  7. Oct 21, 2010 at 6:49 PM
    #7
    WASTE MANAGEMENT

    WASTE MANAGEMENT Well-Known Member

    Joined:
    Oct 17, 2009
    Member:
    #24467
    Messages:
    184
    Gender:
    Male
    First Name:
    Travis
    Umatilla Florida
    Vehicle:
    97 tacoma 4x4 3.4 w/5 speed
    new 31x10.5 tires, mag wheels, drilled rotors, new sound, and a cb.
    If you crack the bleader on the caliper and put a vac line on it you can point in into a container for the fluid to go into.
    Push the pads back with even pressure on the old pads with a screwdriver, you can do this while it is still assembled. Just pop out the retainer springs and put a screwdriver between the pads and rotor, and pry.
    When your done changing out the pads make short strokes on the petal to refill the caliper, with the eng. off, then there is new fluid in the caliper and you can top off the master cyl.
    I have changed thousands of brakes and this is the best way I have found, and I have never bolwn out an ABS pump, but have seen several people do it by pushing fluid backwards.
     
  8. Oct 21, 2010 at 6:54 PM
    #8
    steve o 77

    steve o 77 braaap

    Joined:
    Nov 29, 2009
    Member:
    #26726
    Messages:
    19,924
    Gender:
    Male
    First Name:
    Steven
    In a corn field, OH
    Vehicle:
    1990 Chevy Siveraydo
    245k+ miles, rust, working AC, bald eagles
    I never knew you could mess up the ABS by doing that. Good thing I don't have ABS lol.

    I did do the brakes on my moms old explorer by pushing the fluid backwards and it had no problems with the ABS after.
     
  9. Oct 21, 2010 at 6:59 PM
    #9
    BG04

    BG04 Well-Known Member

    Joined:
    Nov 1, 2009
    Member:
    #25292
    Messages:
    206
    Gender:
    Male
    Vehicle:
    04 2.7 SR5 4X4
    I use a old brake pad and a c-clamp to recess the pistons.
     

Products Discussed in

To Top