

-
Welcome to Tacoma World!
You are currently viewing as a guest! To get full-access, you need to register for a FREE account.
As a registered member, you’ll be able to:- Participate in all Tacoma discussion topics
- Communicate privately with other Tacoma owners from around the world
- Post your own photos in our Members Gallery
- Access all special features of the site
 New Guy Roast/Fumoto Valve Durability
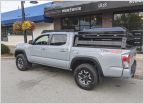 Bed rack and tent recommendations
 Looking for Bed rail tie down
 2016 aftermarket tow hitch / wiring mounting installation question
 Bypassing the Reisistors on LED Turn Signaling Bulbs
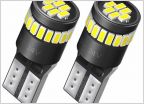 Licence Plate Light - LED - Flashes intermittently
ARB Rated Recovery Point
Discussion in '3rd Gen. Tacomas (2016-2023)' started by Joe23, May 26, 2017.
Page 8 of 12
Page 8 of 12

