

-
Welcome to Tacoma World!
You are currently viewing as a guest! To get full-access, you need to register for a FREE account.
As a registered member, you’ll be able to:- Participate in all Tacoma discussion topics
- Communicate privately with other Tacoma owners from around the world
- Post your own photos in our Members Gallery
- Access all special features of the site
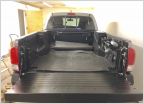 Options for small tool box for bed?
 2022 Tacoma Off-Road will 4Runner TRD SEMA matte gray wheels work?
 Big Brakes, ECGS Bushing, & 5100s; Install @ 60 kMile and Review
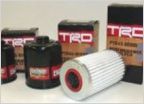 17 TRD 4x4 OFF Road Oil Filter which one?
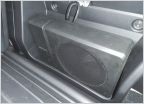 Subwoofers!!
 Wiring an Aux Fuse Block, Relays and Switches in a 2016
Archive Hanger Install Assistance/Motivation
Discussion in '3rd Gen. Tacomas (2016-2023)' started by CAG Gonzo, Apr 5, 2020.
Page 3 of 5
Page 3 of 5


