

-
Welcome to Tacoma World!
You are currently viewing as a guest! To get full-access, you need to register for a FREE account.
As a registered member, you’ll be able to:- Participate in all Tacoma discussion topics
- Communicate privately with other Tacoma owners from around the world
- Post your own photos in our Members Gallery
- Access all special features of the site
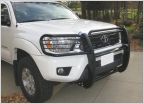 Westin Sportsman Brush Guard Install on 2014 Tacoma
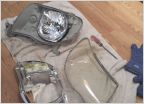 BHLM vs. Buying aftermarkets
 Rear Diff Oil
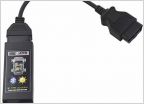 OBD reader for resetting TPMS
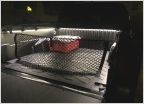 Considering doing some bed lighting.. which lights and the best way to get 12V?
How do I go about fixing this leak at the A/C condenser?
Discussion in '2nd Gen. Tacomas (2005-2015)' started by Hans Moleman, Apr 17, 2020.
Page 5 of 5
Page 5 of 5
