1. Welcome to Tacoma World!

    You are currently viewing as a guest! To get full-access, you need to register for a FREE account.

    As a registered member, you’ll be able to:
    • Participate in all Tacoma discussion topics
    • Communicate privately with other Tacoma owners from around the world
    • Post your own photos in our Members Gallery
    • Access all special features of the site

Hooking up light bars to Switch Pro on power tray

Discussion in 'Lighting' started by TRDCLMB, May 10, 2020.

  1. May 10, 2020 at 9:12 PM
    #1
    TRDCLMB

    TRDCLMB [OP] Well-Known Member

    Joined:
    Aug 10, 2019
    Member:
    #301836
    Messages:
    335
    Gender:
    Male
    Vehicle:
    2019 Cement TRD Off-Road
    I’m pretty new to auto wiring and have only gotten as far as I have thanks to Maverick over @Mr.PowerTrays making a super simple product and to get me started with my SP and the forums here. I ended up getting the Extreme LED x6s 38 Slim with my @upTOPoverland rack and I’m trying to figure out exactly how to wire it into the switch pro. The issue is there’s the ability to turn on ambers only, whites only, or both at once with the light bar harness it came with so I wanted to cut the harness down to get rid of the relays, but I’m unsure if I’d have to wire it into two different positions on the SP or if there’s a way to just run all the options off one position. If anyone has successfully accomplished this with the same set up the solution would be greatly appreciated.
    Thanks
     
  2. May 11, 2020 at 6:50 AM
    #2
    upTOPoverland

    upTOPoverland Well-Known Member

    Joined:
    Feb 1, 2019
    Member:
    #281432
    Messages:
    1,052
    Gender:
    Male
    First Name:
    Drew
    Vehicle:
    2019 Tacoma TRD OR
    upTOP All the Things!
    you can do what you choose. all you need is the wires coming directly out of the bar, no relays or fuses necessary. If you want both amber and white to turn on at the same time then just wire them both into one switch. if you want them independent of one another then they will need to go through two switches.

    Im not as familiar with switch pro but there may be a feature to 'LINK' a switch so it turns an additional two switches on at the same time. i.e. white is wired to switch 1, amber to switch 2, and switch 3 can turn on 1 and 2 simultaneously. this way you will be able to control the lights independently or together.
     
  3. May 11, 2020 at 8:20 AM
    #3
    TRDCLMB

    TRDCLMB [OP] Well-Known Member

    Joined:
    Aug 10, 2019
    Member:
    #301836
    Messages:
    335
    Gender:
    Male
    Vehicle:
    2019 Cement TRD Off-Road
    Thanks a lot! I’ll mess around with the app and see what the options are. Worse case I’ll have three different switches for the one bar.
     
  4. May 11, 2020 at 4:47 PM
    #4
    TRDCLMB

    TRDCLMB [OP] Well-Known Member

    Joined:
    Aug 10, 2019
    Member:
    #301836
    Messages:
    335
    Gender:
    Male
    Vehicle:
    2019 Cement TRD Off-Road
    DC4F2A3E-6B4D-499C-8418-353BBED43A86.jpg So I’m trying to figure exactly how to chop the harness. I assume that the white and red wire run the amber and white lights making the black a common negative. With that being said I should be able to run the white and red to separate switches and then just take the black to my negative bus. If this makes sense I’ll go ahead, if it’s completely wrong some help would be cool.
     
  5. May 11, 2020 at 6:31 PM
    #5
    nvnv

    nvnv Well-Known Member

    Joined:
    Jun 5, 2016
    Member:
    #188803
    Messages:
    1,227
    Gender:
    Male
    First Name:
    Connor
    Vehicle:
    2016 Tacoma TRD OFF ROAD
    Can you take a pic of the whole harness? With all my lights I just make my own harness with quality Ancor wire. The switch pro makes it easy because you just do a straight run from the light to the switch pro and that’s it. Also most harnesses that come with lights are bare minimum for wire size.
     
    Gunshot-6A likes this.
  6. May 11, 2020 at 8:34 PM
    #6
    TRDCLMB

    TRDCLMB [OP] Well-Known Member

    Joined:
    Aug 10, 2019
    Member:
    #301836
    Messages:
    335
    Gender:
    Male
    Vehicle:
    2019 Cement TRD Off-Road
    Not sure this will help. 392B9164-CD8B-4220-B1E8-B2CF7628C6CC.jpg
     
  7. May 11, 2020 at 8:55 PM
    #7
    nvnv

    nvnv Well-Known Member

    Joined:
    Jun 5, 2016
    Member:
    #188803
    Messages:
    1,227
    Gender:
    Male
    First Name:
    Connor
    Vehicle:
    2016 Tacoma TRD OFF ROAD
    What you said in your previous post is correct. If you want to use that harness then just snip the part that goes to the light right at the relay, which looks like the bottommost part of the harness in your pic. Add ring terminals to each wire and connect them to the switch pro and your ground buss and you’re good to go.
     
  8. May 11, 2020 at 9:31 PM
    #8
    TRDCLMB

    TRDCLMB [OP] Well-Known Member

    Joined:
    Aug 10, 2019
    Member:
    #301836
    Messages:
    335
    Gender:
    Male
    Vehicle:
    2019 Cement TRD Off-Road
    Thanks a lot, because it’ll help out with a few other things I have to wire up as well.
     
  9. May 14, 2020 at 10:40 AM
    #9
    Big_Salad

    Big_Salad Well-Known Member

    Joined:
    Nov 27, 2018
    Member:
    #274008
    Messages:
    254
    Gender:
    Male
    First Name:
    Mark
    Bay Area
    Vehicle:
    2019 Cement TRD OR DCLB
    I have the exact same setup as you. Switchpro, x6s, uptop bravo etc. I plan on wiring the clears and amber to two different slots on the switchpro, then being able to control the ambers and clears separately. You can set up the switchpro to really behave in any way you want. The way I'll set mine up is below.

    Switch X: Clears and ambers
    Switch Y: Ambers

    As Uptop and NVNV said earlier, you can clip those relays off. I would do it right before the 3 wires (red/white/black) coming from the harness get to the relay. That way you'll have the most amount of harnessed wire to play with.

    You won't use the switches obviously. Feel free to ping if you need help along the way. This is my project for this weekend and I've been planning it in my head for a month. I also have the scene pods I'm setting up for left and right, as well as a pair of S2 Pros aiming backwards. All going into the switchpro. With my front and rear camera, I'm out of switches!
     
    TRDCLMB[OP] likes this.
  10. May 14, 2020 at 11:59 AM
    #10
    TRDCLMB

    TRDCLMB [OP] Well-Known Member

    Joined:
    Aug 10, 2019
    Member:
    #301836
    Messages:
    335
    Gender:
    Male
    Vehicle:
    2019 Cement TRD Off-Road
    Thanks, that was the plan I’m working with now is just do two separate switch positions to maintain functionality. Kind of defeats the point in buying something nice with the function if you don’t use it. I bought their pre made harness with the racks so they’ll be running to that as of now then through the thin fin etc.
     
  11. May 14, 2020 at 12:05 PM
    #11
    Big_Salad

    Big_Salad Well-Known Member

    Joined:
    Nov 27, 2018
    Member:
    #274008
    Messages:
    254
    Gender:
    Male
    First Name:
    Mark
    Bay Area
    Vehicle:
    2019 Cement TRD OR DCLB
    I got the quickwire harness too. No idea what it actually contains though, but worst case scenario I can scavenge the wires and loom. I plan on running mine somewhere down to the engine outside of the cab. Either the back or the front window runners.

    Hope your install goes smoothly my friend!
     
  12. Nov 13, 2020 at 6:22 PM
    #12
    LOWEREDLIFESTYLE

    LOWEREDLIFESTYLE Well-Known Member

    Joined:
    May 29, 2019
    Member:
    #294749
    Messages:
    141
    Gender:
    Male
    First Name:
    Matt
    Orlando, FL
    Vehicle:
    2019 TRD OFFROAD 4X4 (Super White)
    Stealth Customs, UpTop, Morimoto, Diode Dynamics, Meso Customs, Borla, Rotopax, etc
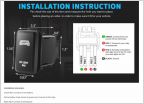
    Did you get a different switch in your kit? This is the one they show in their listing

    B69E959C-F5AE-49BF-A3E6-497CF0091FB6.jpg
     
  13. Nov 13, 2020 at 6:52 PM
    #13
    TRDCLMB

    TRDCLMB [OP] Well-Known Member

    Joined:
    Aug 10, 2019
    Member:
    #301836
    Messages:
    335
    Gender:
    Male
    Vehicle:
    2019 Cement TRD Off-Road
    I’ve ordered two and those switches are not the ones that came with either. The switches pictured above are on both. Also.... extreme LED light bars do NOT fit SSO Heise cutouts. The chord botches a beautiful setup.
     
  14. Jan 4, 2023 at 11:56 AM
    #14
    TKTRDYOTA

    TKTRDYOTA New Member

    Joined:
    Jan 4, 2023
    Member:
    #414729
    Messages:
    1
    Vehicle:
    2021 CEMENT TRD OFF ROAD
    Hey! Just wanted to check in to see how your install went and how you wired up the light bar to your 2 separate switches. I know that the light bar comes with 3 wires (2 positive wires for each color and 1 negative wire) and hence the only way I was thinking to do it would have one switch be positive and negative while the other switch only be positive. Thoughts? Pictures would be much appreciated. Thanks!
     
  15. Jan 7, 2023 at 8:56 AM
    #15
    TRDCLMB

    TRDCLMB [OP] Well-Known Member

    Joined:
    Aug 10, 2019
    Member:
    #301836
    Messages:
    335
    Gender:
    Male
    Vehicle:
    2019 Cement TRD Off-Road
    I actually ended up having to get a different lightbar due to the way to power chord came out so I only ended up with the one hit leg not the three.
     
  16. Oct 29, 2023 at 6:44 AM
    #16
    TS4x4

    TS4x4 Well-Known Member

    Joined:
    Mar 15, 2022
    Member:
    #392650
    Messages:
    746
    Gender:
    Male
    Vehicle:
    2018 TRD Offroad
    Hey guys, looking for some help here in a similar situation.

    So I have a 6 way fuse panel, this one: 6 Gang Switch Panel https://a.co/d/gIYW6H0

    I have a set of ditch lights and a light bar wired to it. I recently got a pair of 6in LED circles lights for the grill. These are the lights in question: https://www.led-colight.com/blogs/news/explore-the-trailblazer-series

    It came with its own wiring harness, similar to the one pictured in OPs post. It has a rocker switch coming from the relay, and two leads for the battery, then finally the connections for the lights themselves. On the back of the switch is a red, yellow, and black wire that are connected with spade connectors and hardwired to the relay. In order to wire it to my aux fuse box/ control panel, do I just connect the yellow and red together and crimp them into one of the free terminals, then ground the negative? My only worry is that it's 20 gauge wire and I don't want to melt it if the aux fuse box somehow sends too much power through it.
    The lights themselves are run to the battery and the ground point near it.
    I thought about removing the relay and going directly to the aux fuse box, but it came with a 25 amp online fuse, and the fuse box only has 20 amp fuses. Would cutting out the relay and directly connecting it potentially overload it?
    I'm a total novice at wiring and don't want to cause an electrical fire!
     
  17. Oct 29, 2023 at 8:39 AM
    #17
    TRDCLMB

    TRDCLMB [OP] Well-Known Member

    Joined:
    Aug 10, 2019
    Member:
    #301836
    Messages:
    335
    Gender:
    Male
    Vehicle:
    2019 Cement TRD Off-Road
    based on the link you sent the black goes to ground red to hot leg and then the yellow and white can go to an aux ckt to have that portion come on only when you do the function you connected it to like blinkers or breaks. If you have a 6 way fuse box it’s going to then you shouldn’t worry about cutting out any protection in the harness as long as you fuse it in your box to the proper amperage.
     

Products Discussed in

To Top