1. Welcome to Tacoma World!

    You are currently viewing as a guest! To get full-access, you need to register for a FREE account.

    As a registered member, you’ll be able to:
    • Participate in all Tacoma discussion topics
    • Communicate privately with other Tacoma owners from around the world
    • Post your own photos in our Members Gallery
    • Access all special features of the site

How to add Factory DRLs to 3rd Gen Tacomas

Discussion in 'Lighting' started by 117KGold, May 15, 2020.

  1. May 15, 2020 at 2:06 PM
    #1
    117KGold

    117KGold [OP] Active Member

    Joined:
    May 2, 2020
    Member:
    #326573
    Messages:
    25
    Gender:
    Male
    Vehicle:
    3rd gen 4x4 V6 Short cab
    Wired my truck for DRLs. DM me if you got questions. Hope this helps somebody out.

    IMG_4556-2.jpg

    61102008799__DA10A93B-CB51-427B-B30F-BE806D80EE80.jpg

    https://www.youtube.com/watch?v=nGrbKQg1TCY

    https://www.youtube.com/watch?v=R3SBpS4ZWJw

    WHAT YOU NEED / COST BREAK DOWN

    Headlights W/ DRLs:
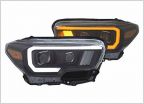
    Varies widely. This is for any housing designed to work with 3rd GENS with factory DRLs. You will need an additional adapter harness if you want to run the 2020 OEM LED headlights. (Grabbed my set from OEMASSIVE)
    $: ???($549.99).

    Connector housing:

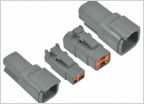
    QTY: 02. TOYOTA part number: 90980-11019 $7.93.
    QTY: 02. TOYOTA part number: 90980-10868 $12.53.
    $: 40.92.

    Terminal repair wire:

    QTY: 04. TOYOTA part number: 82998-12430 $23.27.
    $: 93.08.

    16 Gauge wire:
    QTY: 1-2 FT. Auto parts store. $5.00..

    Butt connectors:
    QTY: 04. Auto parts store. $5.00.

    Ring terminals:
    QTY: 02. Auto parts store. $5.00.

    Fabric wire-harness tape:

    QTY: 1 roll. Auto parts store. $5.00.

    TOTAL: Headlights($549.990) + $154.00.

    Tools:
    Basic wrenches and screwdrivers.
    Jewelers screwdrivers
    Wire cutters / crimpers.
    Heat shrink gun or lighter.
    Sharp knife or box cutter.

    Parts to remove:
    Headlights:
    Which require you to remove the grill and part of the front bumper.
    Washer fluid reservoir: Do not have to disconnect pump and drain.
    Deutsch connectors: Just the two for your LH and RH turn signal.


    HOW TO:
    Disclaimer: Not my fault if you try this and break something. Good Luck!


    Remove and replace headlights:
    LINK: OEMassive has a decent how to video.
    https://www.youtube.com/watch?v=fbdSuENQi0Y&t=196s

    Remove washer fluid reservoir:

    Take off the 10mm bolts and the connector to the pump. Watch for it snagging on any wiring as you lift it. This gives you room to work on the passenger side.

    IMG_4569.jpg

    Remove and de-pin turn signal / parking light connectors (3 pins):
    LINK: how to pin and de-pin connectors.
    https://www.youtube.com/watch?v=_EixzYfBS50&t=9s

    TOYOTA connectors work about the same. Don’t force it. Plastic junk is easy to break.

    Pull out the center white part.

    Then with a small flat blade unclip each wire individually. you should not have to pull hard on the wire.

    IMG_4584.jpg
    IMG_4582.jpg
    IMG_4583.jpg

    Assemble turn signal connectors (2 pin):

    Three wires run to the old connectors. Two provide around 12v for the blinker and parking light. The last is a ground.

    On my truck. The ground on both the LH and RH side is a white wire with a black stripe.

    Use a multi-meter or something similar to determine which wire powers your turn signal.

    On my truck. The LH turn signal was powered by a brown wire. RH was a light blue wire.

    The new 2 pin connectors for the turn signals should look something like the photos below when done. Power wire in the top slot. Ground in the lower slot.

    This should directly plug into the new head lights.

    IMG_4576.jpg
    IMG_4575.jpg

    Make the DRL harness:
    The DRLs use a 4 pin connector but we only need 2 pins to run them. Power and ground.

    Repurpose the power wire from the parking light. Voltage should be the same. Change the terminal on this wire from female to male using one of the terminal repair wires. Cut the old terminal end off. Crimp or solder on the new one. Remember to protect the new connections with heat shrink.

    Cut lengthwise along the outer casing that covers the three wires until there is enough slack to route the parking light power wire over to the DRL connector mounted to the headlight housing. Tape the outer casing back and wrap the parking light power wire separately.

    IMG_4587.jpg
    IMG_4589.jpg

    Make the ground wire. Start with one of the terminal repair wires. Crimp on a short section of wire to it long enough to reach the factory body ground (there is one on both the LH and RH side). Terminate the ground wire with a ring terminal big enough to fit the bolt.

    IMG_4572.jpg

    Pin out the DRL connector. Power wire in the top RH slot. Ground wire in the bottom LH slot. Pins 1 and 4 will be left empty. I filled the empty holes with RTV to prevent moisture intrusion. There are blanking pins if you want to find those. This connector will clip directly into the head light housing. Bolt the ring terminal to the factory ground.

    IMG_4571.jpg

    Make it all look good with Zip-Ties and put everything back together.


    Tell TOYOTA to fuck off. Cause why are there multiple wiring harnesses for the same truck? Then you’re done!
     
    Last edited: May 15, 2020
    JayN, Tacospike and miamijime like this.
  2. May 15, 2020 at 7:00 PM
    #2
    117KGold

    117KGold [OP] Active Member

    Joined:
    May 2, 2020
    Member:
    #326573
    Messages:
    25
    Gender:
    Male
    Vehicle:
    3rd gen 4x4 V6 Short cab
    ^^^Video added to original post.^^^

    The DRLs are wired up to the factory parking light switch. DRLs are on when that switch is on and when the head lights are on.
     
    Last edited: May 16, 2020
  3. May 15, 2020 at 7:04 PM
    #3
    taijai

    taijai Well-Known Member

    Joined:
    Jul 2, 2019
    Member:
    #298113
    Messages:
    255
    Gender:
    Male
    First Name:
    TJ
    New Jersey
    Vehicle:
    2018 Tacoma TRD Sport Quicksand DCLB (SOLD), 2004 4Runner Sport Edition 4x4
    This looks awesome!
    So if I understand correctly, you take the existing LED DRL from any 3rd gen that has the standard DRL and turn it i to the 2020 type?
     
    117KGold[OP] likes this.
  4. May 15, 2020 at 7:08 PM
    #4
    117KGold

    117KGold [OP] Active Member

    Joined:
    May 2, 2020
    Member:
    #326573
    Messages:
    25
    Gender:
    Male
    Vehicle:
    3rd gen 4x4 V6 Short cab
    Kinda. My truck did not have DRLs from factory. This is to add DRLs to a truck without them.

    The harness I made should connect to the 2020 LEDs with an adapter. However I have not looked too far into that.
     
    taijai likes this.
  5. May 15, 2020 at 7:19 PM
    #5
    117KGold

    117KGold [OP] Active Member

    Joined:
    May 2, 2020
    Member:
    #326573
    Messages:
    25
    Gender:
    Male
    Vehicle:
    3rd gen 4x4 V6 Short cab
    Na, my truck had the old school halogens with no DRLs or LEDs. Also, I can not film my truck from the outside while its in Drive and that doesn't change how the lights work. It moves. Need to be in the drivers seat for that..... are you fuckin with me?
     
  6. May 15, 2020 at 7:42 PM
    #6
    117KGold

    117KGold [OP] Active Member

    Joined:
    May 2, 2020
    Member:
    #326573
    Messages:
    25
    Gender:
    Male
    Vehicle:
    3rd gen 4x4 V6 Short cab
    Not sure. As long as the back on your stock head light looks like mine it will work. Should be four connectors. You just have to modify the Parking / turn signal 3 pin.

    My stock headlight:
    IMG_4595.jpg
     
  7. May 15, 2020 at 7:43 PM
    #7
    117KGold

    117KGold [OP] Active Member

    Joined:
    May 2, 2020
    Member:
    #326573
    Messages:
    25
    Gender:
    Male
    Vehicle:
    3rd gen 4x4 V6 Short cab
    Exactly! Moved it to the 4 pin connector to power the DRLs.
     
  8. May 15, 2020 at 7:53 PM
    #8
    117KGold

    117KGold [OP] Active Member

    Joined:
    May 2, 2020
    Member:
    #326573
    Messages:
    25
    Gender:
    Male
    Vehicle:
    3rd gen 4x4 V6 Short cab
    Thats not correct. There is nothing missing and no reason to jumper a wire. The new housings only have a 2 pin connector for the turn signals. The DRLs stay on regardless of drive or park.....

    Not sure what you are hinting at.
     
    Last edited: May 15, 2020
  9. May 15, 2020 at 8:03 PM
    #9
    117KGold

    117KGold [OP] Active Member

    Joined:
    May 2, 2020
    Member:
    #326573
    Messages:
    25
    Gender:
    Male
    Vehicle:
    3rd gen 4x4 V6 Short cab
    No open connectors. My stock harness had 4. I split the 3 pin connector into a 2 pin and a 12v power wire. Then used that power wire and a manufactured ground wire in a 5th connector to run the DRLs.

    Edit: It's aftermarket housing but it's designed to be plug and play with any 3rd GEN tacoma that had factory DRLs.
     
  10. May 15, 2020 at 8:11 PM
    #10
    117KGold

    117KGold [OP] Active Member

    Joined:
    May 2, 2020
    Member:
    #326573
    Messages:
    25
    Gender:
    Male
    Vehicle:
    3rd gen 4x4 V6 Short cab
    There weren't really any instructions for this. :D

    The two open pins in the DRL connector will let you control the circuit a few different ways. Really didn't see a reason to over complicate a light switch.
     
  11. May 16, 2020 at 3:03 AM
    #11
    Bubble Wrap

    Bubble Wrap Well-Known Member

    Joined:
    Jun 21, 2016
    Member:
    #190200
    Messages:
    368
    Gender:
    Male
    Honolulu, HI
    Vehicle:
    2016 SR5 DCSB MGM
    Just for clarification: since your DRLs are wired to your parking light, does that mean your tails are on as well whenever you run your DRLs and your interior switches are illuminated?
     
    117KGold[QUOTED][OP] likes this.
  12. May 16, 2020 at 5:24 AM
    #12
    117KGold

    117KGold [OP] Active Member

    Joined:
    May 2, 2020
    Member:
    #326573
    Messages:
    25
    Gender:
    Male
    Vehicle:
    3rd gen 4x4 V6 Short cab
    Yeah that sounds right. I like that the turn signal stalk still controls all the lights.

    Guess you could wire it all completely separate. Tap a 12v fuse for power and run a new switch to a blank spot in the cabin
     
    Last edited: May 16, 2020
  13. Aug 27, 2021 at 9:44 PM
    #13
    JayN

    JayN New Member

    Joined:
    Aug 26, 2021
    Member:
    #375404
    Messages:
    1
    Gender:
    Male
    First Name:
    Phuoc
    I have followed your instructions.
    But my problem is that the white LED strip is on when I turn on the headlight, and when I put it in the position of DRL and Marker light, the yellow LED strip is on and the white LED strip is off. Which I can't get as shown in the photo.

    upload_2021-8-27_23-39-58.jpg

    Here's how I wired it up.
    upload_2021-8-27_23-41-59.jpg

    Is it possible that I made a mistake somewhere?
     
  14. Sep 10, 2021 at 3:35 PM
    #14
    TACOMA2NDGEN

    TACOMA2NDGEN Well-Known Member

    Joined:
    Jan 24, 2018
    Member:
    #242230
    Messages:
    1,990
    Gender:
    Male
    First Name:
    ROLAND
    new jersey
    Vehicle:
    2010 dcsb silver sport trd
    baja squadron pros
    No has asked about the beautiful mopar sitting in the garage
     

Products Discussed in

To Top