

-
Welcome to Tacoma World!
You are currently viewing as a guest! To get full-access, you need to register for a FREE account.
As a registered member, you’ll be able to:- Participate in all Tacoma discussion topics
- Communicate privately with other Tacoma owners from around the world
- Post your own photos in our Members Gallery
- Access all special features of the site
 Looking for change holder
 2013 Tacoma front differential outside bearing
 Can I use a larger oil filter?
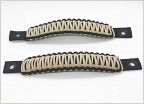 Paracord Grab Handles for interior?
 Manual Trans
 Anyone have this? thought it was funny
Those damn rusty bed bolts...no more!
Discussion in '2nd Gen. Tacomas (2005-2015)' started by XD40SC, Feb 6, 2012.
Page 3 of 4
Page 3 of 4


