

-
Welcome to Tacoma World!
You are currently viewing as a guest! To get full-access, you need to register for a FREE account.
As a registered member, you’ll be able to:- Participate in all Tacoma discussion topics
- Communicate privately with other Tacoma owners from around the world
- Post your own photos in our Members Gallery
- Access all special features of the site
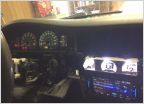 97 tacoma stereo upgrade help
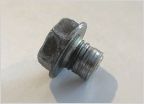 Stripped transmission drain plug
 Paper towel chunks in my exhaust. How much of an issue is this?
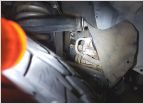 Draining coolant
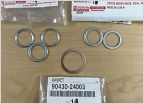 Washers
How To - 1st Gen Badge Removal
Discussion in '1st Gen. Tacomas (1995-2004)' started by yote, Mar 10, 2013.
Page 1 of 2
Page 1 of 2


