1. Welcome to Tacoma World!

    You are currently viewing as a guest! To get full-access, you need to register for a FREE account.

    As a registered member, you’ll be able to:
    • Participate in all Tacoma discussion topics
    • Communicate privately with other Tacoma owners from around the world
    • Post your own photos in our Members Gallery
    • Access all special features of the site
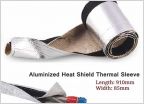
Yet Another DC Manual Swap Thread

Discussion in '1st Gen. Tacomas (1995-2004)' started by osterhagen, Apr 16, 2020.

  1. May 30, 2020 at 12:03 AM
    #61
    Madjik_Man

    Madjik_Man The Rembrandt of Rattle Can

    Joined:
    Dec 2, 2009
    Member:
    #26893
    Messages:
    19,607
    Gender:
    Male
    Colorado Front Range
    Vehicle:
    1998 Ext Cab 3.4 4x4 TRD 5MT, 2004 DC 3.4 4x4 TRD
    Another quick question for confirmation...

    The transfer case for the automatic is applicable with the manual transmission, correct?
     
  2. May 30, 2020 at 12:41 AM
    #62
    nagorb

    nagorb Should be a dang perma mod

    Joined:
    Feb 28, 2011
    Member:
    #52025
    Messages:
    9,352
    Gender:
    Male
    Alabama
    Vehicle:
    2001 dbl cab 4x4
    Yes. I kept my original TC.

    OP, totally agree about MC, it's such a shame what it's turned into. I've spent money elsewhere due to them misleading customers. Seriously? Uber rare experience? Total BS

    Anyway, looks like you have a solid grasp on the swap, but if you run into problems let me know. I completed the swap a few years back and ran into 1 or 20 problems....
     
  3. May 30, 2020 at 12:42 AM
    #63
    nagorb

    nagorb Should be a dang perma mod

    Joined:
    Feb 28, 2011
    Member:
    #52025
    Messages:
    9,352
    Gender:
    Male
    Alabama
    Vehicle:
    2001 dbl cab 4x4
  4. May 30, 2020 at 4:24 AM
    #64
    osterhagen

    osterhagen [OP] Well-Known Member

    Joined:
    Aug 6, 2019
    Member:
    #301384
    Messages:
    579
    Gender:
    Male
    First Name:
    Rafe
    Glendale, AZ
    Vehicle:
    2003 DC v6, MTM, 4x4
    "Totally Stock"
    Thanks I really appreciate that. :)
     
  5. May 30, 2020 at 7:14 AM
    #65
    Madjik_Man

    Madjik_Man The Rembrandt of Rattle Can

    Joined:
    Dec 2, 2009
    Member:
    #26893
    Messages:
    19,607
    Gender:
    Male
    Colorado Front Range
    Vehicle:
    1998 Ext Cab 3.4 4x4 TRD 5MT, 2004 DC 3.4 4x4 TRD
    thanks man. TW is awesome.

    I’m currently in the beginning of thinking about sourcing parts phase.
     
  6. Jun 10, 2020 at 10:36 AM
    #66
    osterhagen

    osterhagen [OP] Well-Known Member

    Joined:
    Aug 6, 2019
    Member:
    #301384
    Messages:
    579
    Gender:
    Male
    First Name:
    Rafe
    Glendale, AZ
    Vehicle:
    2003 DC v6, MTM, 4x4
    "Totally Stock"
    Alright time for more updates! If any of you follow read the "What have you done to your Tacoma today" thread, you will have seen a few action shots. I apologize in advance, these posts are going to be quite detailed. I hope to add my small bit of knowledge to the vast collection of information out there and shed more light into area's I had difficulty gathering data on.

    So we will dive in with the clutch bracket, clutch master cylinder, hydraulic lines and clutch pedal. Will also touch on some information about swapping the brake pedal, as there are some things to be aware of.

    Getting the under-the-dash clutch bracket (which has studs that go through the firewall to mount clutch master cyl) holes drilled correctly was a big concern of mine. Just hadn't come up with a way yet that I was sure would be dead on. This isn't one of those "oops I fucked up, so I'll just give it another go" deals as you really only get one shot to get it right. I'd recently been reading the build thread of this awesome custom 3rz crawler that swapped to a 5 speed and clearly the bloke new what he was doing from the build thread, so I shot him a PM to ask how he went about getting his lined up.

    @Kkrause09 mentioned taking the studs out of his bracket and mounting the bracket under the dash using the pre-drilled and tapped location under the dash. Then marked them with a marker and started a hole with a 1/8 drill bit from inside and then finished them from under the hood. He then plug welded his studs back into the mount and was good to go. So I took that idea and ran with it, made a couple changes to suit my options and went to work.

    I purchased a used broken bracket off E-bay (one of the studs was broken, perfect!) and sheared the bolts off using a cut off wheel on a grinder.
    IMG_1378.jpg
    Then went about finding the dead center of those studs and drilling a 1/8" hole in each. Measured and marked the center of the large center hole (for clutch MC) using a post it note and painters tape.
    IMG_1493.jpg
    Once the bracket was ready, installed it under the dash and made sure all was straight. Looked at several other pictures from thread on here to double check my work along the way. Custom taco's write up, safetydang's etc..
    IMG_1380.jpg
    Once I made sure I was happy with everything, I removed the bracket once more. Filled the area on the firewall that would meet up with those holes I made with black electrical tape to provide a surface to indent. Put the bracket back in place and double checked everything again and used a penny nail to poke through each of those stud holes and make a mark on the tape. Did the same with the center of the big hole with the sticky note. Then removed the bracket again and used a center punch to start a indent in the firewall to ensure my bit didn't skip.
    IMG_1496.jpg
    I used an air drill due to the tight working space and because I had one sitting around. It's nothing special and they are very cheap at harbor freight (I use very occasionally). Started with 1/8" bit from under the dash and created the three pilot holes.
    IMG_1383.jpg
    IMG_1382.jpg
    Then from under the hood I started expanding the holes. Finished at 3/8" for the studs and 1-1/4" for the center MC push rod hole.
    IMG_1384.jpg
    Above is the holes completed right before the first test fit. Boy was I anxious to get it stuffed in there and make sure I got it right! Below the clutch master cylinder is all mounted up. :)
    IMG_1389.jpg
    As you can see in the picture above, I was also very excited to make sure the hard line down to the slave cylinder lined up correctly. I am happy to report that it lined up so perfectly if I hadn't done this myself I would say it was stock! Once I had it lined up on the correct path down the lower bracket (which is already there on a pre-runner FYI) it ended dead center of that bracket and hooking the Marlin SS flex hose was breeze with everything out of the way.
    IMG_1495.jpg
    IMG_1494.jpg
    But that is the end of the clutch hydraulics for now because the next step is to run the line for slave cyl, which I will do with the trans in place. So next was time to get rid of annoying automatic brake pedal that is now too big and sits way to close to my soon to be clutch pedal. This got a bit interesting because the original manual brake pedal I purchased on e-bay was from a 99' Tacoma. Turns out that they are different between some years because of the brake booster / master cylinder. The one I purchased had a bigger support bolt, larger hole where pedal connects to MC (chain link looking deal) and was shaped differently. After some poking around it was easy to figure out that I needed one from around my year. Sourced another used one off e-bay from a 2003 and once it arrived it installed without issue. Here is a picture of the different pedals for reference:
    IMG_1432.jpg
    Top is 99' Tacoma manual brake pedal, Middle is 03' auto brake pedal, bottom is 03 manual brake pedal. Notice how the top one doesn't have the same curve and you can see the hole for the bolt is much larger.

    Put new bushings, cushion and rubber pedal cover on the used brake pedal and lubed it up before installing:
    IMG_1434.jpg

    While I was waiting for the correct brake pedal to arrive I got the clutch pedal all connected and installed the two switches (haven't wired them yet). Here is a picture of the more or less fully installed clutch pedal assembly under the dash:
    IMG_1393.jpg
    IMG_1482.jpg
    Here is the 3 pedals all installed and connected.
    IMG_1452.jpg
    Center shifter portion mocked up to make sure everything is coming along as it should. Will have to stuff the transmission in first to be sure, but I think I have the transmission tunnel on the body trimmed out enough for the levers to come in with clearance.
    IMG_1483.jpg
    Ok more updates coming right up, just want to keep it a bit organized!
     
    Last edited: Jun 10, 2020
    cruiserguy and BlackPearl like this.
  7. Jun 10, 2020 at 11:23 AM
    #67
    osterhagen

    osterhagen [OP] Well-Known Member

    Joined:
    Aug 6, 2019
    Member:
    #301384
    Messages:
    579
    Gender:
    Male
    First Name:
    Rafe
    Glendale, AZ
    Vehicle:
    2003 DC v6, MTM, 4x4
    "Totally Stock"
    Valve covers were leaking and had been for some time based on the amount of built up oil crud on the center support for the steering rack and back/sides of motor. So I had planned already to replace those, the spark plug tubes, cam plugs and half moons. I also wanted to adjust my valves while I had the covers off. So after completing the timing belt job and clutch disc job I replaced a lot of seal and hope to have no more oil leaks. I am accenting in red and my valve covers were in less than great shape and really filthy due to the aforementioned leaks so I cleaned them up and painted them red with rattle can engine enamel.

    I kind of cheesed out on adjusting the valves. I checked 4 of them (two of each) and they were all within spec and it was really hot and I was tired, so just decided to call it. Might revisit this in the future but we will see how she goes. I do have a little taco tick but it doesn't seem excessive compared to other 5VZ-FE engines.

    Gonna just drop some action shots here. This stuff has been documented into the ground at this point...
    IMG_1360.jpg
    IMG_1362.jpg
    IMG_1366.jpg
    IMG_1356.jpg
    IMG_1358.jpg
    I think I am gonna need a re-bore sooner rather than later. Probably will looking into sourcing a spare to as to avoid downtime. Got this all cleaned up and shiny, not sure why I don't have a pic of that lol...
    IMG_1369.jpg

    IMG_1373.jpg
    IMG_1455.jpg
    IMG_1463.jpg
    All buttoned back up (for now...)
    IMG_1464.jpg
    All went well on this job. Pretty straight forward honestly. My valve cover bolts were stupid loose I think some of them could have been turned by hand! So I am sure that didn't help the leaking situation. They are all tightened to FSM spec's with a torque wrench now. Will make a note on the maintenance log to check these in a few k's.
     
    cruiserguy likes this.
  8. Jun 10, 2020 at 11:48 AM
    #68
    osterhagen

    osterhagen [OP] Well-Known Member

    Joined:
    Aug 6, 2019
    Member:
    #301384
    Messages:
    579
    Gender:
    Male
    First Name:
    Rafe
    Glendale, AZ
    Vehicle:
    2003 DC v6, MTM, 4x4
    "Totally Stock"
    So this might trigger some people but I have decided not to de-pin my ECU during the swap. Based on personal knowledge, research and crap I've found on the interwebs, I've decided to just plug and play. I am doing this for a few different reasons. Most importantly, I would like to put the issue to rest, once and for all. There is still speculation nearly 10 years later if this is possible or not and if it will damage the ECU or the truck wiring. I had originally planned to de-pin and had everything lined up to pull the trigger as you see below:
    IMG_1453.jpg
    Funny how similar that image is to @SafetyDang's write up photo. Timeless I guess lol. For anyone keeping track or wondering the guide on wiring is spot on. I checked the wire colors and they were all exactly what they should have been. So had I decided to actually de-pin or cut the wires, I had complete confidence that it would be right.
    IMG_1454.jpg
    So stay tuned I'll let you all know if I blow up my $400 ECU trying to prove it as being safe. Of course from a control standpoint I've no proof that the used ECU off E-bay is actually functional to begin with, if the worst is to happen. Either way, choice is made and the dash is all put back together. Timmy has a great video on swapping these so I didn't bother to document it.
     
    cruiserguy likes this.
  9. Jun 11, 2020 at 6:30 AM
    #69
    Malek

    Malek Well-Known Member

    Joined:
    Aug 23, 2012
    Member:
    #85356
    Messages:
    120
    Gender:
    Male
    First Name:
    Malek
    Denver
    Vehicle:
    02 DC TRD
    1UZFE VVTi 5spd Swap
    Killer work so far! I ran into the same issue with a junkyard brake pedal during my swap. But I wish I had taken as much care as you did while mounting the clutch pedal. Mine is not nearly as even with the brake pedal! :smack:
     
    cruiserguy and osterhagen[OP] like this.
  10. Jun 11, 2020 at 6:46 AM
    #70
    nagorb

    nagorb Should be a dang perma mod

    Joined:
    Feb 28, 2011
    Member:
    #52025
    Messages:
    9,352
    Gender:
    Male
    Alabama
    Vehicle:
    2001 dbl cab 4x4
    I'll be patiently waiting for a report back. De pinning was the worst part of the swap for me.
     
  11. Jun 11, 2020 at 7:10 AM
    #71
    Madjik_Man

    Madjik_Man The Rembrandt of Rattle Can

    Joined:
    Dec 2, 2009
    Member:
    #26893
    Messages:
    19,607
    Gender:
    Male
    Colorado Front Range
    Vehicle:
    1998 Ext Cab 3.4 4x4 TRD 5MT, 2004 DC 3.4 4x4 TRD
    Quick question: I thought you could just buy an ECU from the same year, same engine, 4x4 (in my case) but with the 5MT transmission, then just plug and play with no issue. Correct?
     
  12. Jun 11, 2020 at 7:27 AM
    #72
    osterhagen

    osterhagen [OP] Well-Known Member

    Joined:
    Aug 6, 2019
    Member:
    #301384
    Messages:
    579
    Gender:
    Male
    First Name:
    Rafe
    Glendale, AZ
    Vehicle:
    2003 DC v6, MTM, 4x4
    "Totally Stock"
    That's what we are gonna find out. Previous to this, everyone has either cut or de-pinned some wires that are used for the auto trans that aren't for a manual. Think anything related to the electronically controlled transmission for example. I've personally not be able to locate any swap documented with a plug and pray, with follow up that it worked and continues to work.

    In theory, yes you can just do exactly as you've described and that is exactly as I've done. If you want to read about the initial work that went into this ecu swap, you can find it . Later in this discussion (a few years in fact) a Toyota master tech was asked about this and said that the harness is the same for both trucks and it shouldn't cause any issue. But safety had already cut his wires at this point so could no longer test.

    In my situation the only real unknown is if the ECU I purchased off of E-bay worked to begin with. So the problem is, if it DOESN'T work I won't be able to say 100% that what I did (just plug and pray) caused it to not work.

    But on the other hand, if it WORKS I can report that a direct plug doesn't cause any issues and hopefully put this to bed forever. As much as anyone is willing to stake a few hundred bucks on what some dude on the interweb said lol.
     
    Last edited: Jun 11, 2020
    nagorb and Madjik_Man[QUOTED] like this.
  13. Jun 11, 2020 at 7:29 AM
    #73
    Madjik_Man

    Madjik_Man The Rembrandt of Rattle Can

    Joined:
    Dec 2, 2009
    Member:
    #26893
    Messages:
    19,607
    Gender:
    Male
    Colorado Front Range
    Vehicle:
    1998 Ext Cab 3.4 4x4 TRD 5MT, 2004 DC 3.4 4x4 TRD
    My thoughts exactly. I’m sketched out about the ones on EBay but it’s a leap of faith you have to take.

    And I like “plug and pray” much better.
     
    This site contains affiliate links for which the site may be compensated.
    #73
  14. Jun 11, 2020 at 7:35 AM
    #74
    osterhagen

    osterhagen [OP] Well-Known Member

    Joined:
    Aug 6, 2019
    Member:
    #301384
    Messages:
    579
    Gender:
    Male
    First Name:
    Rafe
    Glendale, AZ
    Vehicle:
    2003 DC v6, MTM, 4x4
    "Totally Stock"
    Thanks! Yeah I honestly spent about half a day messing with just that. Electronics are more my speed than fabrication, though I'd love to get better at it and I will. My son just started welding school and will be done in 3 months. Looking forward to building some bumpers and racks and stuff together!

    I was thinking about starting a "traveling kit" type of deal for the clutch bracket I modified to get everything lined up. Meaning that once someone has the stuff and is ready to that part of the swap I can just mail them the bracket and they can use it for measuring and drilling their clutch bracket and either send it back or on to the next guy.
     
    cruiserguy, nagorb and Malek[QUOTED] like this.
  15. Jun 11, 2020 at 4:19 PM
    #75
    nagorb

    nagorb Should be a dang perma mod

    Joined:
    Feb 28, 2011
    Member:
    #52025
    Messages:
    9,352
    Gender:
    Male
    Alabama
    Vehicle:
    2001 dbl cab 4x4
    I'm the opposite. Electronics are my weakness. And I've got a whole lotta machines that can make a template, from Lazer cut wood plastics etc, CNC Mill, CNC plasma, manual Mills/ lathes. Sooooo, if you sketch something up I'm more than willing to make it.
     
  16. Jun 11, 2020 at 6:23 PM
    #76
    cruiserguy

    cruiserguy Well-Known Member

    Joined:
    Jul 31, 2016
    Member:
    #193416
    Messages:
    19,000
    Gender:
    Male
    First Name:
    Elijah
    SEKS
    Vehicle:
    2000 ext cab, 2.7L, auto, 4x4
    Man has this been a pleasure to read, well written, well worded, solid accurate info and descriptions.
    And it's funny you talk about it like you don't have too much experience and then if one pays close attention to the wording you MIGHT be able to tell you're not a 20 year pro Master mechanic, because your work is freaking top notch hermano! Seriously, this is what is called quality work and taking pride in what you do. :cool:
    Of course you mention Krause's 3RZ crawler.... Birds of a feather for you two? His fab work is absolutely beautiful on that double cab. And I love that it's the 4 banger. Just very very cool.
    Anyways man, I appreciate you taking the time to document your experience so well. :D:fistbump:
     
  17. Jun 12, 2020 at 7:08 AM
    #77
    Kkrause09

    Kkrause09 Well-Known Member

    Joined:
    Jan 20, 2020
    Member:
    #316705
    Messages:
    171
    Gender:
    Male
    First Name:
    Kyle
    Vehicle:
    Tacoma sas
    Yes!!! Good work and detail with that pedal assembly
     
  18. Jun 15, 2020 at 9:47 AM
    #78
    osterhagen

    osterhagen [OP] Well-Known Member

    Joined:
    Aug 6, 2019
    Member:
    #301384
    Messages:
    579
    Gender:
    Male
    First Name:
    Rafe
    Glendale, AZ
    Vehicle:
    2003 DC v6, MTM, 4x4
    "Totally Stock"
    Wow thank you very much. Gonna make me blush :) I have big plans to enjoy large parts of Utah probably next spring if not sooner, so maybe you can take a gander in person some time :cheers:
     
    cruiserguy[QUOTED] likes this.
  19. Jun 15, 2020 at 9:48 AM
    #79
    osterhagen

    osterhagen [OP] Well-Known Member

    Joined:
    Aug 6, 2019
    Member:
    #301384
    Messages:
    579
    Gender:
    Male
    First Name:
    Rafe
    Glendale, AZ
    Vehicle:
    2003 DC v6, MTM, 4x4
    "Totally Stock"
    Thanks! Really appreciate the assistance and suggestions man. Made it a hell of a lot easier.
     
    Kkrause09[QUOTED] likes this.
  20. Jun 15, 2020 at 8:08 PM
    #80
    osterhagen

    osterhagen [OP] Well-Known Member

    Joined:
    Aug 6, 2019
    Member:
    #301384
    Messages:
    579
    Gender:
    Male
    First Name:
    Rafe
    Glendale, AZ
    Vehicle:
    2003 DC v6, MTM, 4x4
    "Totally Stock"
    Got to spend some more time on the truck this weekend. Spent a ton of time getting the trans cleaned, painted and prepped for install. I can finally start to see light at the end of the tunnel.

    I hadn't done much with the transmission since it first arrived other than to remove the plastic and give it a quick once over. Here is how it arrived from JDM imports:
    IMG_1424.jpg
    I noticed right off that the flange on the output of the transfer case was toast, looked like someone got carried away with a cut-off torch. I had checked to make sure everything moved freely and it shifted into all gears along with the transfer case. Then left it to wait while I worked on other stuff first because of Toyota taking ages to get parts to me.

    I had already planned to replace all the sensors because I had no idea if they would be functional or not. Boy was that the right choice. Every sensor was either broken housing, cut wires or otherwise not usable. I would end up finding a few other surprises along the way, but we're skipping ahead...

    With all the parts in hand, it was time to dive in at last and renew this transmission. For all it's faults, it shifted nicely on the pallet, no bearing noise, what fluid was left looked good and a gander inside the various ports showed everything looked pretty clean!

    I stared off by breaking down the different sections. I needed to replace the seal inside the front bearing retainer and wanted to have the bell housing off for that and cleaning. I had over the past week or two, been occasionally spraying all the bolts with a quick blast of PB Blaster in a hopes to have no issues when breaking stuff loose. Happy to report everything broke loose without issue, though I did find a broken bolt in the bell housing during this process... and two different stuck alignment pins from the old engine it came from.

    Decent picture of the before breakdown of whole unit: (Pardon the pile of parts otherwise)
    IMG_1478.jpg
    Broken bolt in bell housing: (just for inspection cover but still, wanted to fix it)
    IMG_1510.jpg
    Drilled the bolt out for removal:
    IMG_1533.jpg
    One of the stuck pins, had to use a torch a vice grips to get these damn things out.
    IMG_1536.jpg
    Wire wheeled:
    IMG_1528.jpg
    Replacing the front bearing cover seal:
    IMG_1549.jpg
    Made sure all the surfaces were very clean. The old seal was really nasty. Bearings were clean and rotated smoothly. Little bit of shaft play top to bottom and side to side but nothing that felt excessive. Can anyone chime in that has a R150F and mention if there input shaft had any play?
    IMG_1551.jpg
    All sealed back up with fresh FIPG:
    IMG_1554.jpg
    Painted & new output seal, back-up sensor, marlin hd magnetic drain plugs, shifter base gasket, marlin short throw shifter, hd seat and bush installed. Along with new throw-out bearing, shift fork, rubber boot and slave cyl. Damn parts have been sitting on the shelf for ages it feels like. So glad to finally have them installed.
    IMG_1561.jpg

    IMG_1557.jpg
    Not perfect by any means, but happy with the outcome. The next post will detail the install and a few bits I wanted to provide more information on. Thanks for reading :)
     
    Area51Runner, cruiserguy and nagorb like this.
To Top