

-
Welcome to Tacoma World!
You are currently viewing as a guest! To get full-access, you need to register for a FREE account.
As a registered member, you’ll be able to:- Participate in all Tacoma discussion topics
- Communicate privately with other Tacoma owners from around the world
- Post your own photos in our Members Gallery
- Access all special features of the site
 Cleaning dirt/dust from new truck interior
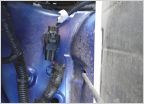 Weird splice in brand new 2023 TRD off road access cab
 Back Up Light Installation Link and BS Thread
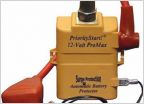 Chronic battery drain-Help!
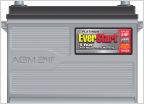 Battery replacement
 USB port vs. 12V DC power for charging iPhone 7 and Kindle
Clean VHF/CB radio installs
Discussion in '3rd Gen. Tacomas (2016-2023)' started by FoleySwampPlotts, Feb 10, 2016.
Page 80 of 139
Page 80 of 139
Products Discussed in


