1. Welcome to Tacoma World!

    You are currently viewing as a guest! To get full-access, you need to register for a FREE account.

    As a registered member, you’ll be able to:
    • Participate in all Tacoma discussion topics
    • Communicate privately with other Tacoma owners from around the world
    • Post your own photos in our Members Gallery
    • Access all special features of the site

Lazy Man's Guide to the Replacing the Intermediate Shaft

Discussion in '2nd Gen. Tacomas (2005-2015)' started by Nimble9, Jun 17, 2020.

  1. Jun 17, 2020 at 8:59 PM
    #1
    Nimble9

    Nimble9 [OP] visit squareonecreations.com Vendor

    Joined:
    Oct 20, 2015
    Member:
    #167184
    Messages:
    11,113
    Gender:
    Male
    Lebanon, PA
    Vehicle:
    2006 4x4 DCSB
    enough to have fun
    Let me preface this by saying I'm not a mechanic, and I typically don't know what I'm doing. I tend to look stuff up on youtube or stare at it long enough and figure it out.

    This is how I replaced my intermediate shaft.

    My Intermediate Shaft Symptoms:
    • Felt like I had a flat spot when turning the wheel where I had to muscle through the turn
    • Steering wouldn't return to center
    • I sprayed the U joint with PB blaster and the symptoms went away temporarily
    Parts I purchased:
    • Replacement Intermediate Shaft - At the time 6/3/2020 the cost was only $39.50
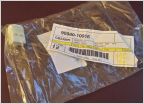
    • OEM Part No.: 90080-11555 - BOLT, W/WASHER - Quantity of 3
      • upload_2020-6-17_23-13-51.jpg
      • I bought them from Toyota Parts Deal because it was the same as Amazon, but somehow faster shipping. They shipped out a week later than they should have, but whatever.
      • Also, the bolts legitimately came in a large flat rate box (I'll post photo at the end)
    Tools I used
    • PB Blaster
    • Hammer
    • 2 pry bars
    • Long flat head screwdriver
    • 12mm ratchet wrench
    • some extensions to place on top of my pry bars to I could hammer them
    • Patience
    • Extra Patience
    • Anti-seize
    • bungee cord for added piece of mind
    • wire brush - to clean the shaft section between the coupler and firewall
    Procedure:

    • I sprayed all the bolts and the shaft daily for a few days while waiting for the new oem bolts to arrive. I think this took the headache out of loosening the bolts.
    • To start, I left my truck on the ground and didn't jack my truck up at all. Maybe I could do this because my truck is lifted, IDK. I did however make sure my steering wheel was straight and then I wiggled it until it locked. I added a bungee cord wrapped around the steering wheel and hooked onto the seat adjustment bar.

    IMG_5593.jpg

    • I made sure my steering coupler was orientated with the gap facing up and the heads of the bolts facing outwards.
    IMG_5592.jpg
    • I removed the little splash shield thing on the driver side wheel well and popped the hood.
    IMG_5631.jpg
    • From the top or side, use the 12mm ratchet wrench to remove the 2 nuts on the coupler
    upload_2020-6-18_16-18-23.jpg
    • From underneath, remove the nut on the bottom where the intermediate shaft meets the steering rack
    upload_2020-6-18_16-19-46.jpg
    • I then placed the tip of my flat head screwdriver into the opening of the lower coupler and tapped it into place with my hammer to widen the gap.
    • I repeated the process of spreading the coupler on top with a hammer and a flat head screwdriver.
    • For the top coupler, I repeated the process with my prybar, hammering it into the gap forcing the coupler to open up.
    IMG_5623.jpg
    • PRO TIP: Keep the prybar toward the top of the coupler wedged in for the next step.
    • With the prybar wedged in in the coupler gap, hammer the coupler back towards the firewall. I struggled with this initially, but once I had the prybar wedged in two hits from the hammer and the old intermediate shaft fell out.
    upload_2020-6-18_16-24-55.jpg
    • I was able to gently wiggle the shaft off the steering
    • To install the new one, I put the top shaft in knowing it could only go on one way, with the flat spot where the bolt goes through facing up.
    • Then gently guide the lower part of the intermediate shaft onto the splines, and adjust so you can start the new OEM bolt by hand
    • Once satisfied, tighten then lower pinch bolt (i threw some anti seize on the splines and bolt for my impending rack replacement)
    • To reset the top coupler, I shoved two prybars into the gab and wiggled the coupler down until the flat spot on the splined end of the intermediate shaft lined up for the bolt hole for the coupler.
    IMG_5634.jpg
    • Thread the bolts in by hand (they should start easily) and then tighten down.
    IMG_5633.jpg

    IMG_5635.jpg
    • Replace the splash guard thing - and if you're an ogre like me who breaks everything use zip ties to fix it)
    IMG_5637.jpg
    • The last thing I did was remove the bungee from the steering wheel, close the hood, and go for a test drive.
    KSPG2558.jpg

    Overall the most frustrating part was smacking the top coupler towards the firewall enough to free the old intermediate shaft. I struggled for a while, but once I had a prybar at the gap toward the top of the coupler it was smooth sailing. Also, my steering wheel was perfectly straight and I didn't need to mark anything or hope that nothing was misaligned, because I didn't jack my truck up. Therefore my wheels didn't turn, and I locked my steering before I did anything else. And there you have it, the lazy way to replace an intermediate shaft.

    Oh, and here is the box my bolts came in :rofl::

    InkedIMG_5640_LI.jpg

    IMG_5641.jpg

    IMG_5618.jpg
     
    Last edited: Jun 18, 2020
    This site contains affiliate links for which the site may be compensated.
    #1
    deanosaurus, Eze1139, Marc70 and 4 others like this.
  2. Jun 17, 2020 at 9:19 PM
    #2
    Jimmyh

    Jimmyh Well-Known Member

    Joined:
    May 16, 2012
    Member:
    #78991
    Messages:
    13,804
    Gender:
    Male
    SC
    Vehicle:
    2012 Prerunner SR5
    Good Job!

    :thumbsup:
     
  3. Jun 17, 2020 at 9:28 PM
    #3
    Bishop84

    Bishop84 Well-Known Member

    Joined:
    Dec 17, 2015
    Member:
    #172494
    Messages:
    10,533
    Gender:
    Male
    Absolute bastard to change, good write up, pics will help when added.
     
  4. Jun 18, 2020 at 1:41 PM
    #4
    Nimble9

    Nimble9 [OP] visit squareonecreations.com Vendor

    Joined:
    Oct 20, 2015
    Member:
    #167184
    Messages:
    11,113
    Gender:
    Male
    Lebanon, PA
    Vehicle:
    2006 4x4 DCSB
    enough to have fun
    Thanks!

    Yeah I agree. I texted @EatSleepTacos while I was doing it to complain the the ECGS bushing install was easier :rofl:
     
    EatSleepTacos likes this.
  5. Jun 26, 2020 at 9:23 PM
    #5
    CJSwan07

    CJSwan07 Well-Known Member

    Joined:
    Dec 20, 2015
    Member:
    #172750
    Messages:
    70
    Gender:
    Male
    First Name:
    Curtis
    Highlands Ranch, CO
    Vehicle:
    2007 Double Cab TRD Off-Road
    Toytec Boss 2.0 Fronts, Deaver J66, Total Chaos UCA's, Full JL Audio System. RCI skids, underbody plates, and bed rack. TRD Cold Air Intake Second Skin full triple layer insulation, Redline Tuning hood struts, Cali Raised LED ditch, fog, and rear OSRAM lights. Air ride (ride control) airbags with wireless adjustment mod, spyder led/projector headlights.
    Curious, did this flat spot in the steering come with a clunk on certain wheel drops or bumps? I just got done wheeling mine and have a similar issue, but also an annoying clunk on random bumps now.
     
  6. Jun 27, 2020 at 3:28 AM
    #6
    That one old guy

    That one old guy Well-Known Member

    Joined:
    Mar 12, 2019
    Member:
    #286340
    Messages:
    1,182
    Gender:
    Male
    First Name:
    Chuck
    Vehicle:
    08 Base 4x4 2.7 Access 5spd
    Stockish
    Excellent write-up and pics.

    Mods sticky this!
     
    Nimble9[OP] and Marc70 like this.
  7. Sep 1, 2020 at 3:48 PM
    #7
    Nimble9

    Nimble9 [OP] visit squareonecreations.com Vendor

    Joined:
    Oct 20, 2015
    Member:
    #167184
    Messages:
    11,113
    Gender:
    Male
    Lebanon, PA
    Vehicle:
    2006 4x4 DCSB
    enough to have fun
    Just saw this! and the flat spot / clunk happened on smooth paced roads, which told me the U joint in there was going bad
     

Products Discussed in

To Top