

-
Welcome to Tacoma World!
You are currently viewing as a guest! To get full-access, you need to register for a FREE account.
As a registered member, you’ll be able to:- Participate in all Tacoma discussion topics
- Communicate privately with other Tacoma owners from around the world
- Post your own photos in our Members Gallery
- Access all special features of the site
 WTB: Toyota OEM Black Wheel Lugs
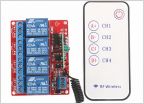 WTB Trigger 6 shooter or Switch Pro
 FS - Bed Lighting Kit
 (Sold) ARE Camper shell with Prinsu rack
 Bed Cap/Trd filter/Dash cam+miscellaneous items
2LM PnP - Plug and play 2WD low range for the 3rd gen. Tacoma
Discussion in '3rd Gen Tacoma Parts Marketplace (2016-2023)' started by lapoltba, Jun 15, 2019.
Page 49 of 100
Page 49 of 100
Products Discussed in


