1. Welcome to Tacoma World!

    You are currently viewing as a guest! To get full-access, you need to register for a FREE account.

    As a registered member, you’ll be able to:
    • Participate in all Tacoma discussion topics
    • Communicate privately with other Tacoma owners from around the world
    • Post your own photos in our Members Gallery
    • Access all special features of the site

Ohcaltexscar's Vragmotor Opbou

Discussion in '2nd Gen. Builds (2005-2015)' started by ohcaltexscar, Jun 4, 2020.

  1. Jun 4, 2020 at 4:22 PM
    #1
    ohcaltexscar

    ohcaltexscar [OP] Out of Huckleberry Licorice…

    Joined:
    Feb 28, 2020
    Member:
    #320594
    Messages:
    1,729
    Gender:
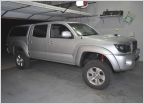
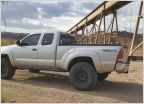
    Male
    First Name:
    Chas
    El Paso, Texas
    Vehicle:
    2005 DCLB SR5 Prerunner
    IM4x4 2.5" NitroGas - Coopers


    In its proper subforum now.

    I've never done a build thread before, but then again, I've never had a community that wouldn't prefer heckling you to death.

    Thank you for that by the way.

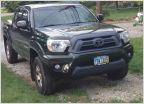
    So I bought this old girl on February 1st, 2020 with 196,000 miles on the clock.
    2005 DCLB PreRunner SR5 V6. 2WD wasn't my first choice but Tacomas here are harder to come by in this configuration and aside from that almost all are ragged on in the desert, 2WD and 4WD alike. This is one of the few that wasn't.

    One owner from new was an older gentleman who didn't do anything to it beyond regular oil changes and the occasional air filter. It was traded in to my friends dealership and I got first dibs. Unfortunately it didn't come with any maintenance history but I'm pretty sure most of it is original anyhow so I'm just planning to replace it all over time.

    0201201352a_HDR.jpg
    The day She came home.

    0205200943a.jpg
    Got snow a few days later, that's a rare occurrence here.

    0312201518.jpg
    Replaced the windscreen. We have a 0$ glass deductible for our Jeep and just mirrored the whole policy over onto the Tacoma, absolutely worth it.

    0315201431_HDR.jpg
    Ditched the chrome.
    You can see the quality of the roof paint in this one ^ The green tape from the windscreen replacement took some paint with it when it was peeled off. :eek:

    0325200827.jpg
    Got the side steps off a trade in at the dealership I worked at. Got front seat covers as well and swapped the complete back seats and sun visors too. :spy:

    0504201712.jpg
    Ordered parts. :spending: OEM blower motor resistor kit, Dobinsons Direct grease-able pin kits (SP59-060) x2 pairs, Dana Spicer grease-able U-Joints 513301X x3. More on the way.


    0505201725.jpg
    Replaced the blower motor resistor. Blower works proper now, recharged the A/C as well. I have a leaking schrader valve on the low pressure line that needs replacing eventually.

    More parts! :spending::spending:
    0515201624a.jpg
    0515201641.jpg
    Found a great deal on the NitroGas Stage 2 kit from Ironman4x4America :oldglory: looks to be well built stuff.

    0518201557a_HDR.jpg
    Rear done up.
    I have +4" SS brake hoses for front and rear from Low Range Off-Road, those will go on when the front is back on the ground. I also installed new shackles from 4xInnovations, came with new poly bushes and zerk fittings.
    Slapped on some F-150 Gatorback mud flaps for kicks. Not too shabby, but we'll see if they stay.
    I ordered some bleeder screws by Speed Bleeder too, the long ones. I didn't go with the stainless steel, it didn't seem necessary. Time will tell.
    0610200543.jpg
    FRONT - SB7100 (M7 x 1.0)
    REAR - SB1010 (M10 x 1.0)
    Got those from rallysportdirect, they had cheap fast shipping.

    0517201904a.jpg
    Prepping the bushes for install.

    0520200913b.jpg
    Yes that is as precarious as it looks. It's barely resting on the blocks under the rear.

    Pulling the LCAs, just about zero rust anywhere underneath. The benefits of a desert vehicle. Not something I ever had growing up in Ohio.

    0520201955.jpg
    Bought a and (no more 6 ton stands I guess). Those are not the recalled stands, confirmed with Harbor Freight customer support. Not that I get underneath there anyway.

    0522201722a.jpg
    Both front and rear shocks were leaking oil. Those coilover bushes though, a little off center.

    0521200732a.jpg
    The extent of my rust woes. So far at least.

    0521200734.jpg
    After slapping it around with some steel wool.

    0521200755.jpg
    Out with the old.

    0521201237.jpg
    In with the ne...wait that's... that's backwards. Nuts. :facepalm:

    SIDE NOTE: pay attention to the instructions for the Whiteline bushes, thicker bit of poly to the outsides of the control arms. I bought the W53312 kit, no fitment issues. Just install them properly. :anonymous:

    It was destroyed getting it back out because I'm an idiot sometimes. You can definitely get it out clean with the right press. Whiteline stood behind their product and sent me a warranty replacement set.

    0526201032a.jpg
    I cannot wait for these to go in, at this point because it'll mean I'm done. Finally.

    0526201325a.jpg
    Replacing the sway bar links too.

    That's all so far, I'm waiting on those replacement bushes and then it'll all go back together. I'm going to have a shop press those bushes in.

    0604200634.jpg
    Bushes in the right way.
    I didn't end up going to a shop, I had a hand from my Father-in-law and his friend who has one serious vise. Still sucked but they're in.

    0602201100a.jpg
    Pulled the steering rack.

    0602202040a.jpg
    Set up the tie rod ends.

    0605201435.jpg
    Old steering rack bushes out.

    0604200628.jpg
    New Energy Suspension rack bushes from RockAuto installed. Got an extra tub of Formula 5 Prelube (P/N: 9.11104) from Energy Suspension as well, I recommend having extra on hand.
    0604200627.jpg

    You may notice in this next picture that there are more threads showing than on the passenger side, and maybe you've zoomed in and noticed the bushing is curved up a bit. That's because I over torqued it, a lot. It ripped the bushing. I'll have to get a replacement set eventually, I'll see how it rides for now. Whoops.
    0604201300.jpg
    This bolt... :frusty:
    This was by far the worst part of the entire project. I moved the A/C compressor because I wasn't about to try wrangling a hacksaw up in there. No thank you.
    I have reinstalled them the non stupid way, with the nut on top. Bold statement you say? Well maybe, but I am confident in my choice.

    0604201338.jpg
    Ran to the local nut and bolt shop, took some measurements anddd...

    0604201356.jpg
    Try falling out now. :quickdraw:

    The eye on that cotter pin is a bit large, I'll have to find a properly sized one and swap it out.

    Screenshot_20200604-150217.jpg
    It was a hot one today, supposed to be like this all week. I sucked it up and worked until three but dagum, all my stuff kept burning my hands. :bananadead:

    We'll see how it goes, it isn't that bad in the morning. Hopefully I can jam and get most of it wrapped up tomorrow.

    0605201050.jpg
    Almost there, just need to load it up and torque to spec.

    0605201358.jpg
    Looking pretty good, the alignment cams lined up nicely.


    0605201437_HDR.jpg
    Baby shoes! Finally back on the ground!

    0608200709.jpg
    Driveshaft time!

    0608200709a.jpg
    Dana Spicer parts; (Universal Joints - 513301X x3) (Carrier Bearing - 5002334)

    0608200730.jpg
    Annd once again I have to stop and order another part. Look closely at the flange on the left side, the retaining groove for the spring clip is blown out. It was hanging on by about 1/2 an inch of what was left.

    0609201628.jpg
    Better shot of the damaged flange. New one is on the way, Dana Spicer part, 5001905. Ordered from Drivetrain America.

    I have no idea how long I was driving around like that. The rear u joint had been replaced before I bought it, I would guess the shop who did it was sketchy.
    Just hammer it in they said, it'll be fine they said...

    0609201628a.jpg
    This yoke will not budge, I soaked it with PB B'laster all day and still nothing. I'll probably need a shop press, again.
    Adventures for tomorrow.

    0609201629.jpg
    Looks surprisingly clean for being so seized. I guess we'll see what the spines look like. I forgot the nut and smacked the end, I'll have to file the threads just a bit to smooth them back out.

    Used a press to get the yoke off, the splines were rusty. I didn't get a picture of that before I put it all back with the new carrier bearing. Finished installing the u-joints and the new flange.

    0615201349.jpg
    Installed. Hopefully I don't get driveline vibrations now. I may need to have it re-balanced.

    0611200735.jpg
    Prepping for brake hose install! Which basically entailed taking them out of the package. Quick, simple, easy.

    0611201327.jpg
    Yikes!

    0611201326.jpg
    That's better, a little breathing room.

    0613201037.jpg
    Rear driver's looking good, passenger not so much.

    0615201348a.jpg
    This little bugger, the only flare nut that didn't come loose. I started soaking them all with PB a few days beforehand but this one decided to round over anyway. That bracket location sucks, unbolting makes it easier to access.

    I'm just replacing that entire line, it links up just below the driver's door on the frame.
    0611201042.jpg
    At this block.

    I can get the line from Toyota through a friend at Ford for 37$.
    I would rather replace the whole thing than try to cobble a "fix" together.
    Those two brake lines are
    47325-04180 and 47326-04150.

    43$ with tax.

    0618200851.jpg
    The old one was a little tough to wrestle out, ended up cutting in three pieces. The new one is not routed through the original locations, because of the angles I would have had to drop the fuel tank to get it in there. No thank you.
    Just zip tied to the frame, properly clearenced from angry and abrasive things.

    That's all for now.

    I'll update as I go.

    Thanks for checking it out!
     
    Last edited: Aug 16, 2021
  2. Jun 14, 2020 at 8:30 PM
    #2
    TacoHunter270

    TacoHunter270 Member

    Joined:
    May 9, 2019
    Member:
    #292830
    Messages:
    9
    Gender:
    Male
    Vehicle:
    2016 Tacoma SR5 DCLB
    Great thread! Keep it up! Can't wait to see the end product
     
    ohcaltexscar[OP] likes this.
  3. Jun 15, 2020 at 4:54 PM
    #3
    ohcaltexscar

    ohcaltexscar [OP] Out of Huckleberry Licorice…

    Joined:
    Feb 28, 2020
    Member:
    #320594
    Messages:
    1,729
    Gender:
    Male
    First Name:
    Chas
    El Paso, Texas
    Vehicle:
    2005 DCLB SR5 Prerunner
    IM4x4 2.5" NitroGas - Coopers
    Thank you! Slowly but surely it's coming together.

    Updated!
     
  4. Jun 18, 2020 at 4:25 PM
    #4
    ohcaltexscar

    ohcaltexscar [OP] Out of Huckleberry Licorice…

    Joined:
    Feb 28, 2020
    Member:
    #320594
    Messages:
    1,729
    Gender:
    Male
    First Name:
    Chas
    El Paso, Texas
    Vehicle:
    2005 DCLB SR5 Prerunner
    IM4x4 2.5" NitroGas - Coopers
    Apparently there's a message size limit. :rofl:

    So here goes the rest.

    Bled the brakes, flushed the whole system. Speed Bleeders are amazing.
    I let the master cylinder drain out too much fluid when I removed that line so I had to bleed that too.

    0618201222.jpg
    Ran a line from the front driver's caliper through a convienently placed hole in the wheel well.
    0618201221_HDR.jpg
    Up to the reservoir thereby creating a closed loop to bleed the master cylinder. No bench needed.

    0618201238_HDR.jpg
    I've also swapped the zerks on the 4xinnovations shackles for a 90 degree so I can actually get a grease gun on them.


    That's all for now.

    I'll keep updating as I go.

    Thanks for checking it out!
     
    Casper66 likes this.
  5. Jun 22, 2020 at 4:24 PM
    #5
    ohcaltexscar

    ohcaltexscar [OP] Out of Huckleberry Licorice…

    Joined:
    Feb 28, 2020
    Member:
    #320594
    Messages:
    1,729
    Gender:
    Male
    First Name:
    Chas
    El Paso, Texas
    Vehicle:
    2005 DCLB SR5 Prerunner
    IM4x4 2.5" NitroGas - Coopers
    Update!

    0619200829.jpg
    Replaced the center console latch, mine was holding it closed but was missing the spring and the housing wouldn't retain the button portion so it kept falling out when I opened it.

    0619200828.jpg
    Easy cheap fix for 12$.


    Patience is a virtue!
    I started my cap search the week I got the truck. Short bed caps are plentiful and I found loads of them.
    I almost settled on a silver A.R.E. off a Ranger about two months ago but decided against it.

    0622200915_HDR.jpg
    Found this locally yesterday and picked it up this morning for 325$.

    0622201043a_HDR.jpg
    No broken glass, everything mostly works. I'll just need struts for the rear glass eventually. Plus it already matches!
     
    BassAckwards likes this.
  6. Jun 26, 2020 at 4:41 PM
    #6
    ohcaltexscar

    ohcaltexscar [OP] Out of Huckleberry Licorice…

    Joined:
    Feb 28, 2020
    Member:
    #320594
    Messages:
    1,729
    Gender:
    Male
    First Name:
    Chas
    El Paso, Texas
    Vehicle:
    2005 DCLB SR5 Prerunner
    IM4x4 2.5" NitroGas - Coopers
    The idea was to be able to load up quick Friday afternoon and make the mountains before sundown.
    Easily loading provisions for two people and one fuzzy butt.

    0625201526_HDR.jpg
    I started taking the seats out to measure for a platform but when I folded the backs down they were pretty flat.
    I took some measurements to see if his house crate would fit. No sence buying or building something if this will slot right in.

    0625201527.jpg
    The butt.

    He hates camping, doesn't like being outside at all. If he had a bathroom inside he'd never leave the house.

    0625201529.jpg
    A few straps on the back and bottom and we're all set!
    He'll have a view up front, and we can roll down the window for some air. :plane:
    We can also open the slider when we're in the back and he'll be right there.


    I'm working on plans for a platform, I'll post up when I get it finalised.
     
    Last edited: Aug 16, 2021
  7. Jun 29, 2020 at 3:33 PM
    #7
    ohcaltexscar

    ohcaltexscar [OP] Out of Huckleberry Licorice…

    Joined:
    Feb 28, 2020
    Member:
    #320594
    Messages:
    1,729
    Gender:
    Male
    First Name:
    Chas
    El Paso, Texas
    Vehicle:
    2005 DCLB SR5 Prerunner
    IM4x4 2.5" NitroGas - Coopers
    Got the Maint Reqd light yesterday.
    0628201401.jpg
    Y'all needed a picture of that right?
    Somebody wiped down the dash with acetone or something they shouldn't have. It isn't that bad to see through but I'll address it eventually.

    The oil sticker from the dealer was still within the date and mileage but I changed it anyway. It was dark but not black. New drain bolt and washer. Pennzoil 5w-30 full synthetic and an STP gold filter or whatever those are. Extended life maybe?

    I've used Pennzoil my whole life. That's how Dad does it, and it's worked out pretty well so far.
    I did not take pictures of the oil change, I'm sure you've seen that though.

    0629201103.jpg
    I started the wire up for the third brake light on the cap. This is how it came.

    0629201102.jpg
    There's a small gap at the top that feeds right into the taillight area.
    0629201102a.jpg
    Like so. I thought my wires would just fit through but I ended up drilling a 5/8 hole in that spot for better space.
    0629201103a.jpg
    I picked up these. I do not usually like quick splices but they were indeed quick and it works. I didn't want to fully cut the harness.

    0629201119_HDR.jpg
    Split for the splice!
    0629201120_HDR.jpg
    Twist, and
    0629201120a_HDR.jpg
    Twist again.

    0629201254.jpg
    Dab of dielectric grease and heat shrink. I taped the extra connector wires together for now and wrapped it all up.

    0629201413_HDR.jpg
    Spliced into the green and white for power and black for earth.
    There was a hole in the cap already that fit a zip tie just right.

    I got the 4 terminal connector so I can wire up some overhead LEDs in the cap later on.

    Works just right!
    Screenshot_20200629-162751.jpg
     
    Last edited: Jul 17, 2022
  8. Jun 29, 2020 at 3:46 PM
    #8
    ohcaltexscar

    ohcaltexscar [OP] Out of Huckleberry Licorice…

    Joined:
    Feb 28, 2020
    Member:
    #320594
    Messages:
    1,729
    Gender:
    Male
    First Name:
    Chas
    El Paso, Texas
    Vehicle:
    2005 DCLB SR5 Prerunner
    IM4x4 2.5" NitroGas - Coopers
    Took advantage of that fancy insurance we've got and had them flatbed it to the shop for an alignment.
    0627200752_HDR.jpg
    0627200754_HDR.jpg
    Off She goes! We just met them there.

    0627200832_HDR.jpg
    On the rack.
    0627200836_HDR.jpg
    It was halfway sort of okay! The screaming tires on the test drive the day before would tell you otherwise though.
     
  9. Jun 30, 2020 at 9:12 AM
    #9
    TacoFergie

    TacoFergie Well-Known Member

    Joined:
    Dec 21, 2015
    Member:
    #172832
    Messages:
    1,301
    Gender:
    Male
    First Name:
    Chris
    Iowa
    Curious how those bushings treat you. I have considered urethane bushings when mine wear out. But in the past I have had squeaking issues when I had them on my 08 xB. That with the energy suspension grease too.
     
  10. Jun 30, 2020 at 10:06 AM
    #10
    ohcaltexscar

    ohcaltexscar [OP] Out of Huckleberry Licorice…

    Joined:
    Feb 28, 2020
    Member:
    #320594
    Messages:
    1,729
    Gender:
    Male
    First Name:
    Chas
    El Paso, Texas
    Vehicle:
    2005 DCLB SR5 Prerunner
    IM4x4 2.5" NitroGas - Coopers
    So far so good! I got an extra 8oz tub or the ES Formula 5 Grease but not in time for all the bushes.
    Whiteline has their own lithium based grease and give you a little packet. I used that and it did fill all the grooves, and while I wouldn't have minded having more I expect it would have been for not because all the excess would just squeeze out anyway.
    Ironman4x4 says to use lithium as well, their videos even show them using red n' tacky. I had the green marine grease available and used that. We'll see if it affects the urethane or not.
    The only ones I ended up using the silicone formula 5 on were the actual ES bushes on the steering rack and the sway bar.

    I'll keep an ear on them as I put more miles on.

    When do you think you'll need to change yours?
     
    TacoFergie[QUOTED] likes this.
  11. Jun 30, 2020 at 1:18 PM
    #11
    ohcaltexscar

    ohcaltexscar [OP] Out of Huckleberry Licorice…

    Joined:
    Feb 28, 2020
    Member:
    #320594
    Messages:
    1,729
    Gender:
    Male
    First Name:
    Chas
    El Paso, Texas
    Vehicle:
    2005 DCLB SR5 Prerunner
    IM4x4 2.5" NitroGas - Coopers
    I did spark plugs today!

    Finally an easy job!
    I did have to go get another 6" 3/8 extension because I couldn't turn my ratchet enough with just a 6" and 3".


    But then...:goingcrazy:

    And then...:help:


    Well this is less than ideal.

    15936971015762201521269112549347.jpg
    There is an odd man out here too.
    EDIT: I mislabeled the Driver and Passenger sides in the old picture, the cylinder numbers are right though.


    #2 is an Iridium LFR6AIX-11 while the rest are LFR6C-11.
    #2 was also the only one without oil on it.


    So I guess valve cover gaskets and/or plug tube seals are now on the list.
    That's for a later time, but not too much later. Catch 22.

    I also changed the rear differential fluid.
    0630201229.jpg
    MasterPro 80W-90 x3
    It was the only dino fluid AutoZone had so in it goes.

    0630201228.jpg
    New crush washers from Toyota too.

    I did not go with synthetic because my seals are old and I don't want to deal with that potential mess right now.
    I do not expect any viscosity issues during the West Texas summer. Or at any point out here really, I mean, come on. :tumbleweed:

    It was cheap enough this time around that I don't mind changing it to synthetic when I do the seals.
     
    Last edited: Jul 15, 2020
    BassAckwards and LostHusker like this.
  12. Jun 30, 2020 at 1:25 PM
    #12
    ohcaltexscar

    ohcaltexscar [OP] Out of Huckleberry Licorice…

    Joined:
    Feb 28, 2020
    Member:
    #320594
    Messages:
    1,729
    Gender:
    Male
    First Name:
    Chas
    El Paso, Texas
    Vehicle:
    2005 DCLB SR5 Prerunner
    IM4x4 2.5" NitroGas - Coopers
    Here are fluid samples if anybody is interested in that.

    Engine Oil:
    0630201224.jpg


    Rear Differential Oil:
    0630201225_HDR.jpg


    Neither looked that bad, but now I know when they were last changed.
     
  13. Jul 1, 2020 at 4:19 PM
    #13
    ohcaltexscar

    ohcaltexscar [OP] Out of Huckleberry Licorice…

    Joined:
    Feb 28, 2020
    Member:
    #320594
    Messages:
    1,729
    Gender:
    Male
    First Name:
    Chas
    El Paso, Texas
    Vehicle:
    2005 DCLB SR5 Prerunner
    IM4x4 2.5" NitroGas - Coopers
    Pulled a wheel to get the # castings off the back, found this thing.

    0701201418.jpg

    I picked at it a bit, feels like metal.

    Opinions?
    Sketchy balance weight?
    Hole in the rim with a super sketchy "weld" repair?
    Just a blob?

    I guess I'll know eventually when they run the old tires off.
     
  14. Jul 1, 2020 at 6:48 PM
    #14
    TacoFergie

    TacoFergie Well-Known Member

    Joined:
    Dec 21, 2015
    Member:
    #172832
    Messages:
    1,301
    Gender:
    Male
    First Name:
    Chris
    Iowa
    Looks to me like tar or asphalt. I have picked that crap off numerous wheels when doing a balance. I would peel it off an not worry about it. I have no idea how it gets there, but it does!!! If it’s on there for extended periods it feel like a blob of JB Weld.
     
  15. Jul 1, 2020 at 7:42 PM
    #15
    ohcaltexscar

    ohcaltexscar [OP] Out of Huckleberry Licorice…

    Joined:
    Feb 28, 2020
    Member:
    #320594
    Messages:
    1,729
    Gender:
    Male
    First Name:
    Chas
    El Paso, Texas
    Vehicle:
    2005 DCLB SR5 Prerunner
    IM4x4 2.5" NitroGas - Coopers
    It definitely feels like JB Weld haha. No peeling this one, I'll smack it with a chisel tomorrow and see what it does.
     
  16. Jul 1, 2020 at 7:58 PM
    #16
    TacoFergie

    TacoFergie Well-Known Member

    Joined:
    Dec 21, 2015
    Member:
    #172832
    Messages:
    1,301
    Gender:
    Male
    First Name:
    Chris
    Iowa
    Ya, I’ve had take a screwdriver or chisel with a good whap from my hand. A hammer if it’s really stuck on there!
     
  17. Jul 2, 2020 at 6:48 AM
    #17
    ohcaltexscar

    ohcaltexscar [OP] Out of Huckleberry Licorice…

    Joined:
    Feb 28, 2020
    Member:
    #320594
    Messages:
    1,729
    Gender:
    Male
    First Name:
    Chas
    El Paso, Texas
    Vehicle:
    2005 DCLB SR5 Prerunner
    IM4x4 2.5" NitroGas - Coopers
    Well whatever it was, it was on there a lonng time. Chiseled it off, it felt like a chunk of rock haha.

    I've seen more than a few crazy repairs some of the shops around here do so that's why I was worried. Some people man, just go for the cheapest of cheap. Like replacing one spark plug :crazy:.
     
  18. Jul 7, 2020 at 4:47 PM
    #18
    ohcaltexscar

    ohcaltexscar [OP] Out of Huckleberry Licorice…

    Joined:
    Feb 28, 2020
    Member:
    #320594
    Messages:
    1,729
    Gender:
    Male
    First Name:
    Chas
    El Paso, Texas
    Vehicle:
    2005 DCLB SR5 Prerunner
    IM4x4 2.5" NitroGas - Coopers
    Ordered new tires yesterday, Cooper Discoverer AT3 4S in 265/75r16, x5.
    Went and had them installed this afternoon.

    After lots of discussion between the forums and local people here I settled on the AT3 4S because of the capability, great reviews and ratings and weight savings versus an E load. 42 lbs to my then current 40 lbs highways. Not to shabby.:thumbsup:

    0707201302.jpg
    In the shop!

    0707201307a.jpg
    Staging to run them on.

    0707201338_HDR.jpg
    Installed!

    Still looks high, probably could have done 33's!
    I did some circles in the parking lot, no rubbing to be found. I took it up over a few inclines and angles to check there too. No rubs.

    A couple of my center caps broke so the shop is going to order replacements for me.

    Walking back out after everything was all buttoned up I took a closer look at the tread and then I saw it.

    0707201413b_HDR.jpg
    That looks like it says LT, because it does say LT. Those are AT3 LT's, not AT3 4S'.
    Well nuts.
    I went back in and talked to the shop guys again :rant: and checked the specs on the LT variation.

    "Looks like the wrong ones were ordered" they said. :smack:

    I'm just going to roll with them. They are C load, still 265/75r16.

    48lbs each, one pound savings from the E loads, 8lbs over what I had. :notsure: So much for all my research.

    We'll see how that impacts the mileage, I don't imagine it'll be enough to make me cry or anything. :anonymous:

    0707201413_HDR.jpg
    0707201413a_HDR.jpg

    They look pretty good! Something tells me I'll be hearing more rocks pinging off the undercarriage!
    :crapstorm:
     
    Last edited: Jul 7, 2020
    TacoFergie likes this.
  19. Jul 7, 2020 at 7:58 PM
    #19
    TacoFergie

    TacoFergie Well-Known Member

    Joined:
    Dec 21, 2015
    Member:
    #172832
    Messages:
    1,301
    Gender:
    Male
    First Name:
    Chris
    Iowa
    Those are great tires! Even in the load C. I believe the Load C rated tires have an additional 2/32" tread over the AT3 4S. Also Being in TX they might be better since the 4S is geared more towards climates with harsh winters. It's a good idea to play around with tire pressures a little too. On my duratracs I settled on 36psi front and 32psi rear when I'm unloaded. So far very even tire wear. I do notice if my front tire pressure drops to 32psi or less I start to get a shimmy. That usually only happens when winter settles in due to air temperature dropping heavily.
     
    ohcaltexscar[OP] likes this.
  20. Jul 8, 2020 at 5:43 PM
    #20
    ohcaltexscar

    ohcaltexscar [OP] Out of Huckleberry Licorice…

    Joined:
    Feb 28, 2020
    Member:
    #320594
    Messages:
    1,729
    Gender:
    Male
    First Name:
    Chas
    El Paso, Texas
    Vehicle:
    2005 DCLB SR5 Prerunner
    IM4x4 2.5" NitroGas - Coopers

    Got her on nice level ground this afternoon, got a bit of rake going on there! It's just backwards :rofl:

    Skid plate recommendations anyone? For weight :curls:.
     
    BassAckwards likes this.

Products Discussed in

To Top