1. Welcome to Tacoma World!

    You are currently viewing as a guest! To get full-access, you need to register for a FREE account.

    As a registered member, you’ll be able to:
    • Participate in all Tacoma discussion topics
    • Communicate privately with other Tacoma owners from around the world
    • Post your own photos in our Members Gallery
    • Access all special features of the site

'99 Prerunner positioning of crash sensor driver's side engine bay

Discussion in '1st Gen. Tacomas (1995-2004)' started by DiverDan, Jun 30, 2020.

  1. Jun 30, 2020 at 7:57 PM
    #1
    DiverDan

    DiverDan [OP] Member

    Joined:
    Jan 8, 2020
    Member:
    #315538
    Messages:
    18
    Gender:
    Male
    Vehicle:
    99 Prerunner
    After completing a front end suspension and steering restoration on my '99 Prerunner, I was attempting to re-install the crash sensor on the driver's side by trying to match up the holes in the fender well and couldn't line it up to where it made any sense. I failed to take pics of the location pre-removal because I took it off while I was rushing to make room for removing the UCA bolt along with a coupl'a other parts.

    If anyone here has a pic of the sensor as originally installed, would you be kind enough to post it in this thread pls?

    Safety check is due in a coupl'a months and I'd greatly appreciate any help toward re-installing it correctly.
     
  2. Jul 1, 2020 at 6:42 AM
    #2
    onakat

    onakat Well-Known Member

    Joined:
    Jul 2, 2016
    Member:
    #191075
    Messages:
    1,672
    Gender:
    Female
    Canada
    Vehicle:
    2000 indestructaco!
    one is hidden just below the battery tray, on the fender and the other one is at the same level on the opposite fender
     
  3. Jul 1, 2020 at 6:50 AM
    #3
    onakat

    onakat Well-Known Member

    Joined:
    Jul 2, 2016
    Member:
    #191075
    Messages:
    1,672
    Gender:
    Female
    Canada
    Vehicle:
    2000 indestructaco!
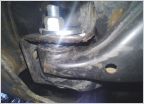
    crashsensloc.jpg

    image on the bottom shows the battery tray at top center (with the battery and plastic tray removed)
     
    DiverDan[OP] likes this.
  4. Jul 5, 2020 at 5:57 PM
    #4
    DiverDan

    DiverDan [OP] Member

    Joined:
    Jan 8, 2020
    Member:
    #315538
    Messages:
    18
    Gender:
    Male
    Vehicle:
    99 Prerunner

    Sorry for the delayed response @onakat, and thank you a hundred times over for posting exactly what I needed to complete the front end resto project.

    Very much appreciated, hope I can return the favor.

    Added a coup'la pics. Still needed to install small items here and there when these pics ere taken. Rain hit the rotors and developed some surface rust on them.


    frt susp rr view web.jpg


    susp-frt-view-edited-web.jpg
     
    onakat[QUOTED] likes this.
  5. Jul 5, 2020 at 7:53 PM
    #5
    onakat

    onakat Well-Known Member

    Joined:
    Jul 2, 2016
    Member:
    #191075
    Messages:
    1,672
    Gender:
    Female
    Canada
    Vehicle:
    2000 indestructaco!
    no problem :)

    But ugh, I'm drooling over that clean underside and frame! Where are you located?
     
  6. Jul 5, 2020 at 8:53 PM
    #6
    DiverDan

    DiverDan [OP] Member

    Joined:
    Jan 8, 2020
    Member:
    #315538
    Messages:
    18
    Gender:
    Male
    Vehicle:
    99 Prerunner

    Thanks for the kind words. I live in Hawaii. The truck has been a garage queen since buying it from a friend, it's seen less than a hundred miles of traveling since I started the resto work on it. Longest trip I took in it was to have a wheel alignment job done on it. I nailed the caster/camber as no changes needed, but the toe was pretty far off after the restoration.

    Next up rear suspension, bearings/seals and rear section of the frame restoration. Looking forward to it, yet not looking forward to it. Just trying to achieve that "new ride" feel again.
     
    onakat[QUOTED] likes this.

Products Discussed in

To Top