

-
Welcome to Tacoma World!
You are currently viewing as a guest! To get full-access, you need to register for a FREE account.
As a registered member, you’ll be able to:- Participate in all Tacoma discussion topics
- Communicate privately with other Tacoma owners from around the world
- Post your own photos in our Members Gallery
- Access all special features of the site
 Filter Housing PSA for all DIYers
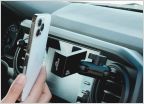 I phone mount
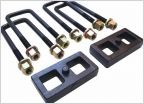 Can I order just the factory overload leaf spring?
 Aftermarket battery recommendations..
 Can I mix Gear Oil..?
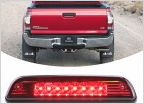 3rd Gen AC LED Third brake light
Front Runner product thread
Discussion in '3rd Gen. Tacomas (2016-2023)' started by GrilledCheese, Jul 10, 2020.
Page 3 of 3
Page 3 of 3


