1. Welcome to Tacoma World!

    You are currently viewing as a guest! To get full-access, you need to register for a FREE account.

    As a registered member, you’ll be able to:
    • Participate in all Tacoma discussion topics
    • Communicate privately with other Tacoma owners from around the world
    • Post your own photos in our Members Gallery
    • Access all special features of the site

New Pioneer DMH-WC6600NEX flush mount install

Discussion in 'Audio & Video' started by PreRunnerSeth, May 27, 2020.

  1. Aug 8, 2020 at 7:00 PM
    #901
    FrayAdjacent

    FrayAdjacent Well-Known Member

    Joined:
    Aug 7, 2017
    Member:
    #226135
    Messages:
    374
    Gender:
    Male
    First Name:
    Matthew
    Austin, TX
    Vehicle:
    2017 Tacoma SR5 4x4
    So I got the head unit, the Maestro and wiring harness in... but there are no instructions with either the Maestro or the wiring harness. People have said the instructions are really good. Where are they?
    (I had to order a premium entune bezel... I decided to wait until that part comes in (probably Monday) before attempting install)
     
  2. Aug 8, 2020 at 9:12 PM
    #902
    TiHo

    TiHo Well-Known Member

    Joined:
    Aug 26, 2018
    Member:
    #264160
    Messages:
    351
    Gender:
    Male
    Vehicle:
    2018 TRD Sport
    Flash the Maestro and it will give you links for PDFs that show the wiring diagram and instructions.
     
  3. Aug 8, 2020 at 9:16 PM
    #903
    Biscuits

    Biscuits Thorny Crown of Entropy

    Joined:
    Aug 8, 2010
    Member:
    #41397
    Messages:
    15,576
    Gender:
    Male
    Swiggity swangin' biggity bangin'
    Dude.

    How is the DMH-W4660NEX damn near $900 for you on Crutchfield? I just checked and it's $595.

    [​IMG]
     
  4. Aug 8, 2020 at 9:36 PM
    #904
    bmorgan1022

    bmorgan1022 Well-Known Member

    Joined:
    Nov 15, 2018
    Member:
    #272752
    Messages:
    45
    Gender:
    Male
    Atlanta, GA
    Vehicle:
    2018 Tacoma SR5
    Hes looking at the WC6600 and you are looking at the W4660
     
    Ch78 and Biscuits[QUOTED] like this.
  5. Aug 8, 2020 at 9:37 PM
    #905
    Biscuits

    Biscuits Thorny Crown of Entropy

    Joined:
    Aug 8, 2010
    Member:
    #41397
    Messages:
    15,576
    Gender:
    Male
    Swiggity swangin' biggity bangin'
    You're right. It would help if I could read.
     
    Ch78 likes this.
  6. Aug 8, 2020 at 10:10 PM
    #906
    FrayAdjacent

    FrayAdjacent Well-Known Member

    Joined:
    Aug 7, 2017
    Member:
    #226135
    Messages:
    374
    Gender:
    Male
    First Name:
    Matthew
    Austin, TX
    Vehicle:
    2017 Tacoma SR5 4x4

    Ahh, there it is. Man, I have a pile of cables and connectors and shit that came with this thing. This is going to be fun. LOL

    Seems mostly it's just splicing the wires from the harness that came with the radio to the matching wires on the T02 harness. Then there are a few extras to splice in directly to the truck, The rest is just plugging in connectors.
     
    Last edited: Aug 8, 2020
  7. Aug 9, 2020 at 12:03 PM
    #907
    TiHo

    TiHo Well-Known Member

    Joined:
    Aug 26, 2018
    Member:
    #264160
    Messages:
    351
    Gender:
    Male
    Vehicle:
    2018 TRD Sport
    I didn’t splice anything into the trucks wiring. Everything is done in the Maestro and Pioneer harness’s and then just plug and play into the trucks harness.
     
    plim likes this.
  8. Aug 9, 2020 at 12:19 PM
    #908
    plim

    plim Well-Known Member

    Joined:
    Aug 9, 2019
    Member:
    #301681
    Messages:
    84
    Gender:
    Male
    First Name:
    Pascal
    Vehicle:
    2019 Black TRD Pro
    IF you DO run into the issue that the vss wire error pops up, you can then connect to pin 17 on the 28pin vehicle connector instead. Apparently this is a known issue with Maestro, and it doesn’t happen often.
     
  9. Aug 9, 2020 at 1:18 PM
    #909
    FrayAdjacent

    FrayAdjacent Well-Known Member

    Joined:
    Aug 7, 2017
    Member:
    #226135
    Messages:
    374
    Gender:
    Male
    First Name:
    Matthew
    Austin, TX
    Vehicle:
    2017 Tacoma SR5 4x4
    Well good. I'll probably lay the harnesses down on my desk today and mate up the wires. If it's all plug-and-play from there, great. I would be a little off-put if I really did have to splice anything into any wires in the truck. That would kinda defeat the purpose of a custom-made harness, wouldn't it? :)

    I may even get extreme and solder the wires together before putting wire nuts on them. Can't hurt anything.

    ETA: I went ahead and soldered all of the wire connections. The little twist on wire connectors I got just didn't seem too sturdy. Solder is mo bettah.

    wiring.jpg
     
    Last edited: Aug 9, 2020
    plim and TiHo[QUOTED] like this.
  10. Aug 9, 2020 at 3:17 PM
    #910
    daveeasa

    daveeasa FBC Harness Solutions

    Joined:
    May 14, 2020
    Member:
    #328079
    Messages:
    7,446
    Gender:
    Male
    First Name:
    David
    PNW
    Vehicle:
    2016 Tacoma OR DCSB 6MT, 2005 RC 5MT PreRunner, 2002 Tundra SR5 RCLB 4x4
    solder and heat shrink is my plan. Once you go there it’s hard to go back. Compact and factory like without any concerns of corrosion or deteriorating connection.
     
  11. Aug 9, 2020 at 8:27 PM
    #911
    FrayAdjacent

    FrayAdjacent Well-Known Member

    Joined:
    Aug 7, 2017
    Member:
    #226135
    Messages:
    374
    Gender:
    Male
    First Name:
    Matthew
    Austin, TX
    Vehicle:
    2017 Tacoma SR5 4x4
    I just used electrical tape. Best is to fold it over itself so the sticky side meets the sticky side, then wrap it around itself. It should be pretty sturdy. All connections are soldered. It really didn't take too much longer than trying to use twist-on wire taps... and I don't have to worry about anything rattling loose years down the road. If I have my druthers, I'll be keeping this truck for a long time.
     
  12. Aug 9, 2020 at 10:23 PM
    #912
    MunchTIME

    MunchTIME Well-Known Member

    Joined:
    May 2, 2018
    Member:
    #252340
    Messages:
    806
    SD, CA
    A proper crimp is better than solder but it’s expensive to get all of the right tools. When crimped properly the pressure actually fuses the metal together without adding a dissimilar metal like solder to change the resistance in the line, but solder is good too and definitely gives piece of mind. As long as you do a bell
    Splice you’ll be okay no matter what you do really, but I wouldn’t use electrical tape in the dash because it doesn’t do well in hot places like that, the adhesive melts and spreads and the whole thing will be a gooey mess.
     
  13. Aug 9, 2020 at 10:24 PM
    #913
    MunchTIME

    MunchTIME Well-Known Member

    Joined:
    May 2, 2018
    Member:
    #252340
    Messages:
    806
    SD, CA
    Who else has poor Siri/ phone call audio quality? It seems like a lag issue or something might be because my speakers are amplified?
     
    plim likes this.
  14. Aug 9, 2020 at 10:42 PM
    #914
    TiHo

    TiHo Well-Known Member

    Joined:
    Aug 26, 2018
    Member:
    #264160
    Messages:
    351
    Gender:
    Male
    Vehicle:
    2018 TRD Sport
    I used Posi-lock connectors and Tesa tape to make everything all neat and clean. The Posi-lock’s are freaking awesome.

    85AE430F-6779-488E-9ACB-EB90125F54E5.jpg
     
  15. Aug 9, 2020 at 10:44 PM
    #915
    TiHo

    TiHo Well-Known Member

    Joined:
    Aug 26, 2018
    Member:
    #264160
    Messages:
    351
    Gender:
    Male
    Vehicle:
    2018 TRD Sport
    My Siri and call quality sounds great. I am not running a amp or sub just upgraded speakers in my doors and dash.
     
  16. Aug 9, 2020 at 11:30 PM
    #916
    FrayAdjacent

    FrayAdjacent Well-Known Member

    Joined:
    Aug 7, 2017
    Member:
    #226135
    Messages:
    374
    Gender:
    Male
    First Name:
    Matthew
    Austin, TX
    Vehicle:
    2017 Tacoma SR5 4x4
    I'm laying out the wiring harness and the Maestro, kinda seeing how things all get put together.

    So the OBDII port connector has three wires. The single purple/grey wire connects to the harness fine. There is no empty 2 pin connector with the red and the yellow wires like the diagram shows. There IS a black 2 pin connector with those color wires that is already connected to the white/vehicle side plugs. Is that where the OBDII connector cable is supposed to go?


    n/m, a better look at the diagram and step 4 of the directions indicates that 2pin black connector gets disconnected, so that is where the OBDII cable goes. Figured that was it.
     
  17. Aug 10, 2020 at 6:17 AM
    #917
    plim

    plim Well-Known Member

    Joined:
    Aug 9, 2019
    Member:
    #301681
    Messages:
    84
    Gender:
    Male
    First Name:
    Pascal
    Vehicle:
    2019 Black TRD Pro
    Mine sounds great. I use the factory JBL speakers and amp.
     
  18. Aug 10, 2020 at 9:24 AM
    #918
    MunchTIME

    MunchTIME Well-Known Member

    Joined:
    May 2, 2018
    Member:
    #252340
    Messages:
    806
    SD, CA
    Yeah you disconnect that one and plug in the OBD harness, it's actually in the Maestro wiring instructions but easy to overlook.
     
  19. Aug 10, 2020 at 9:26 AM
    #919
    MunchTIME

    MunchTIME Well-Known Member

    Joined:
    May 2, 2018
    Member:
    #252340
    Messages:
    806
    SD, CA
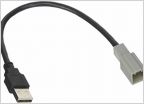
    Does anyone wanna buy my extra TO2 harness and/or the factory USB adapter and XM antenna adapter. I'm not going to use the factory USB and I don't have XM. I'll just return all to crutchfield if no takers!
     
  20. Aug 10, 2020 at 2:32 PM
    #920
    FrayAdjacent

    FrayAdjacent Well-Known Member

    Joined:
    Aug 7, 2017
    Member:
    #226135
    Messages:
    374
    Gender:
    Male
    First Name:
    Matthew
    Austin, TX
    Vehicle:
    2017 Tacoma SR5 4x4
    Got the unit in today after receiving the Premium dash trim bit in the mail. Turns out I had the data cable connected to the wrong port on the Maestro... and I appear to have forgotten the radio antenna connector, and it seems the display is not dimming when I turn the headlights on. Crapola.

    Otherwise it seems to work great. I need some time to play with it and get it set up the way I want. It looks quite nice.
     

Products Discussed in

To Top