

-
Welcome to Tacoma World!
You are currently viewing as a guest! To get full-access, you need to register for a FREE account.
As a registered member, you’ll be able to:- Participate in all Tacoma discussion topics
- Communicate privately with other Tacoma owners from around the world
- Post your own photos in our Members Gallery
- Access all special features of the site
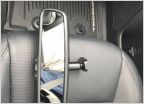 Auto dim rear view mirror
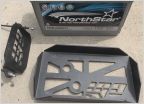 NorthStar Group 31 Battery + CBI battery tray
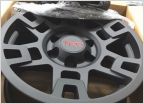 SOLD- New 4Runner TRD Pro Wheels - 17x7
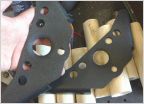 SOLD:Front bed rail brackets
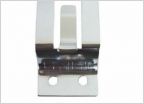 ISO: Hondo Garage CB mic holder
 Sold
SoldTACO GARAGE - Any camera - anytime, plug and play, steering wheel controlled. 2020!
Discussion in '3rd Gen Tacoma Parts Marketplace (2016-2023)' started by FreshMexicanTaco, Dec 6, 2019.
Page 56 of 60
Page 56 of 60
Products Discussed in


