

-
Welcome to Tacoma World!
You are currently viewing as a guest! To get full-access, you need to register for a FREE account.
As a registered member, you’ll be able to:- Participate in all Tacoma discussion topics
- Communicate privately with other Tacoma owners from around the world
- Post your own photos in our Members Gallery
- Access all special features of the site
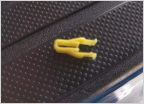 Head Unit Dash Bezel Trip Clips
 Multiple Ignition Coil Failure
 Need input on weBoost Drive 4G-M cell phone booster
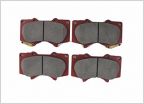 Front Brake Pad Part Numbers
 U joint help required
Installed My New Sliders
Discussion in '2nd Gen. Tacomas (2005-2015)' started by Plannerman99, Nov 29, 2010.
Page 1 of 2
Page 1 of 2


