

-
Welcome to Tacoma World!
You are currently viewing as a guest! To get full-access, you need to register for a FREE account.
As a registered member, you’ll be able to:- Participate in all Tacoma discussion topics
- Communicate privately with other Tacoma owners from around the world
- Post your own photos in our Members Gallery
- Access all special features of the site
 1st gen headlight assembly
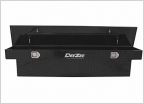 Slim Tool Box for 2001 DC Tacoma
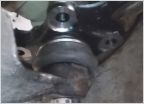 OEM Ball Joint doesnt fit right - Gurus Needed
 1st Gen 5 Lug Front Suspension
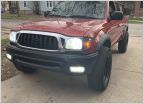 Keyless entry
 Completely Flushing a 240k mi Automatic Transmission
Need LCA Help--Can't Clear Steering Rack to Get Cam Bolt Out!
Discussion in '1st Gen. Tacomas (1995-2004)' started by OG_Tacoma, Oct 12, 2020.
Page 1 of 2
Page 1 of 2


