

-
Welcome to Tacoma World!
You are currently viewing as a guest! To get full-access, you need to register for a FREE account.
As a registered member, you’ll be able to:- Participate in all Tacoma discussion topics
- Communicate privately with other Tacoma owners from around the world
- Post your own photos in our Members Gallery
- Access all special features of the site
 How to relocate my cruise control module
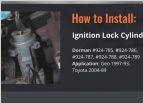 Ignition cylinder and door locks
 Weird problem going uphill
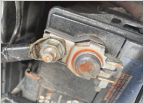 '04 Negative Battery Cable
 Drilling through the headliner?
 Stereo install kit
What have you done to your Tacoma today? 1st Gen Edition
Discussion in '1st Gen. Tacomas (1995-2004)' started by SlimDigg, Feb 7, 2011.
Page 9880 of 11226
Page 9880 of 11226
Products Discussed in


